


7
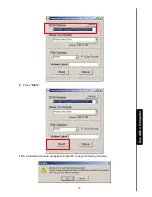
Figure 4. Connect the hard drive to the SATA adapter
4.
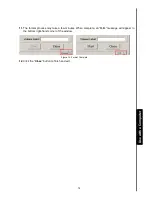
Carefully reinsert the SATA control board and its connected 2.5” hard drive into the metal case.
Figure 5. Reinsert the adapter plus drive and reattach the screws
5.
Reattach the screws to the top cover.
In
s
ta
ll
in
g
a
H
a
rd
D
ri
v
e
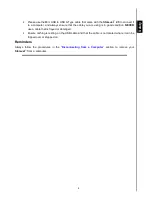
WARNING
a. Make sure the cube-shaped conductive grounding pad is securely attached to
the control board.
b. When inserting the drive, be careful not to let the control board’s grounding pad
get caught on the edge of the case. Gently compress the grounding pad before
sliding the control board completely into the case.
(Incorrect)
(Correct)


