Trane WCY024G1 Installation, Operation & Maintenance Manual Download Page 16

Page 16

FLASH RATE INDICATIONS:

1 — Flash/Second

= Normal operation.

2 — Flashes/Second

= Fault A (Low 

T) i.e.: Inoperative compressor, loss of charge, open ambient sensor, shorted coil sensor.

3 — Flashes/Second

= Fault B (20 defrosts terminated on time)

Fault C (High 

T) i.e.: SOV stuck in heating, shorted ambient sensor, open coil sensor, closed TXV,

OD motor failure, OD fan on in defrost, undercharged unit.

4 — Flashes/Second

= Fault A & C or A & B

For additional information consult Pub. No. 34-1001 Heat Pump Defrost Controls.

DEMAND DEFROST SYSTEM

PROCEDURE FOR TESTING SENSORS

Measure the temperature the subject sensor is exposed to.  If the sensor is mounted on a
tube, place the lead on an Annie A-8 (or equiv.) temperature tester on the same tube near
the sensor and insulate the bulb.

Unplug the sensor and measure the resistance with a good quality ohmmeter (Simpson
260 or equiv.).  Read the value as quickly as possible to prevent the meter current from
changing the resistance reading.

Using the chart on the right, locate (as close as possible) the actual sensor temperature.
The measured resistance should be relatively close to the resistance value shown in the
chart.

Example:

Sensor temp.

= 19°F.

Measured Resistance

= 46K ohms

This sensor is good since the measured value is relatively close to the
chart value.

TEMP °F

RESISTANCE

86

 7.85K

81

 8.85K

75

10.24K

70

11.59K

65

13.14K

59

15.32K

55

16.93K

50

19.41K

45

22.20K

41

24.76K

36

28.45K

32

31.84K

25

37.50K

19

46.44K

14

53.94K

10

57.64K

5

67.06K

0

78.05K

DEFROST CONTROL

The demand defrost control measures heat pump outdoor ambient
temperature with a sensor located outside the outdoor coil.  A
second sensor located on the outdoor coil is used to measure the
coil temperature.  The difference between the ambient and the
colder coil temperature is the difference or delta-T measurement.
This delta-T measurement is representative of the operating state
and relative capacity of the heat pump system.  By measuring the
change in delta-T, we can determine the need for defrost.  The coil
sensor also serves to sense outdoor coil temperature for termina-
tion of the defrost cycle.

FAULT DETECTION

A fault condition is indicated by the flashing light on the defrost
control inside the heat pump control box.

In normal operation, the defrost control light will flash once each
second. If the light is flashing more than once per second or not-at-
all, refer to the service manual for that unit.

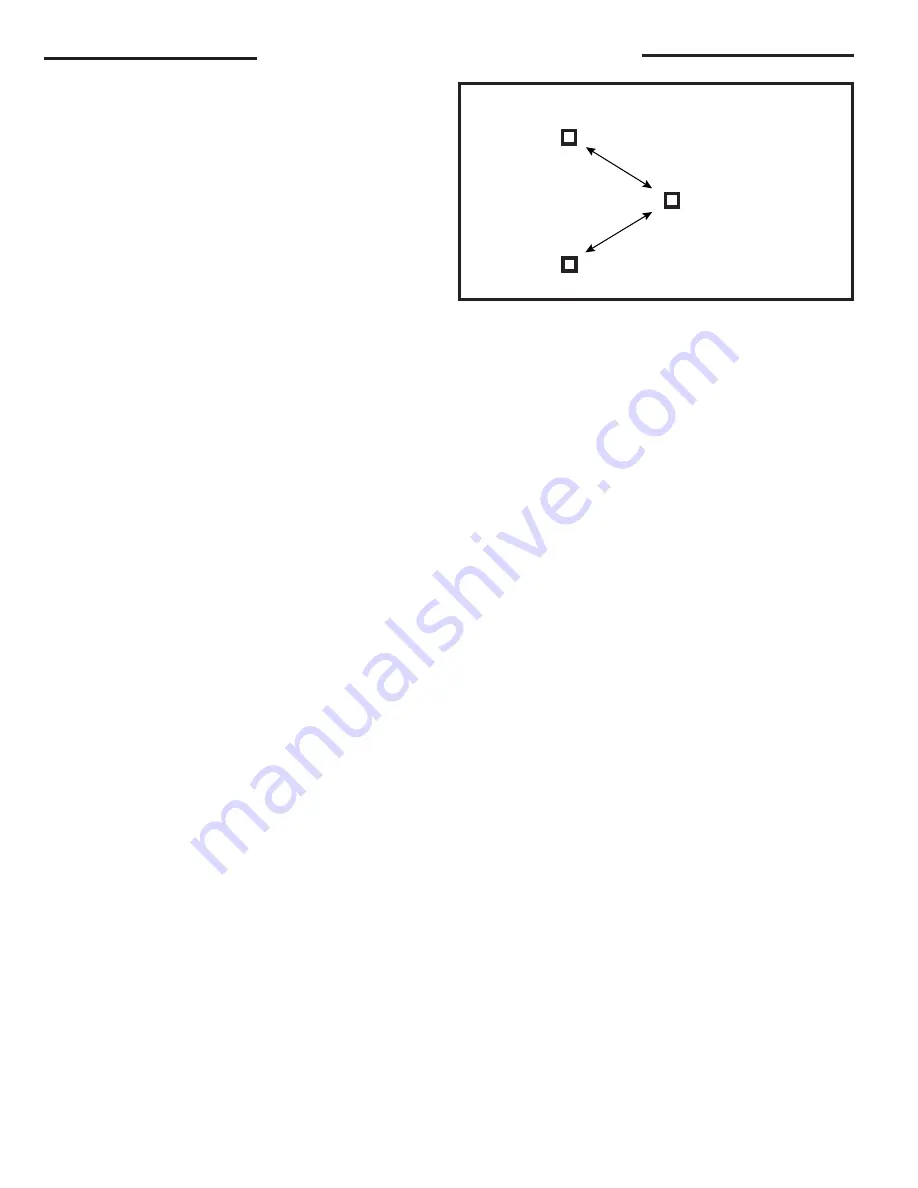
PIN   IDENTIFICATION (See Figure)

1. TEST_COMMON (Shorting any of the other pins to this pin

causes  the function of the other pin to be executed. Leaving this
pin open results in the normal mode of operation.)

2.  TST   =   Test  (Shorting TEST_COMMON  to this pin speeds up

all defrost board timings.)

3.  FRC_DFT  =  Forced Defrost  (Short TEST_COMMON to this pin

for two (2) seconds to initiate a forced defrost. Remove the short
after defrost initiates.)

▲ 

WARNING:

PIN IDENTIFICATION

FRC_DFT

TEST_COMMON

TST

DEFROST CONTROL CHECKOUT

Normal operation requires:

a.  LED on board flashing 1 time/second.

b.  24V AC between R & B

c.  24V AC between Y & B with unit operating

d. Defrost initiation when FRC_DFT pin is shorted to

TEST_COMMON pin.

If a defrost control problem is suspected, proceed to DEMAND
DEFROST CONTROL CHECKOUT in this Service Facts.

                                                Do NOT connect 24 VAC to T1
(ODS-A) terminal. ODS-A thermistor WILL BE BLOWN.

Summary of Contents for WCY024G1

Page 1: ...nge design and specification without notice All phases of this installation must comply with the NATIONAL STATE LOCAL CODES In the absence of local codes the installation must conform with National Electric Code ANSI NFPA 70 or LATEST REVISION WCY IOM 1D 18 BB33D8 5 Indicates a potentially haz result in death or serious injury WARNING CAUTION result in minor or moderate injury It may also be used ...

Page 2: ...R SHOULD BE ENERGIZED FOR EIGHT HOURS Read this manual carefully before attempting to install operate or perform maintenance on this unit Installation and maintenance should be performed by qualified service technicians only NOTE Warnings and Cautions appear at appropriate places in this manual Your personal safety and the proper operation of this air conditioning product require that you follow t...

Page 3: ...SUPPLY OPENING 1 REMOVE THE SCREW NEAREST TO THE OPENING AND PULL THE PANEL FIRMLY TOWARD THE OUTSIDE OF THE UNIT TO DISENGAGE THE BACK ATTACHMENT RETURN OPENING 2 REMOVE RIGHT HAND SCREW AND MOVE PANEL TO THE RIGHT OR REMOVE BOTH SCREWS 3 REMOVE EXTERIOR GASKET MATERIAL 2 3 NOTE 1 The WCY036 042G Models extend out past this end of the curb only NOTE 2 Only the WCY048 060G Models extend past both ...

Page 4: ...1 25 3 8 17 1 2 10 3 4 7 16 WCY030G 82 64 86 110 342 21 24 3 8 WCY036G 110 82 88 118 398 64 36 29 1 16 18 9 16 11 1 16 6 9 16 11 1 8 17 19 1 4 27 1 2 17 1 2 10 3 8 3 4 WCY042G 110 82 88 118 398 19 1 4 27 1 2 WCY048G 149 104 117 134 504 65 1 8 45 33 1 8 21 1 16 15 1 16 4 15 16 9 1 8 21 15 16 24 1 4 28 1 2 20 14 3 1 2 8 5 16 WCY060G 126 98 121 157 502 20 28 WCY024 060G OUTLINE BACK ...

Page 5: ...9 3 16 14 1 2 WCY048G WCY060G 65 1 8 45 33 3 8 14 13 16 RECOMMENDED SERVICE CLEARANCE BACK 6 0 LEFT SIDE 30 0 RIGHT SIDE 24 0 FRONT SIDE 30 0 18 WITH FRESH AIR ACCESSORY 30 WITH ECONOMIZER CLEARANCE TO COMBUSTIBLE MATERIAL BOTTOM 0 0 BACK 1 0 LEFT SIDE 6 0 RIGHT SIDE 6 0 FRONT SIDE 12 0 TOP 36 0 WCY024 060G OUTLINE FRONT ...

Page 6: ... clearance is not necessary AVOID LOCATING THE UNIT WHERE SNOW TENDS TO DRIFT This will reduce the times when it is necessary for the customer to remove the snow from around the unit MAKE CERTAIN THE CUSTOMER KNOWS THAT SNOW ACCUMULATIONS SHOULD BE REMOVED FROM THE SIDES OF THE UNIT FOR BEST EFFICIENCY A snow drift barrier may be installed around the unit to prevent a build up of snow on the sides...

Page 7: ...ted Approximate unit weights are given in outline drawing on page 3 NOTE Accessory BAYLIFT002A Four A lifting lugs are recom mended for rigging the unit for hoisting See Figure 7 insert B 2 Insert the four lifting lugs in openings provided in drip lip on perimeter of unit See Figure 7 insert B 3 Before hoisting the unit be sure that the proper method of rigging is used with straps or slings and sp...

Page 8: ... 2 for the location of the unit overhang on the WCY036 060G Models with BAYCURB030A SPREADER BARS OUTDOOR COIL END OF UNIT GASKET SEAL BASE OF UNIT REST ON TOP OF CURB RAILS DRIP LIP DIMPLE BAYLIFT002A LIFTING LUGS SEE DETAIL A B A DRIP LIP ON PERIMETER OF UNIT UNIT CORNER CURB CORNER EXISTING SHEET METAL SCREW HOLD DOWN BRACKET WITH CURB FLANGE OF CURB A ...

Page 9: ...unit on the frame or roof curb Refer to Figures 9 or 10 5 Secure the unit to the frame or roof curb 6 Insulate any ductwork outside of the structure with at least two 2 inches of insulation and then weatherproof There must be a weatherproof seal where the duct enters the structure 7 Complete the installation according to the instructions in the following sections of this manual TYPICAL ROOFTOP APP...

Page 10: ...rk leaving the unit should be no closer than two feet from the unit to minimize noise and resistance 2 Attach the supply and return air ducts to the unit 3 Insulate any ductwork outside of the structure with at least 2 inches of insulation and weatherproof There must be a weath erproof seal where the duct enters the structure 4 Complete the installation according to the instructions in the followi...

Page 11: ...m Trapped Must not be connected to closed drain system CONDENSATE DRAIN PIPING The following warning complies with State of California law Proposition 65 WARNING This product contains fiberglass wool insulation Fiberglass dust and ceramic fibers are believed by the State of California to cause cancer through inhalation Glasswool fibers may also cause respiratory skin or eye irritation FIELD DUCT U...

Page 12: ... per mfg recommendation with clear resistance of 0 05 WC TABLE 1 AIR FILTERS FiltersaretobeusedwiththeWCY024 060Gheating cooling units Thebasicunitdoesnothavefiltersinit However afilter frame accessory is offered that will allow filters to be installed within the unit Otherwise a filter rack must be installed by the installer in the duct work Affix the filter label supplied with the unit adjacent ...

Page 13: ...D 5 SEE UNIT AND HEATER DIAGRAM FOR ELECTRICAL CONNECTION DETAILS 6 IF ELECTRIC HEATER ACCESSORY IS NOT INSTALLED OMIT THE ELECTRIC HEATER ASSOCIATED POWER WIRES AND THE W AND X2 THERMOSTAT WIRES 7 FIG 3 DEMONSTRATES CONNECTION OF THE OUTDOOR THERMOSTAT ACCESSORY ONLY FOR FURTHER UNIT CONNECTION DETAILS REFER TO THE OTHER FIGURES 8 THE 41A BR WIRE IS FIRST STAGE ELECTRIC HEAT IF THE ELECTRIC HEATE...

Page 14: ...tem selector switch at OFF or place the heating selector lever at a setting below room temperature PRE START QUICK CHECKLIST Is the unit properly located and level with the proper clearance See Figure 5 Is the duct work correctly sized run taped insulated and weatherproofed with proper unit arrangement See Ductwork Installation section Is the condensate line properly sized run trapped and pitched ...

Page 15: ...ntary electric heat is brought on when the indoor temperature drops 1 1 2 degrees below the thermostat setting TSH 2 contacts close providing power to the W terminal on the indoor thermostat and to the supplementary heater control circuit NOTE The fan relay F must have been energized An outdoor thermostat may have been added to disallow the second stage if provided of electric heat above a selecte...

Page 16: ...oor ambient temperature with a sensor located outside the outdoor coil A second sensor located on the outdoor coil is used to measure the coil temperature The difference between the ambient and the colder coil temperature is the difference or delta T measurement This delta T measurement is representative of the operating state and relative capacity of the heat pump system By measuring the change i...

Page 17: ...nsor 2 Does OD fan cycle off in defrost N Replace defrost control 3 Windy weather preventing normal termination 7 Defrost initiates on approximately 15 25 minute intervals Be sure OD coil is clean N Complete Check 2 1 Coil sensor open or reading a very high resistance Y Replace coil sensor 2 Ambient sensor reading less than normal N Complete Check 3 Y Replace ambient sensor 3 OD fan off in defrost...

Page 18: ...mponents and wiring for possible replacement and connection tightness condensate drain for cleaning unit duct connections to see that they are physically sound and sealed to the unit casing unit mounting support for structural integrity the unit for obvious unit deterioration MAINTENANCE PERFORMED BY SERVICEMAN HEATING SEASON Complete the unit inspections and service routines described below at th...

Page 19: ... of the Heat Pump and or damage from failure to properly maintain the Heat Pump as set forth in the Use and Care manual see Proper Maintenance section This limited warranty applies to product installed on or after 10 1 2001 where product is manufactured after 1 1 2000 This limited warranty is not retroactive to any installations prior to 10 1 2001 or on product produced prior to 2000 THE LIMITEDWA...

Page 20: ... the cost of lost refrigerant No liability shall attach to Warrantor until products have been paid for and then liability shall be limited solely to the purchase price of the equipment under warranty shown to be defective THE WARRANTY AND LIABILITY SET FORTH HEREIN ARE IN LIEU OF ALL OTHER WARRANTIES AND LIABILITIES WHETHER IN CONTRACT OR IN NEGLIGENCE EXPRESS OR IMPLIED IN LAW OR IN FACT INCLUDIN...

Reviews: