background image

JetStream Smart Switch

08

Installation

Chapter 2  Installation

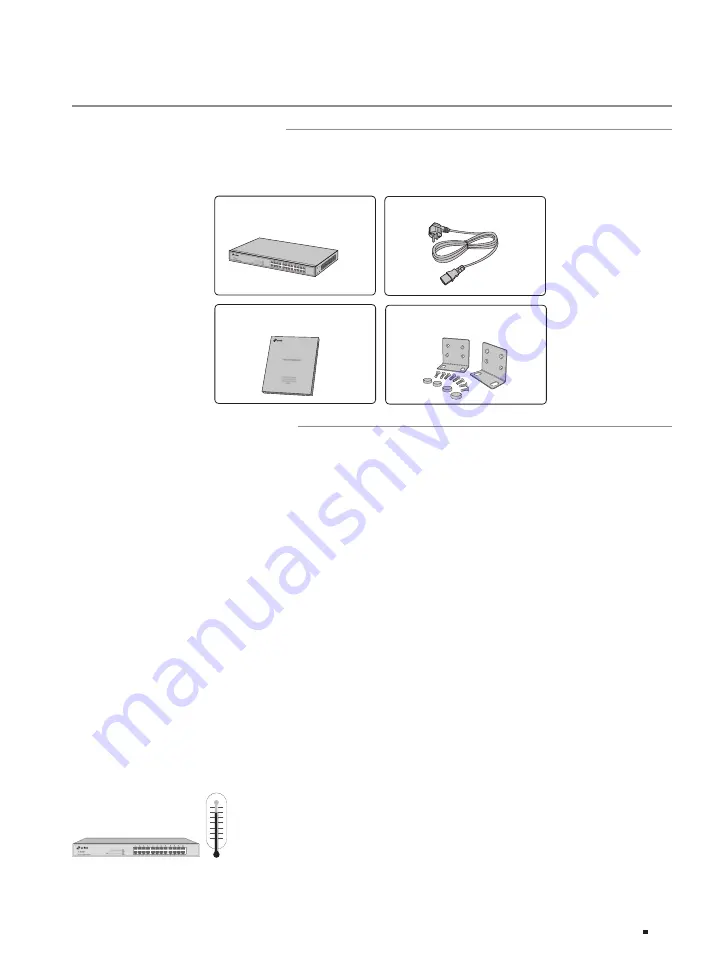
2.1  Package Contents

Make sure that the package contains the following items. If any of the listed items is damaged or 

missing, please contact your distributor.

One Switch

Installation Guide

Installation Guide

Business Networking Solution

Two mounting brackets, eight 

screws and four rubber feet

One Power Cord

2.2  Safety Precautions

To avoid any device damage and bodily injury caused by improper use, you should observe the 

following rules.


Safety Precautions


Keep the power off during the installation.


Wear an ESD-preventive wrist strap, and make sure that the wrist strap has a good skin contact and is 

well grounded.


Use only the power cord provided with the switch.


Make sure that the supply voltage matches the specifications indicated on the rear panel of the 

switch.


Ensure that the switch is installed in a well-ventilated environment and its ventilation hole is not 

blocked.


Do not open or remove the cover of the switch.


Before cleaning the device, cut off the power supply. Do not clean it by the waterish cloth, and never 

use any other liquid cleaning method.


Place the device with its bottom surface downward.


Site Requirements

Temperature/Humidity

40°C

0°C

Summary of Contents for T1700X-16TS

Page 1: ...Business Networking Solution Installation Guide Jetstream Smart Switch ...

Page 2: ...guide may be unavailable in your country or region For local sales information visit https www tp link com The figures in Chapter 2 Chapter 3 and Chapter 4 are for demonstration purposes only Your switch may differ in appearance from that depicted PoE budget calculations are based on laboratory testing Actual PoE power budget is not guaranteed and will vary as a result of client limitations and en...

Page 3: ...s 08 2 3 Installation Tools 10 2 4 Product Installation 10 Chapter 3 Connection 12 3 1 Ethernet Port 12 3 2 SFP SFP Port 12 3 3 Verify Installation 12 3 4 Power On 12 3 5 Initialization 13 Chapter 4 Configuration 14 4 1 Configuration Overview 14 4 2 Standalone Mode 14 4 3 Controller Mode 15 Appendix A Troubleshooting 18 Appendix B Specifications 19 ...

Page 4: ...2452P TL SG2210MP TL SG2428P TL SL2428P is also a Power Sourcing Equipment PSE Some of the RJ45 ports on the switch support Power over Ethernet PoE function which can automatically detect and supply power to those powered devices PDs complying with IEEE 802 3af and IEEE 802 3at PSE a device switch or hub for instance that provides power through an Ethernet cable PoE a technology describes a system...

Page 5: ... shown as the following figure Figure 1 4 Front Panel of T1700G 28TQ LEDs Unit ID LED Reset 10 100 1000 Mbps RJ45 Port SFP Slot The front panel of T1700X 16TS is shown as the following figure Figure 1 5 Front Panel of T1700X 16TS Reset LEDs 100 M 1000 M 10 Gbps RJ45 Port 1 G 10 Gbps SFP Slot LEDs Indication The front panel of TL SG2218 is shown as the following figure Figure 1 6 Front Panel of TL ...

Page 6: ...r supply is abnormal SYS Flashing The switch works properly On or Off The switch works improperly 10 100M Link Act On A device is connected to the corresponding port but no activity Flashing Data is being transmitted or received Off No device is connected to the corresponding port Note Link Act for T1600G 18TS TL SG2216 T1700G 28TQ TL SG2218 1000Mbps On Running at 1000 Mbps Off Running at 10 100 M...

Page 7: ... no activity Green Flashing Running at 10 Gbps and is transmitting or receiving data Yellow On Running at 100 1000 Mbps but no activity Yellow Flashing Running at 100 1000 Mbps and is transmitting or receiving data Off No device is linked to the corresponding port Note Only for port 1 12 of T1700X 16TS Master On The switch works as master in the stack system or does not join any stack system Off T...

Page 8: ... 48 of T1600G 52PS TL SG2452P 10 100M or PoE Speed or PoE When the PoE LED is on Green On The port is supplying power normally Green Flashing The supply power exceeds the correponding port s maximum power Yellow On Overload or short circuit is detected Yellow Flashing Power on self test failed Off Not providing PoE power on the port Note 10 100M or PoE for TL SL2428P Speed or PoE for TL SG2210MP p...

Page 9: ...d as a Combo port which means they cannot be used simultaneously otherwise only SFP slot works SFP Slot Designed to install the SFP module For T1700G 28TQ and T1700X 16TS the switch supports 1G SFP or 10G SFP module connection Port Feature Model 100M 1000 M 10Gbps RJ45 Port 10 100 1000 Mbps RJ45 Port 10 100 Mbps RJ45 Port SFP Slot SFP Slot T1600G 18TS 16 2 T1600G 52TS 48 4 T1600G 52PS 48 4 T1700G ...

Page 10: ...g Protection Guide from the Related Documents https www tp link com us configuration guides lightning_protection_guide Power Socket Connect the female connector of the power cord here and the male connector to the AC power outlet Make sure that the voltage of the power supply meets the requirement of the input voltage 100 240 V 50 60 Hz Caution You should use the provided power cord ...

Page 11: ...ecautions Keep the power off during the installation Wear an ESD preventive wrist strap and make sure that the wrist strap has a good skin contact and is well grounded Use only the power cord provided with the switch Make sure that the supply voltage matches the specifications indicated on the rear panel of the switch Ensure that the switch is installed in a well ventilated environment and its ven...

Page 12: ...ures have been taken for the device to prevent static electricity but too strong static electricity can cause deadly damage to the electronic elements on the internal circuit board To avoid the effect of static electricity on the operation of the switch attach much importance to the following items Dust the device regularly and keep the indoor air clean Keep the device well grounded and ensure tha...

Page 13: ...om us configuration guides lightning_protection_guide Installation Site When installing the device on a rack or a flat workbench attach much importance to the following items The rack or workbench is flat stable and sturdy enough to support the weight of 5 5 kg at least The rack or workbench has a good ventilation system The equipment room is well ventilated The rack is well grounded Keep the devi...

Page 14: ... as illustrated in the following figure Figure 2 2 Bracket Installation Rack mounting Bracket Screw 3 After the brackets are attached to the device use suitable screws not provided to secure the brackets to the rack as illustrated in the following figure Figure 2 3 Rack Installation Rack Caution Leave 5 to 10 cm gaps around the devices for air circulation Avoid placing heavy things on the device P...

Page 15: ...tion of SFP slot to an SFP module Figure 3 2 Inserting the SFP Module SFP SFP Slot SFP SFP Module 3 3 Verify Installation After completing the installation verify the following items There should be 5 to 10 cm of clearance around the device for ventilation and make sure the air flow is adequate The voltage of the power supply meets the requirement of the input voltage of the device The power socke...

Page 16: ...matically to ensure the device functions properly During this time its LED indicators will respond in the following order 1 The PWR LED indicator lights on all the time The SYS LED and the LED indicators of all the ports keep off 2 For TL SG2210MP TL SG2428P TL SL2428P After about one minute all LED indicators will turn green and then the FAN indicator and LED indicators of all the ports will turn...

Page 17: ...e GUI 1 To access the management page of the switch make sure the switch and computer are in the same subnet Open a browser and type the switch s IP address in the address field then press the Enter key If the switch obtains IP address from the DHCP server typically a router find the switch s IP address on the DHCP server If not use the default IP address 192 168 0 1 to launch the switch s managem...

Page 18: ...le network with mass devices All devices can be centrally configured and monitored via Omada Software Controller Omada Hardware Controller or Omada Cloud Based Controller Note Before the following configurations make sure the switch can access the internet When using Omada Software Hardware Controller make sure the switch and the controller are in the same subnet Typically the switch obtains IP ad...

Page 19: ...have no spare PC to keep running Omada Software Controller in the network It needs to be purchased additionally For more details refer to the Installation Guide of Omada Hardware Controller Omada Cloud Service After installing Omada Software Hardware Controller you can remotely access and configure the controller through Omada Cloud Service Follow the steps below 1 Enable Cloud Access on the setti...

Page 20: ...pear in the list once bound with your TP Link ID Click Launch and follow the step by step instructions to complete the Quick Setup After the wizard is finished log in via the created username and password 4 Click Devices on the side bar and then click Add Devices Then you can add devices to the controller manually through the serial numbers at the bottom of the product Omada App With the Omada app...

Page 21: ...nd the power contact is normal 2 Make sure the voltage of the power supply meets the requirement of the input voltage of the switch Q3 What should I do if I cannot access the web management page Try the following 1 Check every port LED on the switch and make sure the Ethernet cable is connected properly 2 Try another port on the switch and make sure the Ethernet cable is suitable and works normall...

Page 22: ...ver For T1700G 28TQ T1700X 16TS 10GBASE T 4 pair UTP of Cat 6 maximum 55 m or Cat 6a maximum 100 m 4 pair STP of Cat 6 Cat 6a Cat 7 maximum 100 m For T1700X 16TS LEDs TL SL2428P PWR SYS PoE MAX FAN 10 100M or PoE 1000M 10 100M PoE TL SG2210MP PWR SYS PoE MAX FAN Speed or PoE SFP1 SFP2 PoE Speed T1600G 18TS PWR SYS 1000Mbps Link Act TL SG2218 PWR SYS 1000Mbps Link Act T1600G 52TS PWR SYS 10 100 100...

Page 23: ...бачені чинними законодавчими актами України Safety Information Keep the device away from water fire humidity or hot environments Do not attempt to disassemble repair or modify the device If you need service please contact us Place the device with its bottom surface downward Do not use any other chargers than those recommended Do not use damaged charger or USB cable to charge the device Adapter sha...

Page 24: ...gineers please visit https community tp link com to join TP Link Community For technical support the user guide and other information please visit https www tp link com support or simply scan the QR code If you have any suggestions or needs on the product guides welcome to email techwriter tp link com cn ...

Reviews: