background image

17

Chapter 3

Customize Your Network

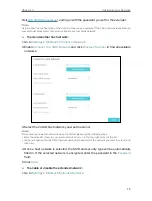
5. Click 

Save

3. 4.  Specify DHCP Server Settings

By default, the DHCP (Dynamic Host Configuration Protocol) Server is enabled and the 
extender acts as a DHCP server; it dynamically assigns TCP/IP parameters to client 
devices from the IP Address Pool. You can change the settings of the DHCP Server if 
necessary.
1. Visit 

http://tplinkrepeater.net

, and log in with the password you set for the extender.

2. Go to 

Settings 

Network

.


¾

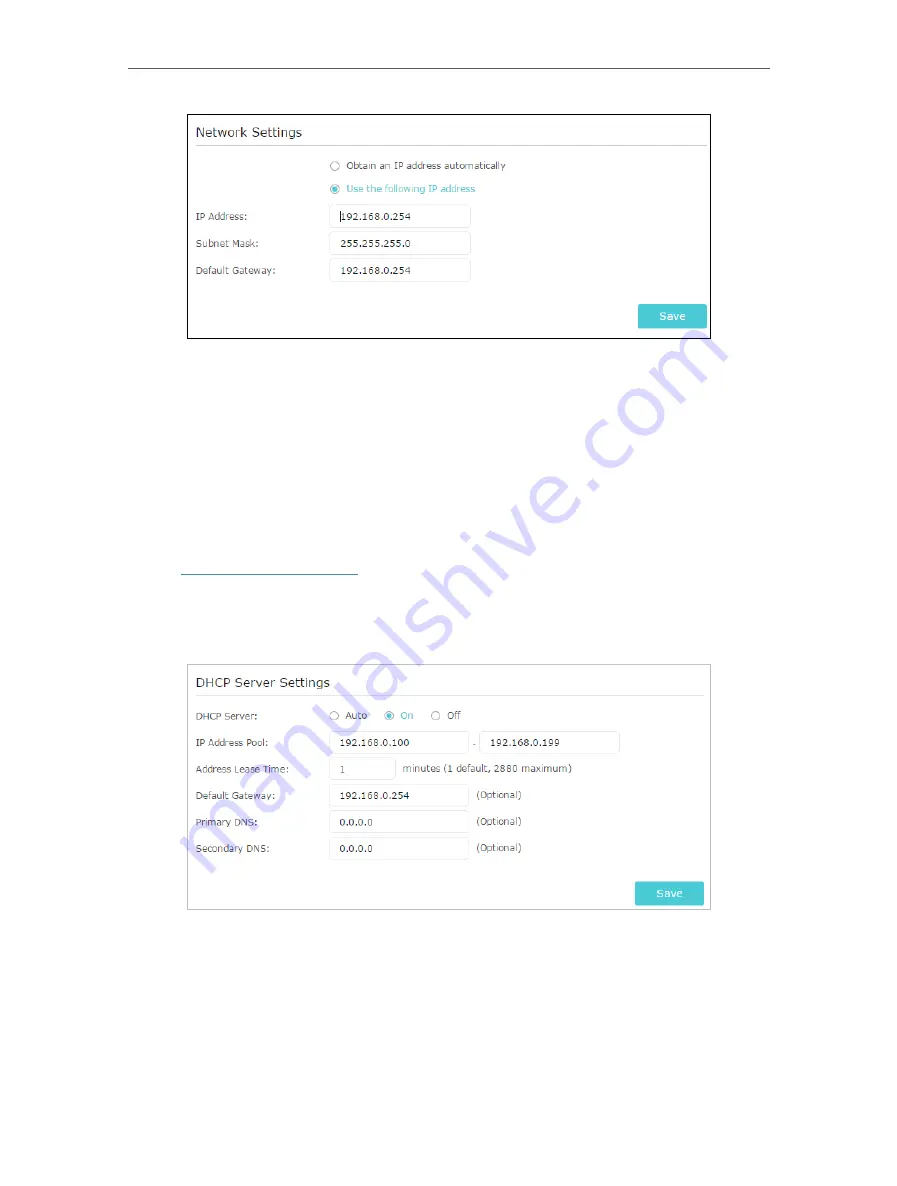
To specify the IP address that the extender assigns:

1. Select 

Auto

 (recommended) or 

On 

to enable the DHCP Server.

2. Enter the starting and ending IP addresses in the 

IP Address Pool

.

3. Enter other parameters if the ISP requires them. The 

Default Gateway

 is automatically 

filled in and is the same as the LAN IP address of the extender.

4. Click 

Save

.

Summary of Contents for A1C750

Page 1: ...User Guide AC1750 Wi Fi Range Extender RE450 REV2 1 0 1910012322...

Page 2: ...Configure Wireless Network 14 3 3 Change LAN Settings 16 3 4 Specify DHCP Server Settings 17 3 5 Adjust Wi Fi Coverage 18 3 6 Set Access Control 18 Chapter 4 More Features of Your Extender 21 4 1 Use...

Page 3: ...us items buttons and so on The menu structures to show the path to load the corresponding page For example Advanced Wireless MAC Filtering means the MAC Filtering function page is under the Wireless m...

Page 4: ...Chapter 1 Get to Know About Your Extender This chapter introduces what the extender can do and its appearance It contains the following sections Product Overview Appearance...

Page 5: ...he extender works with any standard wireless router Instantly connect the extender to a router by pressing the router s WPS button if available followed by the extender s RE WPS button Alternatively f...

Page 6: ...eless connection has been established POWER On The extender is on Flashing The extender is starting up or firmware is being upgraded Off The extender is off 1 2 2 Port and Button Description Ports or...

Page 7: ...Connection This chapter informs you how to boost your host wireless coverage Please follow the step by step instructions to set up the internet connection It contains the following sections Quick Set...

Page 8: ...low Connect to the host network There are three ways to connect to the host network via the WPS button via a web browser or via the TP Link Tether app Using the WPS button is the easiest way to extend...

Page 9: ...etworks Tips Since the performance of the extended networks will be affected by the distance between the extender and the host router we recommend that you relocate your extender by referring to Posit...

Page 10: ...rowser enter http tplinkrepeater net or http 192 168 0 254 in the address field and then create a password for future login attempts and click Start Tips If the login window does not appear please ref...

Page 11: ...support 5GHz wireless network please click Skip to continue 4 Either keep the default SSIDs network names or customize them for the extended networks and then click Next 5 Verify your wireless settin...

Page 12: ...njoy Connect to the extended network and enjoy the internet Both extended networks share the same wireless passwords as those of your host networks but may have different network names if you have cus...

Page 13: ...her App 1 Launch the Apple App Store or Google Play Store and search TP Link Tether or simply scan the QR code to download and install the app OR 2 Go to Wi Fi Settings and connect your device to the...

Page 14: ...trical outlet between your host router and the Wi Fi dead zone The location you choose must be within the range of your existing host network 2 Wait until the Signal LED is lit and solid blue If not r...

Page 15: ...you on how to configure network settings that are available for this extender It contains the following sections Check Internet Status Configure Wireless Network Change LAN Settings Specify DHCP Serv...

Page 16: ...to check the passwords of the host networks If the problem still exists please refer to the FAQ section The extender is connected to the host network but is not transmitting data Please check your ro...

Page 17: ...find all available networks 3 Select the 2 4GHz host network you want to extend Note If the network you want to extend is on but not listed please try the following steps Move the extender closer to...

Page 18: ...roadcast and the corresponding SSID will not be displayed when wireless devices scan for local wireless networks Devices must join the network manually in order to connect 3 Click Save 3 3 Change LAN...

Page 19: ...e settings of the DHCP Server if necessary 1 Visit http tplinkrepeater net and log in with the password you set for the extender 2 Go to Settings Network To specify the IP address that the extender as...

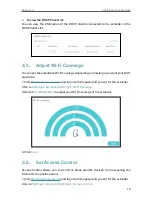
Page 20: ...Visit http tplinkrepeater net and log in with the password you set for the extender 2 Go to Settings Advanced Settings Wi Fi Coverage 3 Select Min Mid or Max to adjust your Wi Fi coverage of the exten...

Page 21: ...able cannot be blocked 1 Select Blacklist and click Save 2 Select the device to be blocked in the Online Devices table by ticking the corresponding checkbox 3 Click Block and the selected device s wil...

Page 22: ...k 5 Click OK To permit specific device s 1 Select Whitelist and click Save 2 Click Add in the Devices in Whitelist table Enter the Device Name and MAC Address And you can set the Effective Time for a...

Page 23: ...Extender This chapter explains how to use the extender as a wireless adapter and as an access point It contains the following sections Use Your Extender as a Wireless Adapter Transform Your Existing...

Page 24: ...of the extender is connected to the 5GHz wireless netwok To change the connected wireless frequency 1 Visit http tplinkrepeater net and log in with the password you set for the extender 2 Go to Settin...

Page 25: ...odem or wired router via an Ethernet cable 4 Visit http tplinkrepeater net and log in with the password you set for the extender 5 Go to Quick Setup to configure your extender 1 Configure your wireles...

Page 26: ...ork cards can be connected to your extender through this method not supported by iOS devices 1 Visit http tplinkrepeater net and log in with the password you set for the extender 2 Go to Settings Wire...

Page 27: ...25 Chapter 4 More Features of Your Extender PIN code Enter the client s PIN and click Connect...

Page 28: ...chapter presents how to manage and maintain your extender It contains the following sections Set Up System Time Control LEDs Power Schedule Upgrade the Firmware Backup and Restore Configuration Settin...

Page 29: ...e extender 2 Go to Settings System Tools Time Settings To get system time 1 Select your local Time Zone from the drop down list 2 Click Save To set up Daylight Saving Time 1 Select Enable Daylight Sav...

Page 30: ...wer Schedule The Power Schdule feature allows you to specify a time period during which the extender is off 1 Visit http tplinkrepeater net and log in with the password you set for the extender 2 Go t...

Page 31: ...2 Visit http tplinkrepeater net and log in with the password you set for the extender 3 Go to Settings System Tools Firmware Upgrade 4 Click Browse to locate the downloaded new firmware file and then...

Page 32: ...the extender 2 Wait a few minutes for the reset and reboot Note During the reset process do not power off or reset the extender We strongly recommend you backup the current configuration settings befo...

Page 33: ...an save the system log and send it to our technical support team 1 Visit http tplinkrepeater net and log in with the password you set for the extender 2 Go to Settings System Tools System Log To save...

Page 34: ...with the password you set for the extender 2 Go to Settings Wireless Wireless Settings to retrieve or reset your wireless password Q4 What should I do if I cannot access the web management page This c...

Page 35: ...ow 1 Log in to your router and disable the MAC filter wireless access control or ACL Note For more information about how to disable your router s MAC filter wireless access control or ACL please refer...

Page 36: ...roduct names are trademarks or registered trademarks of their respective holders No part of the specifications may be reproduced in any form or by any means or used to make any derivative such as tran...

Page 37: ...TV technician for help This device complies with part 15 of the FCC Rules Operation is subject to the following two conditions 1 This device may not cause harmful interference 2 This device must acce...

Page 38: ...ed to indoor use Canadian Compliance Statement This device complies with Industry Canada license exempt RSSs Operation is subject to the following two conditions 1 This device may not cause interferen...

Page 39: ...5350 MHz et 5650 5850 MHz et que ces radars pourraient causer du brouillage et ou des dommages aux dispositifs LAN EL Radiation Exposure Statement This equipment complies with IC radiation exposure li...

Page 40: ...tion Keep the device away from water fire humidity or hot environments Do not attempt to disassemble repair or modify the device The socket outlet shall be installed near the equipment and shall be ea...

Page 41: ...O SE SI SK UK Explanations of the symbols on the product label Symbol Explanation Class II equipment AC voltage Protection earth Indoor use only RECYCLING This product bears the selective sorting symb...

Reviews: