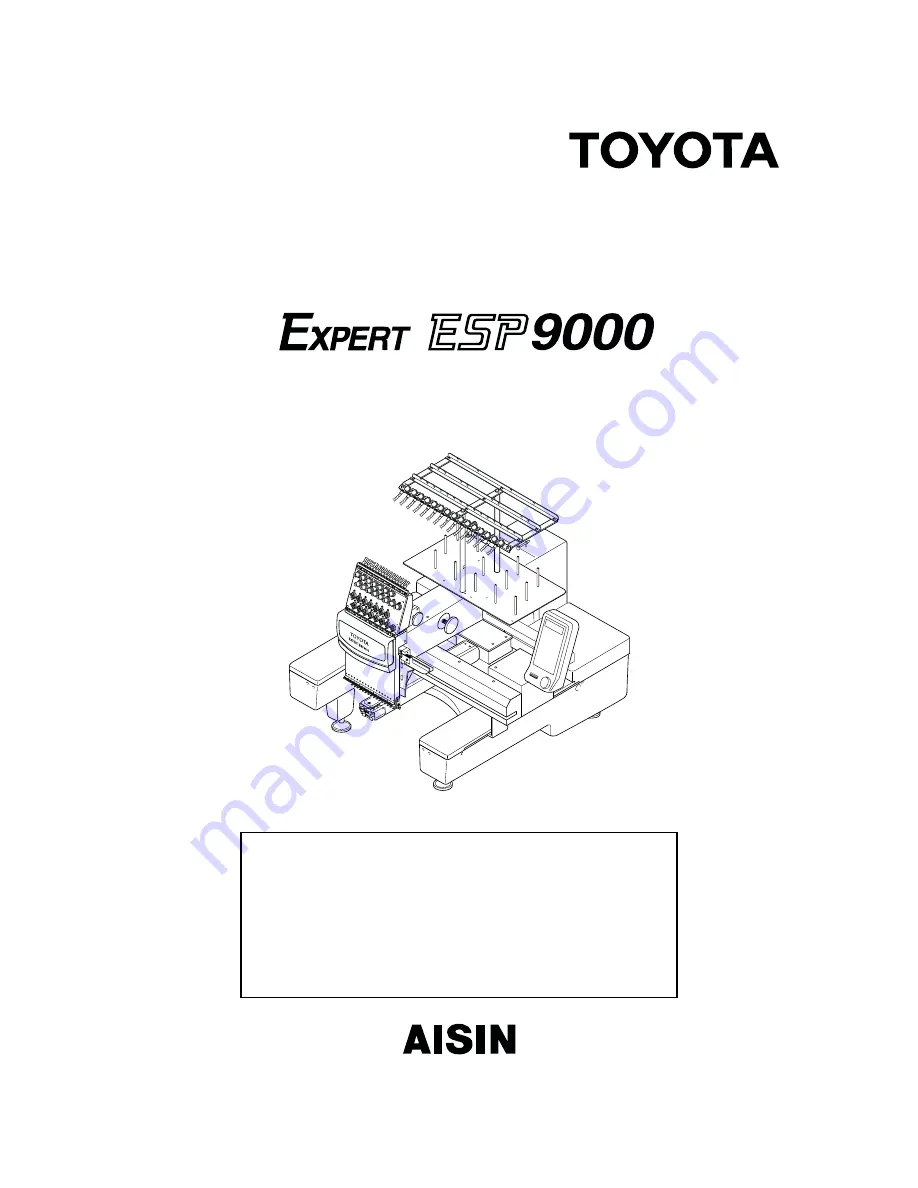
background image

TOYOTA COMPUTERIZED EMBROIDERY SYSTEM

INSTRUCTION MANUAL

Before using the embroidery machine, please read through this manual
carefully for proper use of the machine.

After reading the manual, keep it at a safe place near the machine so
that you can consult it whenever it is necessary.

When you turn over the machine to somebody, make sure to attach this
manual to the machine.

Since this is a business use machine, it should be operated by operators
who are well versed in the basic operations.

Summary of Contents for Expert EPS9000

Page 1: ...r use of the machine After reading the manual keep it at a safe place near the machine so that you can consult it whenever it is necessary When you turn over the machine to somebody make sure to attac...

Page 2: ......

Page 3: ...SENSOR 37 BOBBIN COUNTER SET 38 BOBBIN COUNTER COUNTER 39 LOCK STITCH 40 SATIN ADJUSTMENT 41 SLOW START 42 TRIMMING IN JUMP 43 JUMP LENGTH 44 TRIMMING LENGTH 45 TRIMMING TIMING 46 COMMUNICATION SPEED...

Page 4: ...ER Indicates there could be imminent risk of situation resulting in fatal or serious injury from incorrect handling WARNING Indicates there could be possible accident of fatal or serious injury result...

Page 5: ...water or oils leads to short circuits causing fire and electric shock If water or oils enter the electric electronic units shut off the power by the power switch shut off the source of power supply a...

Page 6: ...the grounding wire of the power cord There is the danger of electric shock due to leak current if the machine is used without grounding Do not touch the parts of the machine that move during embroide...

Page 7: ...r le cercle broder quand il est en mouvement Ne pas mettre les doigts ou la main dans le couvercle du syst me de tension ou le couvercle de protection ATTENTION CAUTION Fingers might be injured Do not...

Page 8: ...de 1 pc Thread stand shaft and hexagon socket head cap screw 2 pcs each Power supply box 1 pc Power cord Embroidery hoop 1 pc Spiral tube Cover DC power supply connector Power switch AC power supply c...

Page 9: ...pc 4 Minus screwdriver large 1 pc 5 Minus screwdriver small 1 pc 6 Offset screwdriver 1 pc 7 L shaped screwdriver plus minus 1 pc 8 Scissors 1 pc 9 Small pincers 1 pc 10 Oiler 1 pc 11 Threader 2 pcs 1...

Page 10: ...NAMES PART 10 AMC335 FLOPPY DISK DRIVE TO BE PURCHASED SEPARATELY Various kinds of embroidery hoop are available Consult your TOYOTA dealer for details FDD floppy disk drive and FDD connection cable...

Page 11: ...Y axis drive system Needle plate Base Adjuster foot Thread stand stud X axis drive motor Main shaft motor Y axis drive motor Thread trimming motor Serial connector Power supply connector Drain port F...

Page 12: ...ey Clear key Set key Trace key Hoop forward key Offset key Forward Back unit selection key Thread trimming key Hoop back key Stop key Start key Hoop travel key Start point return key Color change mode...

Page 13: ...install device selection FD PC 1 Installation mode Normal mode Installation mode if DSW1 1 is ON No Function OFF ON 8 Start up speed Standard High speed 7 Not used Select OFF 6 Not used Select OFF 5...

Page 14: ...1 Place the joint on the one end of spiral tube large in the U shaped slot on the thread guide and fix it in the slot by pressing in the arrow direction Set and fix the joint on the other end of spira...

Page 15: ...achine after loosening the nut 2 4 places of the adjuster foot 1 After adjusting the machine level tighten the nut 2 to lock the adjuster foot Machine holding position indicated in the label Machine h...

Page 16: ...x 5 Insert the plug 11 at the other end of the AC power cord 8 securely into the single phase 100 to 240 V power supply WARNING Connect the earth wire of the AC power cord to the earth terminal It cou...

Page 17: ...RCHASED SEPARATELY 1 Insert the plug 2 of the FDD connection cable 1 securely into the FDD connector 3 2 Insert the plug 4 at the other end of the FDD connection cable 1 securely into the connector of...

Page 18: ...t row 5 Pass the thread through the sub thread tension regulator 2 6 For spools 5 8 11 and 14 set the thread in the same manner up to the sub thread tension regulators of the same number 7 Pass the th...

Page 19: ...15 3 then through the hole of the needle 15 and finally through the hole in the presser foot 15 15 Hook next the thread end on the thread holding spring 16 Set the thread of spools 14 to 1 in the sam...

Page 20: ...be adjusted with the tension adjusting screw of the bobbin case Turning the screw clockwise tightens the thread and turning it counterclockwise loosens the thread tension For adjustment suspend three...

Page 21: ...orrectly set in the hoop by pressing the center of the fabric gently with the finger as shown in the illustration below The fabric should be stretched so that it returns to the state as before when th...

Page 22: ...position meeting the size of the hoop 2 Insert the right and left metallic tabs of the embroidery hoop set in the sections A and B in the direction of dashed line arrows and fix the tabs by engaging t...

Page 23: ...and left of top of the base cover 2 on the embroidery machine 2 Tighten the right and left fixing screws 3 This completes the attaching of the table DIP SWITCH SETTING Set DSW1 2 at ON to change the...

Page 24: ...right so that it touches the inner face of the bobbin 2 4 Thread is wound on the bobbin as the machine operates and the lever automatically returns back turning to the left when a certain amount of t...

Page 25: ...you check the machine without turning the main switch OFF you could sustain injury Check Point Description Action Covers Check for disengagement Install if disengaged Thread Check for disengagement S...

Page 26: ...xed position When the set screw of the handle is at the top position an odd numbered needle bar is selected Check of Needle Lowered Position Check the needle lowered position only after checking the s...

Page 27: ...ency When the EMERGENCY STOP switch is pressed the main shaft stops rotating and the EMERGENCY STOP switch is locked in the pressed state Turn the switch in the arrow direction to release the lock STA...

Page 28: ...set menu key 6 For INPUT DATA select 335 using and hoop travel keys 7 Press the SET key 8 Set the floppy disk in which the hoop data is stored to the FDD 9 Select the hoop data using and hoop travel k...

Page 29: ...e and position of the embroidery hoop 18 If the hoop position does not fit the range of embroidery adjust the position of the hoop using the hoop travel keys and repeat step 17 again If the hoop size...

Page 30: ...r numbers in the order of color change In manual color change mode Use to change the color change mode between auto matic and manual Needle bar No Change the selection with the hoop travel keys and Du...

Page 31: ...keys and Trimming in jump 0 9 stitches Change the selection with the hoop travel keys and Jump length OFF 4 0 9 9 mm Change the selection with the hoop travel keys and Trimming length 1 17 Change the...

Page 32: ...the hoop travel keys and Data Setting Rotation 90 units Change the selection with the hoop travel keys and Mirror OFF X X axis mirror Y Y axis mirror Change the selection with the hoop travel keys and...

Page 33: ...on Data selection When the SET key is pressed Memory No Number of registered designs Design name Change the selection with the hoop travel keys and Number of stitches of memory stored design Available...

Page 34: ...and SINGLE Embroidery is possible without storing the design in memory MULTI Design is input to memory Memory Initialization Memory initialization When the SET key is pressed Press the SET key when Y...

Page 35: ...elect with the hoop travel keys and and ten keys Pause may be inserted by Needle bar operation is suspended temporarily In manual color change mode Color change mode AUTO MANUAL Press the color change...

Page 36: ...idery is displayed while the machine stops FD07 E M B S T AR T AISI N123 10O 1 6 1 0 27 0 1 1 5 2 34 5 67 8 9 AB D 1 Press Select ST stitch or rpm number of revolutions for DISPLAY using the following...

Page 37: ...Press SET to confirm the setting 5 End of operation FD07 Press E M B S T AR T AISI N123 10O 1 0 1 0 27 0 1 1 5 2 34 5 67 8 9 AB D 1 F UN C T IO N M E NU 1 D I S PL A Y S T 2 TH R ED S NS OF F 3 BO B...

Page 38: ...the counter is reached the machine automatically stops by buzzer sounds and the message below is displayed Press the STOP key to reset the alarm message and then perform the necessary work to restore...

Page 39: ...f operation 1 The bobbin counter COUNTER functions only when the PRESET data is set FD07 Press E M B S T AR T AISI N123 10O 1 0 1 0 27 0 1 1 5 2 34 5 67 8 9 AB D 1 F UN C T IO N M E NU 1 D I S PL A Y...

Page 40: ...4 Press SET to confirm the setting 5 End of operation FD07 E M B S T AR T AISI N123 10O 1 0 1 0 27 0 1 1 5 2 34 5 67 8 9 AB D 1 Press F UN C T IO N M E NU 1 D I S PL A Y S T 2 TH R ED S NS 2 3 BO B B...

Page 41: ...n FD07 E M B S T AR T AISI N123 10O 1 0 1 0 27 0 1 1 5 2 34 5 67 8 9 AB D 1 Press F UN C T IO N M E NU 1 D I S PL A Y S T 2 TH R ED S NS 2 3 BO B BI N CN T S E T Press F UN C T IO N M E NU 4 L O C K S...

Page 42: ...FD07 E M B S T AR T AISI N123 10O 1 0 1 0 27 0 1 1 5 2 34 5 67 8 9 AB D 1 Press F UN C T IO N M E NU 1 D I S PL A Y S T 2 TH R ED S NS 2 3 BO B BI N CN T S E T Press Move the cursor using hoop travel...

Page 43: ...succession reaches the set value thread trimming is inserted 5 End of operation FD07 E M B S T AR T AISI N1 2 3 1 0O 1 0 1 0 27 0 1 1 5 2 34 5 67 8 9 AB D 1 Press F UN C T IO N M E NU 1 D I S PL A Y...

Page 44: ...B S T AR T AISI N1 23 1 0O 1 0 1 0 27 0 1 1 5 2 34 5 67 8 9 AB D 1 Press F UN C T IO N M E NU 1 D I S PL A Y S T 2 TH R ED S NS 2 3 BO B BI N CN T S E T Press the FUNCTION menu key twice F UN C T IO N...

Page 45: ...0 1 0 27 0 1 1 5 2 34 5 67 8 9 AB D 1 Press F UN C T IO N M E NU 1 D I S PL A Y S T 2 TH R ED S NS 2 3 BO B BI N CN T S E T Press the FUNCTION menu key twice F UN C T IO N M E NU 7 T R I M J UM P 3 S...

Page 46: ...tion FD07 E M B S T AR T AISI N1 23 1 0O 1 0 1 0 27 0 1 1 5 2 34 5 67 8 9 AB D 1 Press F UN C T IO N M E NU 1 D I S PL A Y S T 2 TH R ED S NS 2 3 BO B BI N CN T S E T Press the FUNCTION menu key three...

Page 47: ...PL A Y S T 2 TH R ED S NS 2 3 BO B BI N CN T S E T Press the FUNCTION menu key three times F UN C T IO N M E NU A T R I M T MN G 0 B CO M S P E ED 38 4 0 0 C MA C HI N E 1 Move the cursor using hoop t...

Page 48: ...initial screen displayed when the power is turned ON when the hoop mode is set Press the SET key to display the EMB START screen E M B S T AR T AISI N1 23 1 0O 1 0 1 0 27 0 1 1 5 2 34 5 67 8 9 AB D 1...

Page 49: ...ly 4 Press SET to confirm the selection 5 End of operation FD07 E M B S T AR T AISI N1 2 3 1 0O 1 0 1 0 27 0 1 1 5 2 34 5 67 8 9 AB D 1 Press H O O P M EN U 1 H O O P F L A T 2 IN I TI A L IZ E ON 3 S...

Page 50: ...urn the hoop to the start point press the start point return key 4 Press SET to confirm the selection 5 End of operation FD07 E M B S T AR T AISI N1 23 1 0O 1 0 1 0 27 0 1 1 5 2 34 5 67 8 9 AB D 1 Pre...

Page 51: ...B S T AR T AISI N1 2 3 1 0O 1 0 1 0 27 0 1 1 5 2 34 5 67 8 9 AB D 1 Press H O O P M EN U 1 H O O P F L A T 2 IN I TI A L IZ E ON 3 ST A RT P NT MA N U AL Press Select 1 2 or 3 using the follow ing ke...

Page 52: ...23 1 0O 1 0 1 0 27 0 1 1 5 2 34 5 67 8 9 AB D 1 Press H O O P M EN U 1 H O O P F L A T 2 IN I TI A L IZ E ON 3 ST A RT P NT MA N U AL Press H O O P M EN U 4 M A N UA L S P D 1 5 HO O P T M NG AU T O 6...

Page 53: ...the selection 6 End of operation FD07 E M B S T AR T AISI N1 2 3 1 0O 1 0 1 0 27 0 1 1 5 2 34 5 67 8 9 AB D 1 Press For details of offset refer to Pages 73 and 74 H O O P M EN U 1 H O O P F L A T 2 I...

Page 54: ...hoop travel key and input the data for MIRROR or REPEAT before pressing the SET key 4 End of operation FD07 E M B S T AR T AISI N1 23 1 0O 1 0 1 0 27 0 1 1 5 2 34 5 67 8 9 AB D 1 Press For details of...

Page 55: ...ta for ROTATE or REPEAT before pressing the SET key 5 End of operation FD07 E M B S T AR T AISI N1 2 3 1 0O 1 0 1 0 27 0 1 1 5 2 34 5 67 8 9 AB D 1 Press For details of mirror refer to Page 80 E D I T...

Page 56: ...esign repeat refer to Page 81 E D I T M EN U 1 R O T AT E 0 2 MI R RO R O F F 3 RE P EA T S E T Move the cursor using hoop travel key E D I T M EN U 1 RO T AT E 0 2 MI R RO R O F F 3 R E P EA T S ET P...

Page 57: ...ntinu ously set ROTATE or MIRROR before pressing the SET key 11 End of operation R E PE A T S E TT I NG D IR V ER T IC A L T IM E S 0 4 S PA C E 0 m m Select 0 or 255 using the following keys and hoop...

Page 58: ...splayed as shown below 4 End of operation To change the needle bar refer to the manual operation step explained in Page 59 FD07 E M B S T AR T AISI N1 23 1 0O 1 0 1 0 27 0 1 1 5 2 34 5 67 8 9 AB D 1 P...

Page 59: ...h the LCD on the oper ation panel box 3 Input the needle bar number for the next step 4 Press SET to confirm the setting of needle bar numbers 5 End of operation Needle bar No No 1 No 10 No 11 Operati...

Page 60: ...e LCD on the oper ation panel box 4 Press SET to confirm the setting of needle bar numbers 5 End of operation Needle bar No No 1 No 10 No 11 Operation Indication 1 A B FD07 E M B S T AR T AISI N1 23 1...

Page 61: ...desired steps 4 Press SET to confirm the setting When the pause is set is inserted before the set step 5 End of operation FD07 E M B S T AR T AISI N1 2 3 1 0O 1 0 1 0 27 0 1 1 5 2 34 5 67 8 9 AB D 1...

Page 62: ...n below 5 Select the design data Example AISIN 123 6 Input the selected design data Needle bar No 1 9 10 11 12 13 14 15 Indication 1 9 A B C D E F FD07 E M B S T AR T AISI N1 23 1 0O 1 0 1 0 27 0 1 1...

Page 63: ...peration The input design data is set as the embroidery data 1 2 3 4 5 6 7 8 9 0 10 Set the number at which the nee dle bar is changed by pressing the ten keys C OL O R C H AN G E M O DE AU T O 0 1 0...

Page 64: ...C to the serial port of the machine 2 Turn ON the power switch of the machine 3 After making sure that the power is supplied to the machine turn ON the power switch of the external device 4 Send the d...

Page 65: ...ery data When the data is read the screen will show the color change mode screen as shown below after the input of the design data Input the needle bar No at the cur sor position Refer to Page 59 I NP...

Page 66: ...SI N1 23 1 0O 1 0 1 0 27 0 1 1 5 2 3 4 56 7 8 9A D 1 Press D A T A M EN U 1 I N P UT DA T A P C 2 SE L EC T DA T A 3 DE L ET E DA T A Move the cursor using hoop travel key D A T A M EN U 1 IN P UT D A...

Page 67: ...TART screen press the ESCAPE key twice FD07 E M B S T AR T AISI N1 2 3 1 0O 1 0 1 0 27 0 1 1 5 2 3 4 56 7 8 9A D 1 Press D A T A M EN U 1 I N P UT DA T A P C 2 SE L EC T DA T A 3 DE L ET E DA T A Move...

Page 68: ...ation If SINGLE is set for MEMORY input the data from PC or 335 To restore the EMB START screen press the ESCAPE key FD07 E M B S T AR T AISI N1 23 1 0O 1 0 1 0 27 0 1 1 5 2 3 4 56 7 8 9A D 1 Press D...

Page 69: ...the design data press the ESC key The EMB START screen will be as shown below if there is no data set as the embroidery data FD07 E M B S T AR T AISI N1 2 3 1 0O 1 0 1 0 27 0 1 1 5 2 3 4 56 7 8 9A D...

Page 70: ...changed back from manual to automatic the lamp is turned OFF CAUTION When performing this operation do not put your hands or others under the needle or on the table Otherwise you could get hurt when...

Page 71: ...ET key is pressed 3 End of operation 1 Start point is the start point of design If automatic offset is set the offset start position is taken as the start point CAUTION When performing this operation...

Page 72: ...g embroidering If you press the TRACE key during tracing the hoop stops traveling at the nearest corner in the direction of present traveling Tracing restarts when the TRACE key is pressed again CAUTI...

Page 73: ...creen as shown to the left is displayed This indicates that the hoop has stopped at the offset position 5 Return the hoop back to the previously located position The hoop travels back to the posi tion...

Page 74: ...d position The hoop travels back to the posi tion before offsetting when you press the offset key CAUTION When performing this operation do not put your hands or others under the needle or on the tabl...

Page 75: ...When lock stitch is selected Page 40 one stitch is sewn before trimming CAUTION When performing this operation do not put your hands or others under the needle or on the table Otherwise you could get...

Page 76: ...o travel to the next color change position 3 End of operation CAUTION When performing this operation do not put your hands or others under the needle or on the table Otherwise you could get hurt when...

Page 77: ...essing the SET key makes it traveling forward or backward hoop travel to the input stitch position 4 End of operation CAUTION When performing this operation do not put your hands or others under the n...

Page 78: ...you release the FORWARD key Press the STOP key to stop the hoop from traveling 3 The hoop stops traveling at the color change position CAUTION When performing this operation do not put your hands or...

Page 79: ...to stop the hoop from traveling 3 The hoop stops traveling at the color change position The hoop keeps traveling back ward up to the color change posi tion CAUTION When performing this operation do n...

Page 80: ...design data which is set as the embroidery data The design data is reversed around the X Y axis that passes the start point of the design Mirror axis X reversal around the X axis Y reversal around the...

Page 81: ...r Example Direction Horizontal Times 3 Space 55 mm You can check the entire embroidery range by executing trace after setting the repeat data Adjust the start point number of repetition times and spac...

Page 82: ...he MOVE HOOP key offset key while the machine is at a still causes the hoop to travel to the offset position Pressing the offset key again returns the hoop to the previously located position Example A...

Page 83: ...Changing the hoop 1 End of embroidery 2 The hoop travels to the offset position automatically 3 Remove the hoop 4 Attach the new hoop 5 Press the START key The hoop travels to the design start positio...

Page 84: ...dth Satin stitch adjustment is made according to the set adjustment value for stitch width of 1 5 mm or larger For satin stitch width less than this limit satin stitch width is adjusted with a value s...

Page 85: ...left and front right corners of the embroidery range then return to the design start point If repeat is set the function traces the entire embroidery range If the TRACE key is pressed during tracing t...

Page 86: ...sustain electric shock or injury If the message shown in the right appears at the start of embroidery supply lubricating oil to the rail on rotary hook Page 88 After supplying lubricating oil as instr...

Page 87: ...Once week 4 X Y axis drive system 2 places Once 2 weeks FD07 1 3 4 4 2 Thread trimming section cleaning procedure 1 Remove two needle plate clamp screws 2 Detach the needle plate 3 Remove waste thread...

Page 88: ...2 places 3 Needle bar drive shaft 2 places Every day 4 Needle bar drive shaft of presser foot 5 Inside the arm 3 places 6 Needle bar Once week 7 Inside the cylinder bed 8 Felt packing needle bar Once...

Page 89: ...utor for the details Greasing Point Interval 1 Presser foot cam 2 Take up lever drive cam 3 Take up lever roller Once 3 months 4 Needle case linear section 5 X Y axis drive system 3 places Once 6 mont...

Page 90: ...w 2 Turn ON the DSW2 1 2 2 and DSW1 1 3 Connect the personal computer and the machine with the serial cable Use an off the shelf cross cable D SUB9 pin for the serial connec tor You need a personal co...

Page 91: ...ogram related to drive system 9 Press key to start installation Installation will proceed automati cally in response to pressing of the Install key Following message appears 10 Completion of program i...

Page 92: ...TROUBLESHOOTING AND MAINTENANCE 92 12 Attach the switch cover and tighten the screw FD07 Tighten the screw Switch cover...

Page 93: ...as shown below will be dis plyed If this screen is displayed press the SET key and continue operation from step 5 5 Select the program to be installed MAIN Program related to CPU XY Program related t...

Page 94: ...ogram to be installed using the following keys and hoop travel keys I N ST A L L 1 M AI N 2 X Y 3 PA N EL I N ST A L L 1 M AI N 2 X Y 3 PA N EL I NS T AL L Press I N ST A LL 1 MA I N I NS T AL L 2 XY...

Page 95: ...ard object such as a button and further movements were disabled Remove thread from the rotary hook Supply lubricating oil to the lubricating points Press the TRACE key and check the relation ship betw...

Page 96: ...broken 5 Lower thread was bro ken Thread the upper thread again Remove the cause of upper thread breakage Thread the upper thread correctly Set lower thread Change the preset value of bobbin counter S...

Page 97: ...rrectly 29 15 BAD NUMBER Wrong design number 1 When reading the design data from the external device a wrong design data number was designated Designate a correct design data number 62 64 16 INSERT DI...

Page 98: ...the same position as other take up levers Needle position signal not detected Needle position signal not detected Adjust the needle position so that the normal needle position signal is displayed at...

Page 99: ...n Picker device At the start end of stitching and at thread trimming Number of revolutions Max 1200 rpm normal speed 800 rpm Embroidery range Max 500 mm X direction 360 mm Y direction Width of stitchi...

Page 100: ...E 48 J JUMP LENGTH 44 L LOCK STITCH 40 M MANUAL OERATION 70 MANUAL SPEED 51 MEMORY INITIALIZATION 69 MEMORY MODE 68 MIRROR 55 80 N NEEDLE BAR SETTING CHANGING 60 NEEDLE BAR SETTING INPUTING 59 O OFFSE...

Page 101: ...LTD HEAD OFFICE Fashion Systems Department 2 1 Asahi machi Kariya City Aichi 448 8650 Japan 81 566 24 8695 Fax 81 566 24 8895 Email fashion cld aisin co jp Homepage http www aisin co jp ESP9000 0303 P...

Reviews: