3
Filter version
One active charcoal filter is needed for this and
can be obtained from your usual retailer. The
filter removes the grease and smells from the
extracted air before sending it back into the
room through the upper outlet grid.
Attention: If the hood is not supplied with carbon
filter, then it must be ordered and mounted.
Operations
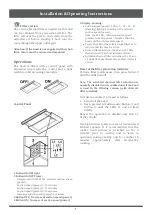
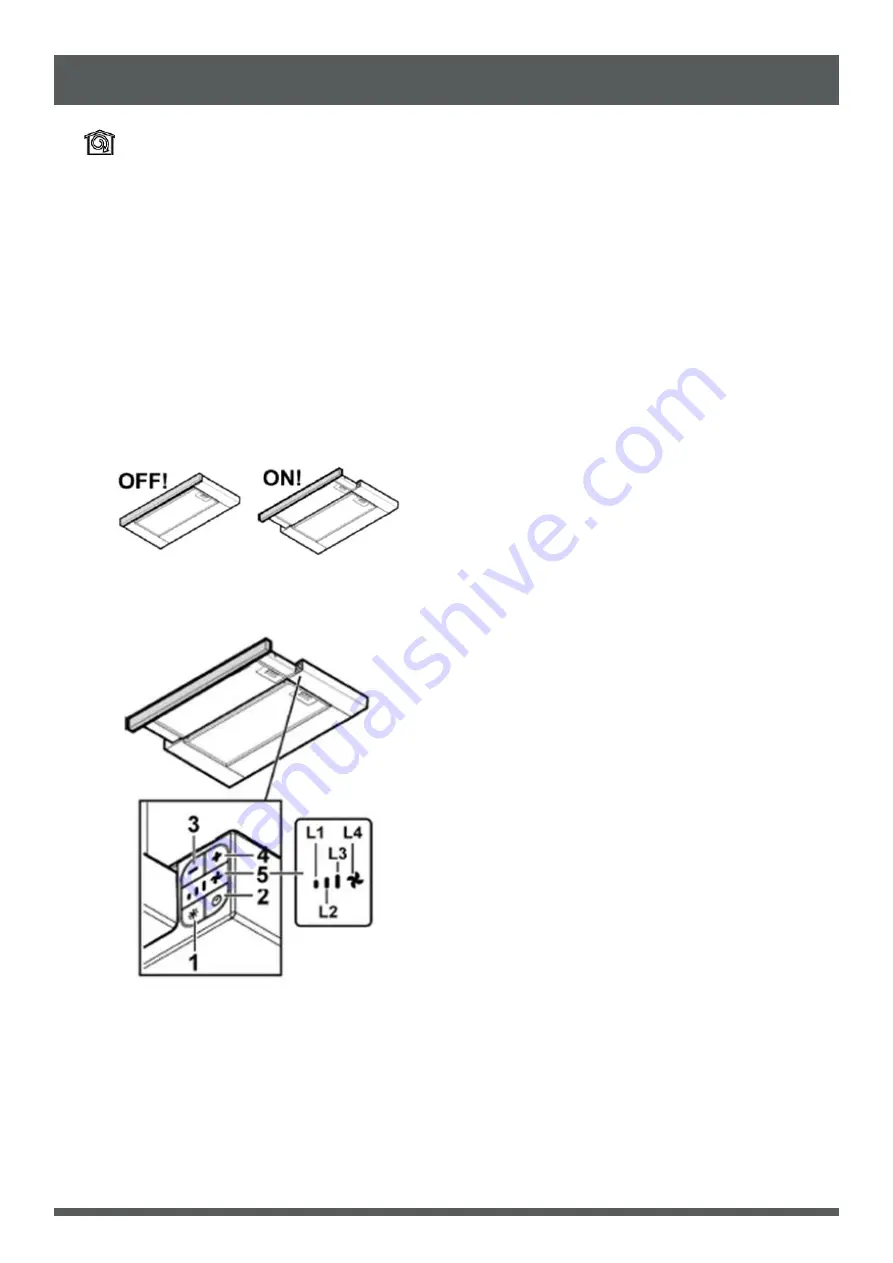
The hood is fitted with a control panel with
aspiration speed selection control and a light
switch to control cooking area lights.
Control Panel
1 Button ON/OFF light
2 Button ON/OFF Timer:
Delayed switch-off of the selected suction speed
(power):
Suction speed (power) 1: 20 minutes
Suction speed (power) 2: 15 minutes
Suction speed (power) 3: 10 minutes
Intensive suction speed (power): 5 minutes
3 Button OFF / Decrease of suction speed (power)
4 Button ON / Increase of suction speed (power)
5 Display, showing:
Suction speed (power): LEDs L1 – L2 – L3 - L4
(flashing) light up according to the selected
suction speed (power).
Note: the L4 LED – intensive suction speed
(power) works for about 5 minutes, then the
hood sets the intermediate speed.
Timer: the LED of the selected speed flashes to
indicate that the timer is active.
Grease filter saturation: the L3 and L4 LEDs
flash alternately at short intervals of time.
Activated charcoal filter saturation: the L3 and
L4 LEDs flash simultaneously at short intervals
of time.
Reset of the filter saturation indicator
Perform filter maintenance, then press button 2
until the LEDs turn off.
Note: The activated charcoal filter saturation is
normally disabled and is enabled only if the hood
is used in the filtering version (with charcoal
filter installed).
In order to activate it, proceed as follows:
1. Switch off the hood
2. Keep pressed simultaneously Button 3 and
Button 4, until the LEDs L1 and L2 flash
briefly.
Repeat the operation to disable; only LED L1
flashes briefly.
Use high suction speed in cases of concentrated
kitchen vapours. It is recommended that the
cooker hood suction is switched on for 5
minutes prior to cooking and to leave in
operation during cooking and for another 15
minutes approximately after terminating
cooking.
Installation & Operating Instructions
Summary of Contents for Mia Cucina MY60
Page 1: ......
Page 2: ......
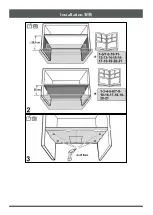
Page 3: ...Installation 安裝 ...
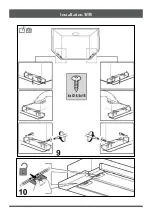
Page 4: ...Installation 安裝 ...
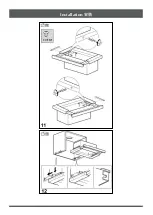
Page 5: ...Installation 安裝 ...
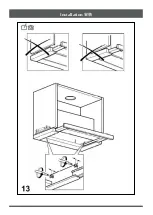
Page 6: ...Installation 安裝 ...
Page 7: ...Installation 安裝 ...
Page 8: ...Installation 安裝 ...
Page 9: ...Installation 安裝 ...
Page 10: ...Installation 安裝 ...
Page 11: ...Installation 安裝 ...
Page 22: ......
Page 23: ......
Page 24: ...2 0 1 6 0 8 M Y 6 0 M Y 9 0 ...


