53
CONTENTS
Adjustments &
Settings
QUICK MENU adjustments and settings (continued)
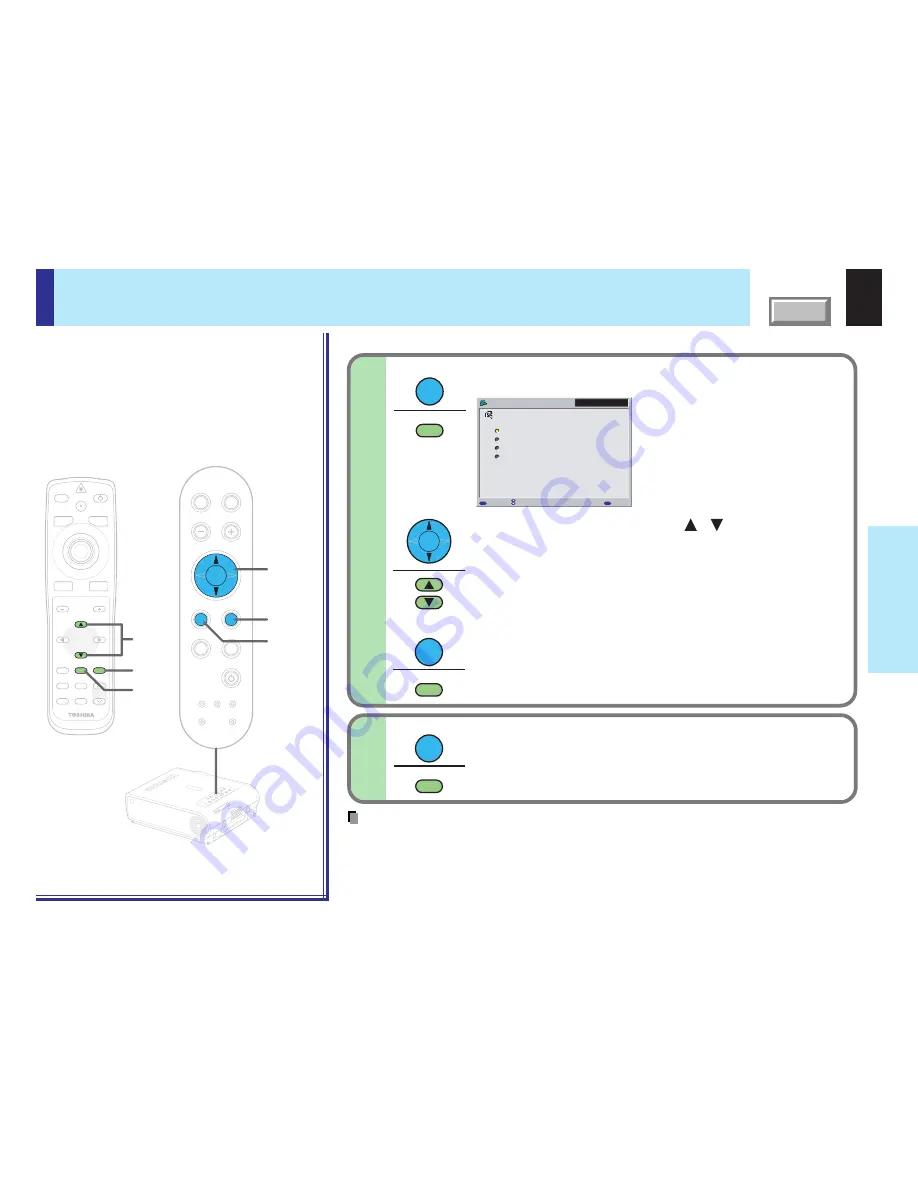
3-d
Press ENTER.
The sub-menu screen of interval setting appears.
Use the selection buttons ( / ) to select
interval time.
10 sec.
30 sec.
3 min.
10 min.
Depending on the compression format of the JPEG files, it may
take more time than the setting value.
Press EXIT to return to the QUICK MENU.
4
After the adjustments and settings are finished,
press EXIT.
The menu screen disappears.
LASER
3-d,4
3-d
3-d,4
3-d
3-d
3-d
MENU
ON/STANDBY
INPUT
L-CLICK
R-CLICK
ENTER
KEYSTONE
AUTO
SET
EXIT
PIP
FREEZE
MUTE
CALL
RESIZE
VOLUME/ADJUST
TEMP LAMP
ON
BUSY
FAN
KEYSTONE
SET
AUTO
AUTO
EXIT
ENTER
MENU
INPUT
VOL/ADJ.
TEMP
LAMP
ON
BUSY
FAN
ON/ST
ANDBY
KEYST
ONE
SET
AUTO
AUTO
EXIT
ENTER
MENU
INPUT
VOL/ADJ
.
ON/STANDBY
ENTER
ENTER
EXIT
EXIT
When selecting “Interval” in step 2. (Set the interval time of the automatic slide show.)
Memory card
Interval
10 sec.
30 sec.
3 min.
10 min.
MENU
EXIT
QUICK MENU
FULL
Select
Back
EXIT
EXIT
Notes
• If the power is turned off by pressing the ON/STANDBY button, the adjustments or settings
made are automatically stored in the memory. If the power cord is unplugged or if a power
failure occurs while the projector is on, the adjustments or settings are not stored in the
memory.
• The adjustments or settings are stored for each of the items marked “O” in the table in step 2.
Remote control
Control panel
(Main unit side)


