background image

6

IMPORTANT SAFETY INSTRUCTIONS (Continued)

11.Lightning storms

For added protection for this product
during a storm, or when it is left
unattended and unused for long
periods of time, unplug it from the wall
outlet. This will prevent damage to the
product due to lightning and power-
line surges.
However, while it is thundering or
lightning, do not touch the apparatus
and any connected cable and/or
equipment.
This will prevent you from receiving
the electric shock by an electric surge.

14.Do not place the product

vertically

Do not use the product in the upright
position or any other vertical positions to
project the pictures. It may fall which
could result in serious injury and/or
damage to the product.

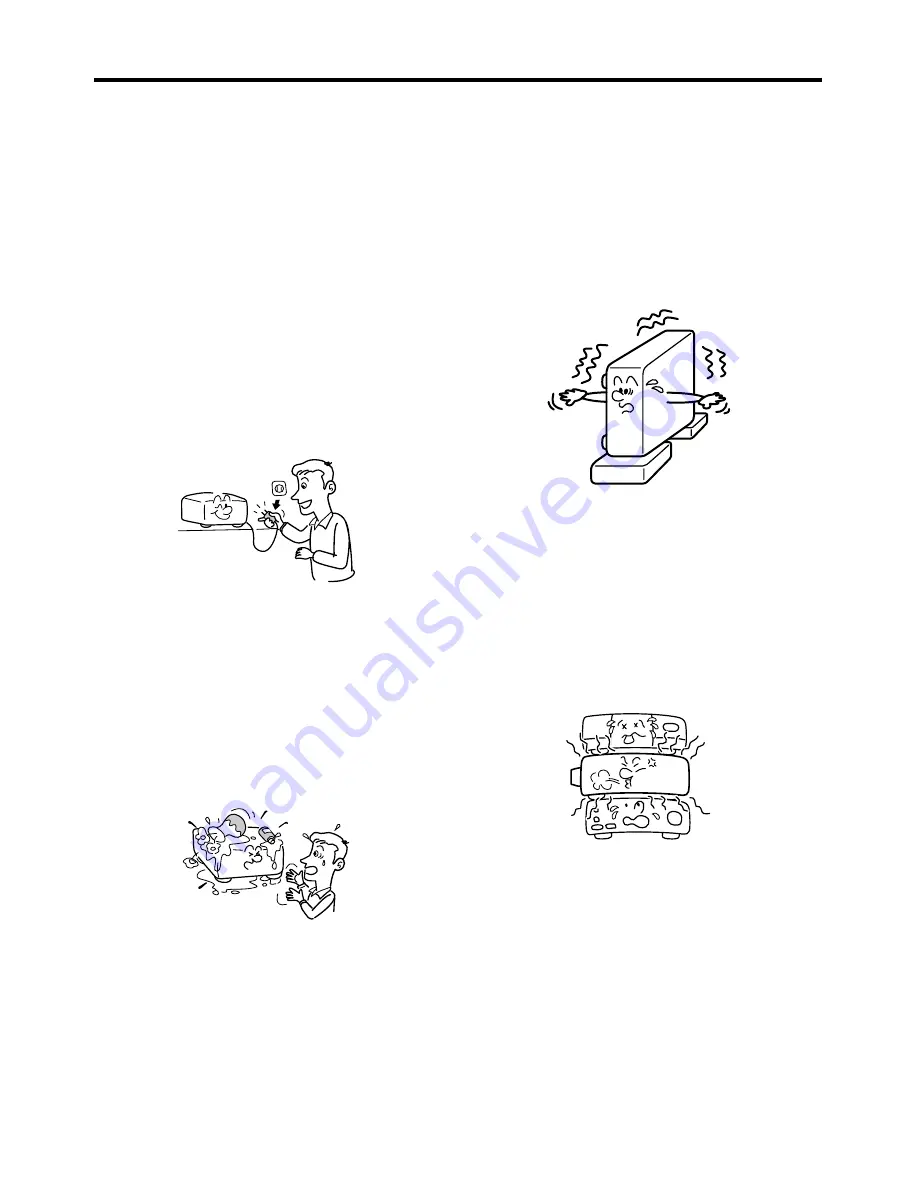
15.Stack Inhibited

Do not stack other equipment on this
product and do not place this product on
other equipment. The top and bottom
surface of this product increase in
temperature during normal use and may
damage the other unit.

16.Attachments

Do not use attachments not recommended
by the product manufacturer.
Use of an incompatible attachments could
cause hazards or damage to the product.

12.Object and Liquid Entry

Never push objects of any kind into
this product through openings as they
may touch dangerous voltage points
or short-out parts that could result in a
fire or electric shock. Never spill liquid
of any kind on the product.

13.Do not place or keep the

projector within the reach
of the children.

It may fall or tip over, possibly causing
serious injury.

Summary of Contents for TDP-F10

Page 1: ...perations Maintenance Others TDP F10 LED PROJECTOR OWNER S MANUAL In the spaces provided below record the Model and Serial No located at the bottom of your projector Model No Serial No Retain this information for future reference ...

Page 2: ...lowing measures Reorient or relocate the receiving antenna Increase the separation between the equipment and receiver Connect the equipment into an outlet on a circuit different from that to which the receiver is connected The lightning flash with arrowhead symbol within an equilateral triangle is intended to alert the user to the presence of uninsulated dangerous voltage within the product s encl...

Page 3: ...7 U S A Phone 949 583 3000 CAUTION Changes or modifications made to this equipment not expressly approved by Toshiba or parties authorized by Toshiba could void the user s authority to operate the equipment Notice This Class B digital apparatus complies with Canadian ICES 003 Cet appareil numérique de la classe B est conforme à la norme NMB 003 du Canada USA ONLY CANADA ONLY ...

Page 4: ...t look into the lens while the projector is on The strong light from the lens may cause damage to your eyesight 2 Power Sources This product should be operated only from the type of power source which does not exceed the voltage range specified on the rating label and the power cord If you are not sure of the type of power supply to your home consult your product dealer or local power company 4 Ve...

Page 5: ...ce receptacles and the point where they exit from the product 10 Overloading Do not overload wall outlets To reduce the risk of electric shock do not use the polarized plug with an extension cord receptacle or other outlet unless the blades can be inserted completely with three wire grounding type to prevent blade exposure Failure to follow these instructions may result in fire or electric shock 6...

Page 6: ...ll which could result in serious injury and or damage to the product 15 Stack Inhibited Do not stack other equipment on this product and do not place this product on other equipment The top and bottom surface of this product increase in temperature during normal use and may damage the other unit 16 Attachments Do not use attachments not recommended by the product manufacturer Use of an incompatibl...

Page 7: ...d injury and contact your dealer for repair service Avoid any broken pieces of glass since they may cause injury 20 Servicing Do not attempt to service this product yourself as opening or removing covers may expose you to dangerous voltage or other hazards Refer all servicing to qualified service personnel 18 Damage Requiring Service Unplug this product from the wall outlet and take the product to...

Page 8: ...pairs to this product ask the service technician to perform safety checks to verify that the product is in proper operating condition 23 Do not leave thermal paper documents or easily deformed items on top of the unit or near the air exhaust for long periods of time The heat from the unit could erase the information on the thermal paper or cause deformation or warping 24 Do not use the product in ...

Page 9: ...densation naturally disappears In a high altitude location such as over 1500m 5000ft from sea level the air is thin and cooling efficiency is reduced so use the projector with Fan mode set to High Otherwise surface of the projector becomes hot and the lifetime may be reduced Only plug the power cord into outlets rated for use within the power cord s specified voltage range Do not overload extensio...

Page 10: ...hiba Corporation bears no responsibility for incidental damages lost profit work interruption corruption or loss of the memory contents etc arising from the use of or the inability to use this unit Toshiba Corporation accepts no liability whatsoever for any damages arising from not having followed the descriptions in this Owner s Manual Toshiba Corporation accepts no liability whatsoever for any d...

Page 11: ...ll help prevent potential negative consequences for the environment and human health which could otherwise be caused by inappropriate waste handling of this product For more detailed information about recycling of this product please contact your local city office your household waste disposal service or the shop where you purchased the product Trademarks VGA SVGA XGA SXGA and UXGA are trademarks ...

Page 12: ...ote control does not operate correctly or if the operating range becomes reduced replace the battery with a new one If the battery is dead or if you will not be using the remote control for a long time remove the battery to prevent battery acid from leaking into the battery compartment Following information is only for EU member states Disposal of batteries and or accumulators The crossed out whee...

Page 13: ... in door use AC adapter becomes hot during use however it is not a malfunction Noise can be heard from the inside during use however it is not a malfunction Never cover rug clothes or other similar materials over the AC adapter Place it well ventilated location Do not take it apart Do not allow it to get wet or place it on top of wet objects Unplug the power cord if you will not be using the proje...

Page 14: ...ement 23 Connection 25 Operations Turning the power on and off 26 Basic operations 28 Using handy features 30 Using auto setting For computer input only 30 Correcting the keystone distortion KEYSTONE 30 Cutting off the picture temporarily MUTE 30 Freezing the image FREEZE 31 Resizing image RESIZE 31 Adjusting LED power LED 32 Using the menus 33 How to use the menus 33 Image adjustment menu 34 Disp...

Page 15: ...15 Before Using Specifications 46 List of general specifications 46 List of supported signals RGB signals 47 List of supported signals Component signals 48 Pin assignment of COMPUTER IN terminals 49 ...

Page 16: ...F format PDF Portable Document Format Please use Acrobat Reader 5 or later version to view the manual Adobe Acrobat Reader or Adobe Reader The supplied CD ROM does not contain Acrobat Reader If you cannot read PDF files please install Adobe Reader software in your computer by downloading it from the Adobe Systems website Viewing the manual Run the CD ROM and double click Start pdf Acrobat Reader l...

Page 17: ...red remote sensor Senses commands from the remote control 6 Air exhaust Expels air that has grown hot inside the projector 7 Foot adjuster Adjusts the vertical projection angle 8 SERVICE port Use for service purpose only 9 Tripod socket Allows tripod mounting 10 Control panel Operates the projector 11 Power switch Turns the power on off 12 SD USB cover Protects SD and USB slots 13 Rear panel Conne...

Page 18: ...tton Displays menus Short cut for LED brightness control and keystone correction when it is pressed and held over 2 seconds 5 INPUT button Selects input 6 STATUS indicator Lights when an internal error occurs Remote control 1 Selection buttons Menu selections and adjustments etc 2 ENTER button Accepts the selected mode 3 COMP button Selects analog RGB signal from a computer 4 MENU button Displays ...

Page 19: ...nput signal from SD or USB memory device 7 FREEZE button Pauses image 8 MUTE button Cuts off the picture temporarily 9 AUTOSET button Performs auto adjustment of input signal from com puter 10 LED button Adjusts LED power 11 KEYSTONE S T button Adjusts keystone distortion 12 RESIZE S T button Digitally magnifies an image up to 4 times on the projection screen or reduces the zoomed image p 38 p 31 ...

Page 20: ... IN terminal Connects the AC adapter here 2 VIDEO IN terminal Inputs video signals from video equipment 3 COMPUTER IN terminal Inputs analog RGB signal from a computer or other source or a component video signal Y PB PR from video equipment 1 2 3 p 26 ...

Page 21: ...lder back into the remote control until you feel a click Operating the remote control Turning the power on by sliding the power switch to ON position Point toward the projector s infrared remote sensor and press a button on the remote control Operating the projector from the front Note When operating the remote control from behind the projector the infrared signal is reflected on the projecting su...

Page 22: ...of children Battery is a choking hazard and can be very dangerous if swallowed If the battery is swallowed seek medical assistance immediately The remote control The remote control may fail to operate if the infrared remote sensor is exposed to bright sunlight or fluorescent lighting Do not drop or bang Do not leave in hot or humid locations Do not allow it to get wet or place it on top of wet obj...

Page 23: ...nt the projector on the ceiling be sure to ask your dealer to do so Mounting the projector on a ceiling requires special ceiling brackets sold separately and specialized knowledge Improper mounting could cause the projector to fall resulting in possible injury and unit damage If the projector is ceiling mounted install the breaker for turning off the power in case of anomaly Let everyone involved ...

Page 24: ... and corresponds to a range of 0 6 m to 2 4 m 23 6 inches to 94 5 inches The lens center is in the same level with an image bottom 1 inch 2 54 cm Screen As seen from above 90 As seen from the side a 90 Lens center projection size inches projection distance a m 15 0 6 20 0 8 25 1 0 30 1 2 35 1 4 40 1 6 45 1 8 50 2 0 55 2 2 60 2 4 projection size inches projection distance a inches 15 23 6 20 31 5 2...

Page 25: ...ow show sample connections This does not mean that all of these devices can or must be connected simultaneously Connecting with computers or AV equipment Note Moving pictures played back on computers using DVD software may appear unnatural when projected with this projector but it is not a malfunction of the projector p 47 To RGB output RGB cable supplied Desktop type Laptop type Video cable suppl...

Page 26: ...rmed due to heat Turning the power on Slide the power switch to ON position The power turns on and the selection button area on the control panel lights blue after a few seconds After a moment the start up screen appears CAUTION Do not look into the lens while the projector is on The strong light from the lens may cause damage to your eyesight Do not block the air intake or exhaust Doing so could ...

Page 27: ...will be displayed Do not touch the lens directly with your hand If fingerprints or stains are left on the projection lens surface they may interfere with the projector s ability to project images on the screen Turning the power off Slide the power switch to OFF position The projector turns off Precautions Right after turning off the power the unit may become very hot especially air exhaust or the ...

Page 28: ...utton Message for setup confirmtion is displayed in a selected language Note The language can also be set via the Default setting menu This owner s manual assumes that English has been selected Activate the connected device Turn on and start the connected device such as a computer Press the INPUT button An image of the connected equipment is projected Each time you press the INPUT button it switch...

Page 29: ...uality slightly To view high quality images set the computer s external output to SVGA With some computer models having LCD or similar displays displaying images simultaneously on the projector and the monitor s display may prevent the images from displaying properly If this happens turn off the computer s LCD display For information on how to turn off the LCD display see the computer s owner s ma...

Page 30: ...tortion This projector can correct for this keystone distortion Press the remote control s KEYSTONE S T button You can also select Keystone in the Display setting menu You may also press and hold the MENU button on the projector over 2 seconds and then use the or button to correct the keystone Note Depending on the amount of keystone adjustment needed and the image content some information may be ...

Page 31: ...tware broadcast or cable broadcasting except for the purpose of your private viewing may infringe the copyright protected by the copyright laws Freeze function is not available on SD USB input Resizing image RESIZE The projected image can be resized zoomed in out Press the remote control s RESIZE S button Each time you press the RESIZE S button zoom ratio is up You can keep pressing it to enlarge ...

Page 32: ...function other than Mute will release resizing As zooming is processed digitally the image quality is degraded in larger zoom ratio During resizing or moving the zooming area the image may be distorted Adjusting LED power LED This function is used to adjust LED power Press the LED button on the remote control LED power is increased or decreased You may also press and hold the MENU button on the pr...

Page 33: ...menu Item Adjustment Setting Value These marks signify that there are options Press to display a list of options Image adjustment menu Display setting menu Default setting menu Status display menu The figure shows displays given for operation instructions purposes As the display may differ depending on the item refer to the following applicable pages for the menu item you desire The menu disappear...

Page 34: ...R and Video input HDTV NTSC PAL WIDE Yes Yes Yes Yes LED Power Adjust LED brightness Darker Brighter Yes Yes Yes Yes Brightness Adjust the brightness of the image Darker Brighter Yes Yes Yes Yes Contrast Adjust the image contrast Lower Higher Yes Yes Yes Yes Color Adjust the color of the image Lighter Deeper No Yes Yes No Tint Note Adjust the image to an appropriate tint Reddish Greenish No Yes Ye...

Page 35: ...e Note Screen size setting Normal Wide Normal Display the image in a maximum size to fit in the screen Wide Wide screen dispay Yes Yes Yes No Up down shift Adjust the vertical position when Screen size is set to Wide Lower Higher Yes Yes Yes No Background Screen to display when there is no input signal Logo Blue Black Yes Yes Yes Yes Icon Display icons as function guides On Off Yes Yes Yes Yes Sta...

Page 36: ...y device will enter the Slide show mode Set to Off then plug in the SD USB memory device will enter the File view mode No No No Yes Slide show Set slide show mode Auto Manual No No No Yes Interval Adjust the interval time in Slide show auto mode Shorter Longer No No No Yes Slide show loop Set loop function of the slide show On Off No No No Yes Display effect Note Set transition effect of the slide...

Page 37: ...quested for customer service Item Description RGB Y PB PR Video SD USB Input Input source name Yes Yes Yes Yes Resolution Note Resolution in dots Yes No No No Video mode Color method of video signal No Yes Yes No Picture mode Picture mode setting Yes Yes Yes Yes Color space Color space setting Yes Yes Yes Yes LED Power LED brightness Yes Yes Yes Yes Version Note Firmware version Yes Yes Yes Yes p ...

Page 38: ...been ended File View Mode 1 When Quick start is set to On and there is JPEG file s in the root folder of the SD USB memory device the slide show starts automatically 2 When Quick start is set to Off or there is no JPEG file in the root folder of the SD USB memory device the file list appears as below file view mode 3 Press the S T button to select the folder or file Press the X button to display t...

Page 39: ...s set to Auto in the Default setting menu the slide will change automatically when displaying Display time also can be changed in Interval setting in the Default setting menu Interval time doesn t include reading time of the next file so it takes longer to display the next picture than the setting When Slide Show loop is set to Off the slide show cycles only once and then enter file view mode Afte...

Page 40: ...rminal of the projector is USB 1 1 compliant which can connect with a USB memory device 2 The SD terminal The SD terminal supports SD and SDHC memory cards 3 SD USB memory 8GB limited SD USB memory size Do not support USB HDD Hard disk Do not support USB hub Some USB card readers such as multi card readers are not supported 4 SD and USB memory devices whose operation has been verified Toshiba does...

Page 41: ...ted file extensions are jpg and JPG Some JPEG files such as interlaced JPEG are not supported Maximum resolution is 16384 x 16384 7 Folders and files Folders are limited to 4 levels The number of files in each folder is limited to 9986 ...

Page 42: ... soft cloth Do not wipe the main unit with a damp cloth Doing so may allow water to get inside resulting in possible electric shock or unit failure Do not use benzene thinner or other similar chemical solutions as they may deform or discolor the unit or damage the paint surface Do not use a chemically saturated cloth WARNING Request cleaning and maintenance of a ceiling mounted unit from your proj...

Page 43: ...43 Maintenance ...

Page 44: ... position and then check the applicable items in the Before calling service personnel Afterward restart the projector again State Problems Icon Messages Close Messages LED Indicators TEMP STATUS System overheat See Note below On Fan lock See Note below F2 System error See Note below F2 F2 SD USB error Turn off the power once and turn it back again Some kinds of files may cause this problem so plea...

Page 45: ...e within the projector s supported range Is the projector s screen placement angle tilted too far Are the sharpness or sampling phase adjustments off Colors too light Bad shading Are the color or tint adjustments off Is the screen dirty Image is dark Are the brightness or contrast adjustments off Remote control doesn t work Is the power switch set to OFF Is the remote control s battery drained Is ...

Page 46: ...o 30o C 41o F to 86o F 1500 2400m 5000 8000ft Fan mode High 5oC to 28oC 41oF to 82oF 2400 3000m 8000 10000ft Fan mode High Storage temp 20o C to 60o C 4o F to 140o F Relative humidity 85 max Altitude Operating 0 3 000m 0 10 000 ft Storage 0 12 000m 0 40 000 ft Display device 1 DLP chip Picture elements True 858 x 600 resolution 16 7M True colors Lens f 17 67mm fixed lens Light source LED module Pr...

Page 47: ...ion exceeds the native resolution 858 x 600 pixels will be compressed For this reason some information may be lost and or image quality may be affected Compatibility Resolution H Sync KHz V Sync Hz VGA 640 x 480 31 5 59 9 37 9 72 8 37 5 75 0 43 3 85 0 SVGA 800 x 600 35 2 56 3 37 9 60 3 48 1 72 2 46 9 75 0 53 7 85 1 XGA 1024 x 768 48 4 60 0 56 5 70 1 60 0 75 0 68 7 85 0 SXGA 1152 x 864 64 0 70 0 67...

Page 48: ...ed signals Component signals Signal Horizontal Frequency kHz Vertical Frequency Hz 480i 15 8 kHz 60 Hz 480p 31 5 kHz 60 Hz 576i 15 6 kHz 50 Hz 576p 31 3 kHz 50 Hz 720p 45 0 kHz 60 Hz 720p 37 5 kHz 50 Hz 1080i 33 8 kHz 60 Hz 1080i 28 1 kHz 50 Hz ...

Page 49: ...49 Others Pin assignment of COMPUTER IN terminals Pin No Signal Name 1 RED 2 GREEN 3 BLUE 4 NC 5 GND 6 GND 7 GND 8 GND 9 VCC 5V 10 GND 11 NC 12 SDA 13 HSYNC 14 VSYNC 15 SCL Mini D sub 15 pin connector ...

Page 50: ......

Reviews: