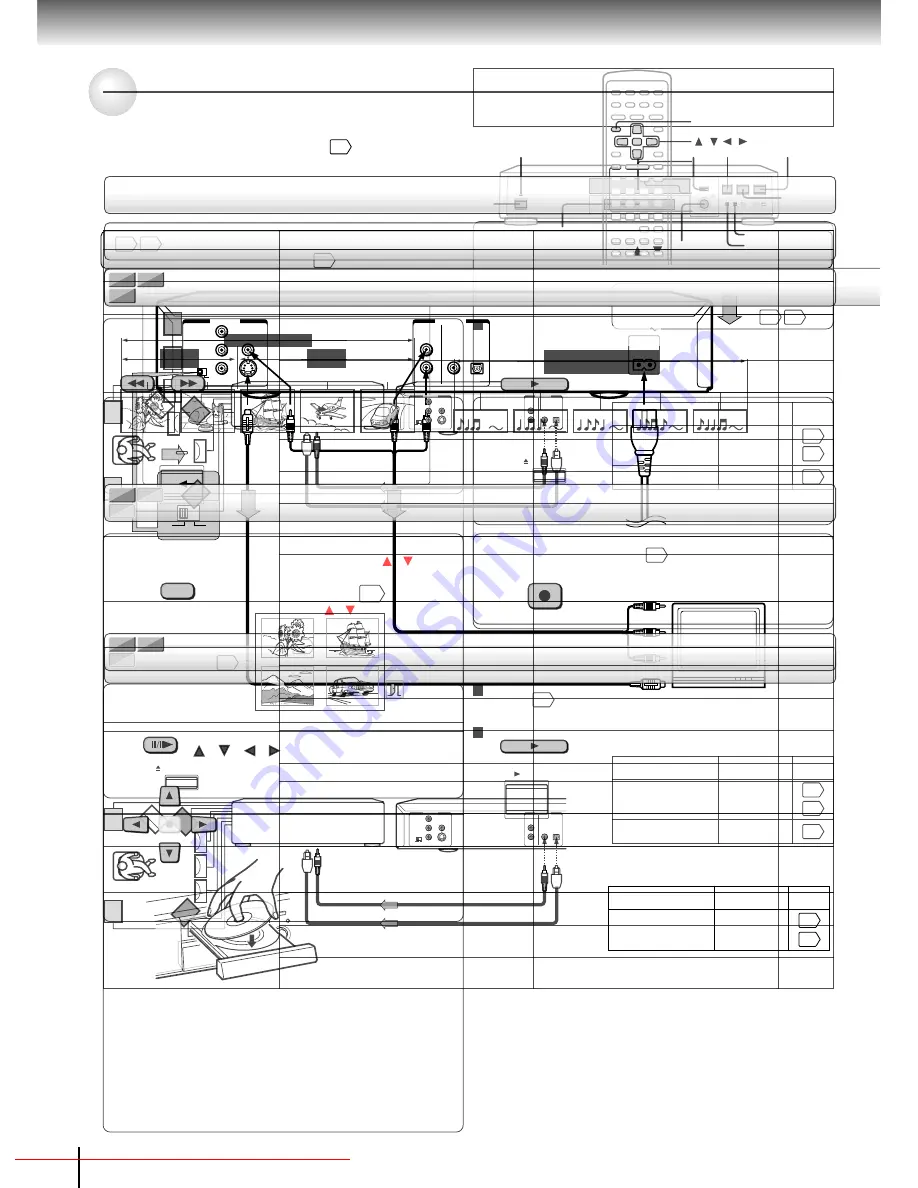
background image

18

Connections

AUDIO OUT

L

R

COAXIAL

OPTICAL

DIGITAL

2CH

BITSTREAM

/PCM

S

SELECT

P

I

VIDEO OUT

VIDEO

Y

P

B

P

R

AC IN

SELECT

P

I

Connecting to a TV

Connect the DVD player to your TV.

For details of output sound, see 

43

.

Connecting to a TV

To S VIDEO OUT

To VIDEO OUT

To 2CH AUDIO OUT

(white)

(red)

(yellow)

Signal flow

To wall outlet

(yellow)

(red)

(white)

To S video input

Audio/video cable
(supplied)

S video cable
(not supplied)

To audio inputs

If the TV has an S video input, connect the
DVD player with an S video cable. When
using an S video cable, do not connect the
yellow video cable.

Notes
• Refer to the owner’s manual of the connected TV as well.
• When you connect the DVD player to your TV, be sure to turn off the power and unplug both units from the wall outlet before

making any connections.

• If your television set has one audio input, connect the left and right audio outputs of the DVD player to a Y cable adapter (not

supplied) and then connect to your TV.

• Connect the DVD player directly to your TV.  If you connect the DVD player to a VCR, TV/VCR combination or video selector,

the playback picture may be distorted as DVD video discs are copy protected.

• Make the following setting.

On-screen display

Select:

Page

“Bitstream”

or

“PCM”

“Audio Out Select”

TV or monitor with
audio/video inputs

To video input

56

59

Set to “I.”

Downloaded From DvDPlayer-Manual.com Toshiba Manuals

20

Connections

Connecting to Optional Equipment

You can enjoy high quality dynamic sounds by connecting the DVD player to
optional audio equipment.

Warning
• When you are connecting (via the BITSTREAM/PCM

(DIGITAL) AUDIO OUT jack) an AV decoder that does
not have Dolby Digital, Digital Theater Systems (DTS)
or MPEG2 decoding function, be sure to set “Audio Out
Select” to “PCM” from the on-screen displays 

56 59

.

Otherwise, high volume sound may damage your
hearing as well as the speakers.

• When playing DTS-encoded discs (audio CDs),

excessive noise may be output from the analog audio
output jacks.  To avoid possible damage to the audio
system, you should take proper precautions when the
analog audio output jacks of the DVD player are
connected to an amplification system.  To enjoy DTS
Digital Surround™ playback, an external 5.1 channel
DTS Digital Surround™ decoder system must be
connected to the BITSTREAM/PCM (DIGITAL) AUDIO
OUT jack of the DVD player.

Notes
• DO NOT connect the BITSTREAM/PCM (DIGITAL)

AUDIO OUT jack of the DVD player to the AC-3 RF input
of a Dolby Digital Receiver.  This input on your A/V
Receiver is reserved for Laserdisc use only and is
incompatible with the BITSTREAM/PCM (DIGITAL)
AUDIO OUT jack of the DVD player.

• Connect the BITSTREAM/PCM (DIGITAL) AUDIO OUT

jack of the DVD player to the “DIGITAL (OPTICAL)” or
“DIGITAL (COAXIAL)” input of a Receiver or Processor.

• Refer to the owner’s manual of the connected equipment

as well.

• When you connect the DVD player to other equipment, be

sure to turn off the power and unplug all of the equipment
from the wall outlet before making any connections.

• The output sound of the DVD player has a wide dynamic

range. Be sure to adjust the receiver’s volume to a
moderate listening level. Otherwise, the speakers may be
damaged by a sudden high volume sound.

• Turn off the amplifier before you connect or disconnect the

DVD player’s power cord. If you leave the amplifier power
on, the speakers may be damaged.

• For connection to your TV, see “Connecting to a TV”

18 19

.

• For details of output sound, see 

43

.

• This section uses the following reference marks.

: Front speaker

: Rear speaker

: Sub woofer

: Center speaker

: Signal flow

Downloaded From DvDPlayer-Manual.com Toshiba Manuals

22

Connections

Connecting to an amplifier equipped with a DTS decoder

Digital Theater Systems (DTS)

DTS is a high quality surround technology used in theaters and now available for
home use, on DVD video discs or audio CDs.
If you have a DTS decoder or processor, you can obtain the full benefit of 5.1
channel DTS encoded sound tracks on DVD video discs or audio CDs.

Connecting to an amplifier equipped with an MPEG2 audio decoder

MPEG2 sound
You can enjoy motion picture and live concert DVD video discs with dynamic
realistic sound by connecting an amplifier equipped with an MPEG2 audio
decoder or MPEG2 audio processor.

• Use DVD video discs or audio

CDs encoded via the DTS
recording system.

• Make the following setting.

“DTS” and “DTS Digital Surround” are
trademarks of Digital Theater Systems,
Inc.

• Use DVD video discs encoded via

the MPEG2 recording system.

• Make the following setting.

On-screen display

Select:

Page

“Bitstream”

“Audio Out Select”

Recording system

DTS

On-screen display

Select:

Page

“Bitstream”

“Audio Out Select”

Recording system

MPEG

Amplifier equipped with
a DTS decoder

Connect either.

To OPTICAL
type digital
audio input

Optical digital cable

75   coaxial cable

To COAXIAL
type digital
audio input

Amplifier equipped with an
MPEG2 audio decoder

Connect either.

To OPTICAL
type digital
audio input

Optical digital cable

75   coaxial cable

To COAXIAL
type digital
audio input

Connecting to Optional Equipment (Continued)

42

42

AUDIO OUT

L

R

COAXIAL

OPTICAL

DIGITAL

2CH

BITSTREAM

/PCM

S

SELECT

P

I

VIDEO OUT

VIDEO

Y

P

B

P

R

AUDIO OUT

L

R

COAXIAL

OPTICAL

DIGITAL

2CH

BITSTREAM

/PCM

S

SELECT

P

I

VIDEO OUT

VIDEO

Y

P

B

P

R

56

59

56

59

Downloaded From DvDPlayer-Manual.com Toshiba Manuals

26

Basic playback

Playing a Disc

This section shows you the basics on how to play a disc.

CAUTION
Keep your fingers well clear of the disc tray as it is closing.
Neglecting to do so may cause serious personal injury.

Preparations
• When you want to view a disc, turn on the TV and select the video input connected to the DVD player.
• When you want to enjoy the sound of discs from the audio system, turn on the audio system and select the input connected

to the DVD player.

1

2

3

4

POWER indicator

Press the power button (POWER).

The DVD player turns on and the
POWER indicator on the player
illuminates.

When the DVD player is turned on for
the first time, an on-screen display will appear
to provide initial settings. Press the   / 
buttons to select an item, and press the
ENTER button. See the pages in 

, and

make a selection using the   /   buttons, then
press the ENTER button.

On-Screen Language
TV Shape

After making all the settings, select “

” and

press the ENTER button.

Press OPEN/CLOSE.

The disc tray opens.

Place a disc on the disc tray.

With the playback
side down.

• There are two different disc sizes. Place the disc in

the correct guide on the disc tray. If the disc is out
of the guide, it may damage the disc and cause the
DVD player to malfunction.

• Do not place a disc which is unplayable in this

DVD player.

Press OPEN/CLOSE to close the disc
tray.

Playback starts.

If you insert a DVD video disc that contains a top
menu, a menu may appear. See “Locating a title
using the top menu.” 

30

You may need to press the TOP MENU or MENU
button to display disc menu (depending on the
actual DVD video disc.)

Note
If the disc tray contains a disc you have already played,
playback will begin from the location where you last stopped
playback. 

29

To start playback in the stop mode

Press PLAY.

DVD display

DVD-V

CD

VCD

Basic playback

60

58

POWER

OPEN/CLOSE

OPEN/CLOSE

PLAY

3

1

2, 4

MENU
TOP MENU

STOP

PAUSE

PLAY

 /   / ENTER

Downloaded From DvDPlayer-Manual.com Toshiba Manuals

28

Basic playback

DVD-V

CD

VCD

DVD-V

CD

VCD

Playing in fast reverse or fast forward directions

Press REV or FWD during playback.

REV : Fast reverse playback
FWD: Fast forward playback

Each time you press the REV or
FWD button, the playback speed
changes.

To resume normal playback

Press PLAY.

Notes
• The DVD player mutes sound and omits subtitles during

reverse and forward scan of DVD video discs.

• The playback speed may differ depending on the disc.

Playing frame by frame

Press PAUSE/STEP during still playback.

Each time you press the PAUSE/
STEP button, the picture advances
one frame.

To resume normal playback

Press PLAY.

Note
The sound is muted during frame by frame playback.

PAUSE/STEP

PLAY
FWD
REV

FWD

REV

Variable Speed Playback

You can play discs at various speeds, and resume playback from the location
where you stopped playback.

PLAY

PAUSE/STEP

PLAY

Downloaded From DvDPlayer-Manual.com Toshiba Manuals

30

Basic playback

DVD-V

CD

VCD

Locating a title using the top menu

Press TOP MENU.

The top menu appears on the TV
screen.

e.g.

Press   /   /   /   to select the title you
want.

If the titles in the top menu are
assigned a number, you can directly
locate a specific title by pressing its
designated number with the number
buttons.

Press ENTER.

Playback starts from chapter 1 of the
selected title.

1

2

3

Notes
• The instructions above describe basic procedures which

may vary depending on the contents of the DVD video disc.
If different instructions appear on the TV screen, follow those
instructions.

• If you display the top menu during playback and press the

TOP MENU button again without selecting any title, the DVD
player may resume playback from the point where you first
pressed the TOP MENU button (depending on the actual
DVD video disc.)

• This method of locating a title is available only on a disc that

contains a top menu.

• Instruction notes of discs may refer to the button that

displays the top menu as TITLE button.

Normally, DVD video discs are divided into titles, and the titles are sub-divided into chapters. VIDEO CDs and audio CDs are
divided into tracks. You can quickly locate any specific title, chapter, or track.

DVD video disc

Title 1

Title 2

Chapter 1

Chapter 2

Chapter 1

Chapter 2

Chapter 3

Track 1

Track 2

Track 3

Track 4

Track 5

VIDEO CD/Audio CD

Locating a Desired Section

TOP MENU

TITLE 1

TITLE 3

TITLE 2

TITLE 4

ENTER

ENTER

TOP MENU

   /   /   /   / ENTER

Downloaded From DvDPlayer-Manual.com Toshiba Manuals

68

Others

Before Calling Service Personnel

Check the following guide for the possible cause of a problem before contacting service.

Symptom

No power.

The DVD player turned off by
itself.

No picture.

No sound.

The playback picture has
occasional distortion.

Brightness is unstable or
noises are present in the
playback pictures.

The DVD player does not
start playback.

Playback does not follow the
course of the disc’s program.

Buttons do not work.

The remote control does not
work properly.

Cause

• The power plug is disconnected.

• The automatic power off function turned

the unit off.

• The TV is not set to receive DVD signal

output.

• The video cable is not connected securely.

• The equipment connected with the audio

cable is not set to receive DVD signal
output.

• The audio cable is not connected securely.

• The audio receiver or TV is turned off.

• The setting of output sound format is

incorrect.

• The disc is dirty.

• It is in fast forward or fast reverse

playback.

• The effect of copy protection.

• No disc is inserted.

• An unplayable disc is inserted.

• The disc is placed upside down.

• The disc is not placed within the guide.

• The disc is dirty.

• The parental lock function is set.

• It is in the mode of repeat playback,

memory playback, etc.

• Power supply fluctuations or other

abnormalities such as static electricity may
interrupt correct operations.

• The remote control is not pointed at the

remote sensor of the DVD player.

• The remote control is too far from the DVD

player.

• The batteries in the remote control are

exhausted.

Correction

• Connect the power plug securely into the

wall outlet.

• Press the PLAY button.

• Select the appropriate video input mode

on the TV so the picture from the DVD
player appears on the TV screen.

• Connect the video cable securely into the

appropriate jacks.

• Select the correct input mode of the

audio receiver so you can listen to the
sound from the DVD player.

• Connect the audio cable securely into

the appropriate jacks.

• Turn on the equipment connected with

the audio cable.

• Select the proper audio setting.

• Eject the disc and clean it.

• Sometimes a small amount of picture

distortion may appear. This is not a
malfunction.

• Connect the DVD player directly to the

TV.  Avoid connecting the DVD player to
a VCR or TV/VCR combination.

• Insert a disc.

• Insert a playable disc. (Check the disc

type.)

• Place the disc with the playback side

down.

• Place the disc correctly inside the guide

on the disc tray.

• Clean the disc.

• Cancel the parental lock function or

change the parental lock level.

• These operations may prevent a proper

progress of the contents.

• Turn the power on or off with the POWER

button. Or disconnect the power plug and
insert it into the wall outlet again.

• Point the remote control at the remote

sensor of the DVD player.

• Operate the remote control within about

7 m.

• Replace the batteries with new ones.

Page

18

27

26

18, 19

26

18-23

26

42, 56

59

9

18

26

10

26

26

9

56, 62

15

15

15

Symptoms and correction

Downloaded From DvDPlayer-Manual.com Toshiba Manuals

70

Others

LIMITED WARRANTY DVD PLAYER

Toshiba America Consumer Products, Inc. (“TACP”), Toshiba Hawaii (“THI”) and Toshiba Canada Limited (“TCL”) make the
following limited warranties. These limited warranties extend to original purchaser or any person receiving this set as a gift
from the original purchaser and to no other purchaser or transferee.

Limited Ninety (90) Day Warranty
TACP/THI warrant this product against defects in materials
or workmanship for a period of ninety (90) days after the
date of original retail purchase. During this period, TACP/
THI will repair or replace a defective product or part, at their
option, with a new or refurbished product or part without
charge to you. You must deliver the entire product to a
TACP/THI Authorized Service Station. You are responsible
for all transportation and insurance charges for the unit to
and from the Authorized Service Station. If you live in the
U.S.A. you may, at your option, return your DVD Unit to:

Toshiba America Consumer Products Inc.
Returns Center
1420C Toshiba Dr.
Lebanon, TN 37087

Upon receipt we will, at our option, exchange the DVD Unit
with a new or refurbished unit. Canadian consumers are
requested to contact TCL. In Hawaii consumers are
requested to contact THI.

Limited One (1) Year Warranty
TACP/THI further warrant the parts in this product against
defects in materials or workmanship for a period of one (1)
year after the date of original retail purchase. During this
period, TACP/THI will repair or replace a defective product
or part, at their option, with a new or refurbished product or
part without charge to you, except that if a defective part is
replaced after ninety (90) days from the date of the original
retail purchase you pay labor charges involved in the
replacement. You must also deliver the entire product to a
TACP/THI Authorized Service Station. You are responsible
for all transportation and insurance charges for the unit to
and from the Authorized Service Station. If you live in the
U.S.A. you may, at your option, return your DVD Unit to:

Toshiba America Consumer Products Inc.
Returns Center
1420C Toshiba Dr.
Lebanon, TN 37087

Upon receipt we will, at our option, exchange the DVD Unit
with a new or refurbished unit. Canadian Consumers are
requested to contact TCL. In Hawaii consumers are
requested to contact THI.

Rental Units
The warranty for rental units begin with the first rental or
thirty (30) days from the date of shipment to the rental firm,
whichever comes first.

Commercial Units
Products sold and used for commercial use have a limited
ninety (90) day warranty for all parts and labor.

Owner’s Manual
You should read the owner’s manual thoroughly before
operating this product. You should complete and mail the
enclosed Demographic card within ten (10) days after you,
or the person who has given you this product as a gift,
purchased this product. This is one way to enable TACP to
provide you with better customer service and improved
products. Failure to return the card will not affect your rights
under this warranty.

Your Responsibility
The above warranties are subject to the following
conditions:
(1) You must retain your bill of sale or provide other proof of

purchase.

(2) You must notify a TACP/THI/TCL /Authorized Service

Station within thirty (30) days after you discover a
defective product or part.

(3) All warranty servicing of this product must be made by a

TACP/THI/TCL Authorized Service Station.

(4) U.S.A. warranties are effective only if the product is

purchased and operated in the Continental U.S.A. or
Puerto Rico.

(5) Labor service charges for set installation. Set up,

adjustment of customer controls and installation or
repair of antenna systems are not covered by this
warranty. Reception problems caused by inadequate
antenna systems are your responsibility.

(6) Warranties extend only to defects in materials or

workmanship as limited above and do not extend to any
product or parts which have been lost or discarded by
you or to damage to products or parts caused by
misuse, accident, damage caused by Acts of God, such
as lighting or fluctuations in electric power, improper
installation, improper maintenance or use in violation of
instructions furnished by us; or to units which have
been altered or modified without authorization of TACP/
THI/TCL or to damage to products or part thereof which
have had the serial number removed, altered, defaced
or rendered illegible.

(7) Should you elect to return your DVD Unit to TACP after

the ninety (90) days and within one (1) year, or after the
warranty period has expired: Call (800)-631-3811 to
receive information concerning an exchange price.
Payment must be enclosed with product in the form of a
certified check or money order including reason for
return.

(8) Physically damaged DVD Units are not acceptable for

repair or exchange whether in or out of warranty and
will be returned as received.

Downloaded From DvDPlayer-Manual.com Toshiba Manuals

Summary of Contents for SD-3750

Page 1: ...DVD VIDEO PLAYER OWNER S MANUAL Jan 2002 S SD 3750 SD K700 DIGITAL VIDEO Downloaded From DvDPlayer Manual com Toshiba Manuals ...

Page 2: ...a weak detergent solution wring well and wipe Use a dry cloth to wipe it dry Do not use any type of solvent such as thinner and benzine as they may damage the surface of the DVD player If you use a chemical saturated cloth to clean the unit follow that product s instructions To obtain a clear picture The DVD player is a high technology precision device If the optical pick up lens and disc drive pa...

Page 3: ...aratus The object may fall causing serious personal injury and serious damage to the apparatus 20 Do not use a cracked deformed or repaired disc These discs are easily broken and may cause serious personal injury and apparatus malfunction Downloaded From DvDPlayer Manual com Toshiba Manuals Introduction Struct Normally DVD video discs are divided into titles and the titles are sub divided into cha...

Page 4: ...a weak detergent solution wring well and wipe Use a dry cloth to wipe it dry Do not use any type of solvent such as thinner and benzine as they may damage the surface of the DVD player If you use a chemical saturated cloth to clean the unit follow that product s instructions To obtain a clear picture The DVD player is a high technology precision device If the optical pick up lens and disc drive pa...

Page 5: ...aratus The object may fall causing serious personal injury and serious damage to the apparatus 20 Do not use a cracked deformed or repaired disc These discs are easily broken and may cause serious personal injury and apparatus malfunction Downloaded From DvDPlayer Manual com Toshiba Manuals Introduction Struct Normally DVD video discs are divided into titles and the titles are sub divided into cha...

Page 6: ...a weak detergent solution wring well and wipe Use a dry cloth to wipe it dry Do not use any type of solvent such as thinner and benzine as they may damage the surface of the DVD player If you use a chemical saturated cloth to clean the unit follow that product s instructions To obtain a clear picture The DVD player is a high technology precision device If the optical pick up lens and disc drive pa...

Page 7: ...aratus The object may fall causing serious personal injury and serious damage to the apparatus 20 Do not use a cracked deformed or repaired disc These discs are easily broken and may cause serious personal injury and apparatus malfunction Downloaded From DvDPlayer Manual com Toshiba Manuals Introduction Struct Normally DVD video discs are divided into titles and the titles are sub divided into cha...

Page 8: ...d wipe Use a dry cloth to wipe it dry Do not use any type of solvent such as thinner and benzine as they may damage the surface of the DVD player If you use a chemical saturated cloth to clean the unit follow that product s instructions To obtain a clear picture The DVD player is a high technology precision device If the optical pick up lens and disc drive parts are dirty or worn down the picture ...

Page 9: ...The object may fall causing serious personal injury and serious damage to the apparatus 20 Do not use a cracked deformed or repaired disc These discs are easily broken and may cause serious personal injury and apparatus malfunction Downloaded From DvDPlayer Manual com Toshiba Manuals Introduction Struct Normally DVD video discs are divided into titles and the titles are sub divided into chapters V...

Page 10: ...d wipe Use a dry cloth to wipe it dry Do not use any type of solvent such as thinner and benzine as they may damage the surface of the DVD player If you use a chemical saturated cloth to clean the unit follow that product s instructions To obtain a clear picture The DVD player is a high technology precision device If the optical pick up lens and disc drive parts are dirty or worn down the picture ...

Page 11: ...The object may fall causing serious personal injury and serious damage to the apparatus 20 Do not use a cracked deformed or repaired disc These discs are easily broken and may cause serious personal injury and apparatus malfunction Downloaded From DvDPlayer Manual com Toshiba Manuals Introduction Struct Normally DVD video discs are divided into titles and the titles are sub divided into chapters V...

Page 12: ...d wipe Use a dry cloth to wipe it dry Do not use any type of solvent such as thinner and benzine as they may damage the surface of the DVD player If you use a chemical saturated cloth to clean the unit follow that product s instructions To obtain a clear picture The DVD player is a high technology precision device If the optical pick up lens and disc drive parts are dirty or worn down the picture ...

Page 13: ...aratus The object may fall causing serious personal injury and serious damage to the apparatus 20 Do not use a cracked deformed or repaired disc These discs are easily broken and may cause serious personal injury and apparatus malfunction Downloaded From DvDPlayer Manual com Toshiba Manuals Introduction Struct Normally DVD video discs are divided into titles and the titles are sub divided into cha...

Page 14: ...d wipe Use a dry cloth to wipe it dry Do not use any type of solvent such as thinner and benzine as they may damage the surface of the DVD player If you use a chemical saturated cloth to clean the unit follow that product s instructions To obtain a clear picture The DVD player is a high technology precision device If the optical pick up lens and disc drive parts are dirty or worn down the picture ...

Page 15: ...aratus The object may fall causing serious personal injury and serious damage to the apparatus 20 Do not use a cracked deformed or repaired disc These discs are easily broken and may cause serious personal injury and apparatus malfunction Downloaded From DvDPlayer Manual com Toshiba Manuals Introduction Struct Normally DVD video discs are divided into titles and the titles are sub divided into cha...

Page 16: ... Toshiba Manuals Advancedplayback Customizing the performance of your DVD player Accessing a Specific Location Directly Playing Repeatedly Playing in a Favorite Order Playing in Random Order Zooming a Picture Selecting the Sound Enhancement E A M Selecting the Camera Angle Selecting Subtitles Selecting a Language Downloaded From DvDPlayer Manual com Toshiba Manuals Quick control Simple use of a si...

Page 17: ... If you display the top menu during playback and press the TOP MENU button again without selecting any title the DVD player may resume playback from the point where you first pressed the TOP MENU button depending on the actual DVD video disc This method of locating a title is available only on a disc that contains a top menu Instruction notes of discs may refer to the button that displays the top ...

Page 18: ...TOP MENU PAUSE STEP STOP OPEN CLOSE Downloaded From DvDPlayer Manual com Toshiba Manuals Basic playback DVD V CD VCD DVD V CD VCD Playing in Press SLOW d Each time you press the SLOW button the slow motion speed changes If you press the SLOW button during playback you can view the picture in reverse slow motion Only when using a DVD video disc Each time you press the SLOW button the slow motion sp...

Page 19: ... If you display the top menu during playback and press the TOP MENU button again without selecting any title the DVD player may resume playback from the point where you first pressed the TOP MENU button depending on the actual DVD video disc This method of locating a title is available only on a disc that contains a top menu Instruction notes of discs may refer to the button that displays the top ...

Page 20: ...ENU PAUSE STEP STOP OPEN CLOSE Downloaded From DvDPlayer Manual com Toshiba Manuals Basic playback DVD V CD VCD DVD V CD VCD Playing in Press SLOW d Each time you press the SLOW button the slow motion speed changes If you press the SLOW button during playback you can view the picture in reverse slow motion Only when using a DVD video disc Each time you press the SLOW button the slow motion speed c...

Page 21: ...ns If you display the top menu during playback and press the TOP MENU button again without selecting any title the DVD player may resume playback from the point where you first pressed the TOP MENU button depending on the actual DVD video disc This method of locating a title is available only on a disc that contains a top menu Instruction notes of discs may refer to the button that displays the to...

Page 22: ...ENU PAUSE STEP STOP OPEN CLOSE Downloaded From DvDPlayer Manual com Toshiba Manuals Basic playback DVD V CD VCD DVD V CD VCD Playing in Press SLOW d Each time you press the SLOW button the slow motion speed changes If you press the SLOW button during playback you can view the picture in reverse slow motion Only when using a DVD video disc Each time you press the SLOW button the slow motion speed c...

Page 23: ... Toshiba Manuals Advancedplayback Customizing the performance of your DVD player Accessing a Specific Location Directly Playing Repeatedly Playing in a Favorite Order Playing in Random Order Zooming a Picture Selecting the Sound Enhancement E A M Selecting the Camera Angle Selecting Subtitles Selecting a Language Downloaded From DvDPlayer Manual com Toshiba Manuals Quick control Simple use of a si...

Page 24: ... If you display the top menu during playback and press the TOP MENU button again without selecting any title the DVD player may resume playback from the point where you first pressed the TOP MENU button depending on the actual DVD video disc This method of locating a title is available only on a disc that contains a top menu Instruction notes of discs may refer to the button that displays the top ...

Page 25: ...TOP MENU PAUSE STEP STOP OPEN CLOSE Downloaded From DvDPlayer Manual com Toshiba Manuals Basic playback DVD V CD VCD DVD V CD VCD Playing in Press SLOW d Each time you press the SLOW button the slow motion speed changes If you press the SLOW button during playback you can view the picture in reverse slow motion Only when using a DVD video disc Each time you press the SLOW button the slow motion sp...

Page 26: ... If you display the top menu during playback and press the TOP MENU button again without selecting any title the DVD player may resume playback from the point where you first pressed the TOP MENU button depending on the actual DVD video disc This method of locating a title is available only on a disc that contains a top menu Instruction notes of discs may refer to the button that displays the top ...

Page 27: ...TOP MENU PAUSE STEP STOP OPEN CLOSE Downloaded From DvDPlayer Manual com Toshiba Manuals Basic playback DVD V CD VCD DVD V CD VCD Playing in Press SLOW d Each time you press the SLOW button the slow motion speed changes If you press the SLOW button during playback you can view the picture in reverse slow motion Only when using a DVD video disc Each time you press the SLOW button the slow motion sp...

Page 28: ... If you display the top menu during playback and press the TOP MENU button again without selecting any title the DVD player may resume playback from the point where you first pressed the TOP MENU button depending on the actual DVD video disc This method of locating a title is available only on a disc that contains a top menu Instruction notes of discs may refer to the button that displays the top ...

Page 29: ...MENU PAUSE STEP STOP OPEN CLOSE Downloaded From DvDPlayer Manual com Toshiba Manuals Basic playback DVD V CD VCD DVD V CD VCD Playing in Press SLOW d Each time you press the SLOW button the slow motion speed changes If you press the SLOW button during playback you can view the picture in reverse slow motion Only when using a DVD video disc Each time you press the SLOW button the slow motion speed ...

Page 30: ... Toshiba Manuals Advancedplayback Customizing the performance of your DVD player Accessing a Specific Location Directly Playing Repeatedly Playing in a Favorite Order Playing in Random Order Zooming a Picture Selecting the Sound Enhancement E A M Selecting the Camera Angle Selecting Subtitles Selecting a Language Downloaded From DvDPlayer Manual com Toshiba Manuals Quick control Simple use of a si...

Page 31: ... You can access a specific location by entering its corresponding time hours minutes seconds 2 1 Notes Some discs may not respond to this process Some scenes may not be located precisely as you specified This method for accessing specific locations is available only within the current title of the DVD video disc or within the current track of the VIDEO CD audio CD 3 Entering the time counter of th...

Page 32: ...VD player automatically returns to point A and starts repeat playback of the selected segment A B 2 1 To resume normal playback Press CLEAR Notes Some discs may not permit A B repeat operation You cannot set the A B repeat function for a segment that includes multiple camera angles 40 You can specify a segment only within the current title There may be a slight difference between point A and the l...

Page 33: ...itle number Press PLAY while the display appears on the TV screen The DVD player starts memory playback 1 2 3 To change the programmed selections 1 While the display appears on the TV screen press the buttons to highlight the item you want to change 2 Change the selection following the instructions in step 2 To cancel the programmed selections 1 While the display appears on the TV screen press the...

Page 34: ... Press PLAY The DVD player starts random playback Press the PLAY button within about 5 seconds after you press the RANDOM button 3 1 To resume normal playback Press CLEAR Notes Some discs may not permit random playback operation You cannot use the random playback function in conjunction with the memory playback function Chapter Random Title Random Track Random Track Random Random Off Plays the cha...

Page 35: ... the monitor scope and the icon during zoom playback Press to select EXIT and press ENTER To resume normal playback Press ZOOM repeatedly until the monitor scope and the icon disappear Alternatively press to select ZOOM on the icon and press ENTER repeatedly until the monitor scope and the icon disappear Notes Some discs may not respond to zoom feature During some scenes the buttons may not work a...

Page 36: ... M 2 E A M ENTER To exit the audio enhancement selection Press ENTER Alternatively leave the DVD player unattended for about 5 seconds after having made a selection Notes Actual effects to sounds may vary depending on the speaker systems Make selection according to your preference Actual effects to sounds may vary depending on the disc When the DVD player is connected to an amplifier equipped with...

Page 37: ...me you press the ANGLE button or the buttons the camera angle changes You can change the camera angle directly by pressing the number buttons corresponding to its angle number instead of using the buttons To turn off the angle number display Press CLEAR Notes You can change the camera angle during still playback The camera angle changes to the new setting when you resume normal playback If you pau...

Page 38: ...ress while the subtitle setting is displayed on the TV screen to select On or Off Notes When you turn on the DVD player or replace a disc the player returns to the initial default setting 61 When you select a subtitle language which is not included on the disc the DVD player plays a prior language programmed on the disc During some scenes the subtitles may not appear immediately after you change t...

Page 39: ... off the audio setting display press the CLEAR button 1 2 Selecting sound channels of VIDEO CDs You can switch left and right channels by pressing the AUDIO button repeatedly during playback Notes When you turn on the DVD player or replace a disc player returns to the initial default setting 61 If you select a sound track which is not included on the disc the DVD player plays a prior sound track p...

Page 40: ...ital Bitstream 48 kHz 20 bit 48 kHz 20 bit 48 kHz 20 bit Bitstream Bitstream Bitstream Noise Bitstream Noise 44 1 kHz 16 bit 44 1 kHz 16 bit 44 1 kHz 16 bit 48 kHz 16 bit 48 kHz 16 bit 48 kHz 16 bit 44 1 kHz 16 bit 44 1 kHz 16 bit 44 1 kHz 16 bit 44 1 kHz 16 bit 44 1 kHz 16 bit VIDEO CDs Audio CDs DTS MPEG1 MPEG1 MPEG2 Linear PCM 44 1 kHz 16 bit DTS Audio selection from the menu and output jacks o...

Page 41: ... Toshiba Manuals Advancedplayback Customizing the performance of your DVD player Accessing a Specific Location Directly Playing Repeatedly Playing in a Favorite Order Playing in Random Order Zooming a Picture Selecting the Sound Enhancement E A M Selecting the Camera Angle Selecting Subtitles Selecting a Language Downloaded From DvDPlayer Manual com Toshiba Manuals Quick control Simple use of a si...

Page 42: ...details on the features V REMOTE 1 1 25 30 1 V REMOTE DVD V You can access a desired location After step 2 perform the steps below steps 3 to 5 on 31 steps 2 and 3 on 34 After step 2 a sub menu will appear Perform step 2 on the page in To locate succeeding chapters or tracks Audio setting Subtitle setting Angle setting Reverse slow motion playback Pause Frame by frame playback To begin slow motion...

Page 43: ...or the mode selections see page 37 Bit Rate To activate the bitrate display Bit rate data transfer rate Mbit s Amount of picture sound and subtitle data in the DVD video disc transferred per second The larger the value the more data processed but this does not necessarily insure better picture quality Text To activate the Text display Text display Displays DVD Text data or CD Text data if included...

Page 44: ...r to the list on the next page Press ENTER Selection details appears Refer to the list on the next page and follow the instructions detailed on subsequent pages 1 3 4 2 NAVI menu items NAVI ENTER ENTER DVD V 1 2 3 To exit the NAVI menu Press NAVI Alternatively press to remove the highlight from an icon to the center position and press ENTER Note Depending on the disc some features cannot be access...

Page 45: ...referred one from them You can fine adjust picture quality and store up to 3 custom picture settings in the memory of the DVD player You can easily switch a preferred audio enhancement You can control key playback functions using the graphics based on screen remote control You can view information about a disc and its operational status on the TV screen You can display closed caption included on a...

Page 46: ...es of titles or chapters and select a preferred one After selecting this icon and pressing ENTER the following on screen display appears e g 1 Press to select 1 6 To locate the scene Title To display the first scenes of titles 1 to 6 Chapter To display the first scenes of chapters 1 to 6 Interval To display scenes at intervals of about 10 minutes apart To go to the previous page To go to the next ...

Page 47: ... this icon and pressing ENTER the following on screen display appears e g 1 Pause playback at a scene you want to capture 2 Press to select Storing To sample and store the current picture in the player memory Exit To quit the on screen display 3 Press ENTER The stored picture will be displayed as a background picture when the player is in the stop mode It is necessary to confirm this process via t...

Page 48: ... Greener DNR 1 On Off Edge Enhance 2 On Off All Reset To restore all the elements to the normal setting A message will appear Follow the procedure displayed on screen 1 DNR Digital Noise Reduction To view a picture with less video noise Notes Actual picture enhancement may vary depending on the quality of the disc While the DNR feature can provide additional improvement in the reduction of noise i...

Page 49: ...losed caption decoder to your TV After selecting this icon and pressing ENTER the following on screen display appears e g 1 Press to select On To display closed caption Off To disable closed caption 2 Press ENTER Notes While you are using on screen displays including the above one you cannot view closed caption When On is selected some displays such as may be disabled On Off ENTER ENTER CC Title 1...

Page 50: ... Toshiba Manuals Advancedplayback Customizing the performance of your DVD player Accessing a Specific Location Directly Playing Repeatedly Playing in a Favorite Order Playing in Random Order Zooming a Picture Selecting the Sound Enhancement E A M Selecting the Camera Angle Selecting Subtitles Selecting a Language Downloaded From DvDPlayer Manual com Toshiba Manuals Quick control Simple use of a si...

Page 51: ...SETUP button can function even during normal playback however some operations may be inaccessible and a message will appear In this case try again after playback is stopped Press to select the setting you want to change then press ENTER Change the selection by or other buttons by referring to the corresponding pages 58 then press ENTER Repeat steps 3 and 4 to change other settings To select anothe...

Page 52: ...yback To turn on or off the vocal output during DVD KARAOKE disc playback To select a preferred language for on screen displays To select a preferred language for disc menus To select a preferred language for the sound track To select a preferred language for subtitles To turn on or de activate the operational status display on the TV screen To select the background color or background picture To ...

Page 53: ...when connected to a PROGRESSIVE TV Full Displays pictures expanded horizontally to fill the 16 9 screen 4 3 Displays images in 4 3 aspect ratio with masking bars to the left and right of the picture Progressive Conversion DVD V There are two types of source content in pictures recorded in DVD video discs film content pictures recorded from films at 24 frames per second and video content video sign...

Page 54: ... level of Dynamic Range Reduction may differ depending on the DVD disc PCM Down Sampling DVD V Make this selection only when you use your audio equipment e g receiver connecting to the DVD player via the BITSTREAM PCM DIGITAL AUDIO OUT jack According to performance of your connected receiver select a sound processing option for playback of a disc that contains high frequency signals sampling frequ...

Page 55: ... button Note Some DVD video discs may not include your pre selected language In this case the DVD player automatically displays disc menus consistent with the disc s initial language setting AB C Language Disc Menu Language Audio Language Subtitle Language On Screen Language ENG ENG ENG ABC Language Disc Menu Language Audio Language Subtitle Language On Screen Language ENG English French Spanish O...

Page 56: ...urther choice After pressing the ENTER button follow steps 1 4 below 1 Obtain the abbreviation of the preferred language from the list 65 2 Select the first character by pressing the buttons Language Disc Menu Language Audio Language Subtitle Language On Screen Language ENG English French Spanish Others Code E S ENG ENG ABC 3 Press the buttons to shift and select the second character by pressing t...

Page 57: ...tionless picture more clearer when you pause it Parental Lock DVD V DVD video discs equipped with the parental lock function are rated according to their content The contents allowed by a parental lock level and the way a DVD video disc can be controlled may vary from disc to disc For example if the disc allowed you could edit out violent scenes unsuitable for children and replace them with more s...

Page 58: ...evel 3 PG Level 1 G The parental lock levels for other countries areas than U S are included for future use Check the appropriate parental lock level when you buy a DVD video disc equipped with the parental lock feature in the future To change the parental lock level Follow steps 1 3 To change your 4 digit security code 1 After selecting On or Off press the STOP button four times then press the EN...

Page 59: ...CD without using the menu On To use the menu when playing a PBC featured VIDEO CD Initialize DVD V CD VCD To restore all settings to the factory set 1 Press the buttons to select Yes and press the ENTER button 2 Read the message and if you really want to restore all settings press the buttons to select Yes and press the ENTER button The message of completion appears Note The Parental Lock setting ...

Page 60: ...H SI SK SL SM SN SO SQ SR SS ST SU SV SW TA TE TG TH TI TK TL TN TO TR TS TT TW UK UR UZ VI VO WO XH YO ZU Guarani Gujarati Hausa Hindi Croatian Hungarian Armenian Interlingua Interlingue Inupiak Indonesian Icelandic Hebrew Yiddish Javanese Georgian Kazakh Greenlandic Cambodian Kannada Kashmiri Kurdish Kirghiz Latin Lingala Laotian Lithuanian Latvian Lettish Malagasy Maori Macedonian Malayalam Mon...

Page 61: ...Others Before Calling Service Personnel Specifications LIMITED WARRANTY DVD PLAYER Downloaded From DvDPlayer Manual com Toshiba Manuals ...

Page 62: ... If you display the top menu during playback and press the TOP MENU button again without selecting any title the DVD player may resume playback from the point where you first pressed the TOP MENU button depending on the actual DVD video disc This method of locating a title is available only on a disc that contains a top menu Instruction notes of discs may refer to the button that displays the top ...

Page 63: ...E STEP STOP OPEN CLOSE Downloaded From DvDPlayer Manual com Toshiba Manuals Basic playback DVD V CD VCD DVD V CD VCD Playing in Press SLOW d Each time you press the SLOW button the slow motion speed changes If you press the SLOW button during playback you can view the picture in reverse slow motion Only when using a DVD video disc Each time you press the SLOW button the slow motion speed changes T...

Page 64: ...layback and press the TOP MENU button again without selecting any title the DVD player may resume playback from the point where you first pressed the TOP MENU button depending on the actual DVD video disc This method of locating a title is available only on a disc that contains a top menu Instruction notes of discs may refer to the button that displays the top menu as TITLE button Normally DVD vid...

Page 65: ...TOP MENU PAUSE STEP STOP OPEN CLOSE Downloaded From DvDPlayer Manual com Toshiba Manuals Basic playback DVD V CD VCD DVD V CD VCD Playing in Press SLOW d Each time you press the SLOW button the slow motion speed changes If you press the SLOW button during playback you can view the picture in reverse slow motion Only when using a DVD video disc Each time you press the SLOW button the slow motion sp...

Page 66: ...Downloaded From DvDPlayer Manual com Toshiba Manuals ...

Reviews: