background image

E

ng

lis

h

E

ng

lis

h

Playback Feature(continued)

B

  Press 

 / 

 to select the folder and press OK to 

open the folder.


 Press PREV 

 / NEXT 

 to select the pre-    

vious or next track/file page in the current folder.

C

  Press 

 / 

 to select a track/file.

D

   Press 

OK

 to confirm.


Tips:


- If you highlight on a jpeg file, a preview will appear.


- During MP3 playback, the LED will display the time 

(M : S).


- During JPEG playback, the LED will display moving 

bars “-----”.


Playback Selection


During playback, you can;


 Press PLAY/PAUSE    repeatedly to pause/re

-

sume playback.


 Press PREV 

 / NEXT 

 to go to the 

previous or next chapter/track.


For MP3


 Within the first 5 seconds,  press PREV 

 to go 

back to the previous track.


After the first 5 seconds of playback, press PREV


to go back to the beginning of current track. 


 During playback, press F.R  

 / F.F 


to ac

-

cess fast forward or fast reverse with the required 

speed: 2X, 4X, 8X, 16X.


Zoom picture (JPEG)


 During playback, press ZOOM repeatedly to dis

-

play the picture with different scales.


 Use 

 / 

 / 

 / 

 to view the zoomed picture. 


Play modes for MP3/Audio CD/JPEG/

DivX® 


Users are able to modify the play modes through the 

Toolkit which appears on the right of the file menu.

Press 

  /  

 to navigate between the windows and 

 / 

 buttons to select files/ tracks or play mode 

items. Then press OK . Please refer to below steps 

to playback files /tracks in the

 Program View

 list:  

A

  Select 

Edit Mode

 in the Toolkit then press OK to  

start 

EDIT Mode

.  

B

  Select a file/track or more files/tracks you want in the 

original view list.    

C

  Select 

 Add To Program 

in the toolkit then press  

OK. 

√ 

'

  will disappear from screen. It means that 

the files/tracks you selected have already  added into 

the 

Program View

 list.

D

  Select 

Program View

 in the Toolkit then press OK 

to open the files/tracks in the Program View list  that 

you already selected in step 

B

.

E

  Press PLAY


to playback all files/tracks in the Pro

-

gram list.


The toolkit has the following play mode items:


Filter 

Audio/Photo/Video 

): Sets file filters

  


Repeat

 (

Off/Single/ All

): 


Off

Resumes normal playback


Single

: Repeat the current tracks/files.


All

: Repeats  files on the current folder or all tracks 

on the disc.


Helpful hint


The operating features described here might not be possible for certain discs.

                                    Always refer to the instructions  supplied with the discs. 

seconds of playback, playback will start from the 

beginning of the current chapter/track. If you press 

the button within the first 5 seconds, playback will 

start from the beginning of the preceding chapter/
track.


  

During playback, pressing RETURN will return to 

the menu screen (if PBC is on).


If you want to skip the index menu and playback 

directly from the beginning.

  

Press MENU on the remote control to turn the PBC 


off.

Playing a DivX® Disc


This DVD player supports the DivX

®

 movie playback 

that you download from your computer onto a CD-

R/RW or DVD

+

R/RW (see page 13 for more 


information).

A

  Load a DivX

®

 disc.


The data disc menu appears on the TV screen.

B

  Press 

/

 to select the folder and press OK to 

open the folder.

C

  Press 

/

 to select a track/file.

D

  Press OK to confirm.

  

 Press SUBTITLE on the remote control will turn 

on or off the subtitle.

  

 If multilingual subtitles are embedded on the DivX

®


disc, pressing SUBTITLE will change the subtitle 

language during playback.


Tips:


–Subtitle files with the following filename extensions 

(.srt, .smi, .sub, .ssa, .txt) are supported but do not 

appear on the file navigation menu.


–The subtitle filename(.sub) has to be  saved under 

the same filename as the movie(.avi) in the same 

folder.


[For example, Folder A: abc.avi and abc.sub]

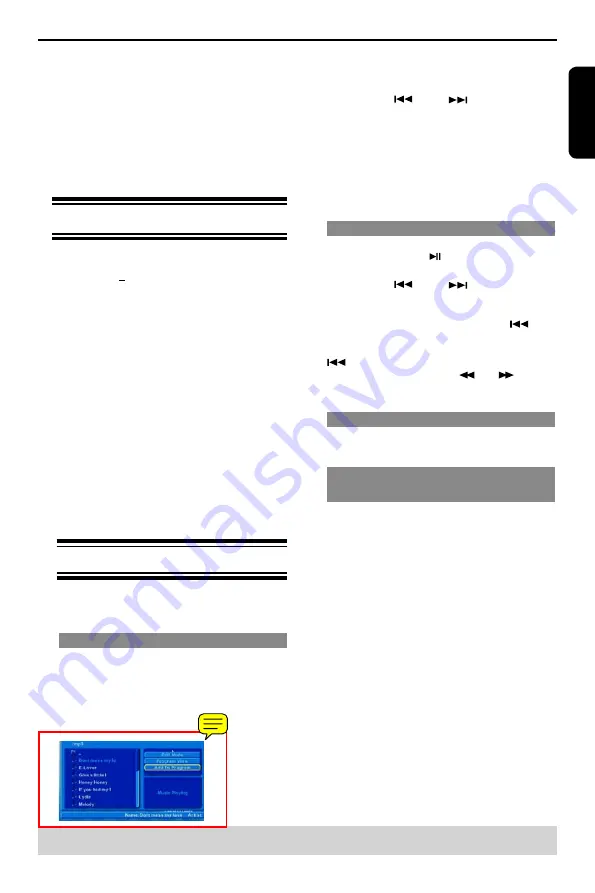
  Playing MP3/JPEG/ Kodak Picture CD

  IMPORTANT!

  You have to turn on your TV and set to 

the correct Video In channel. (See page 

11, "Finding your viewing channel.")


General Operation

A

  Load a disc.

  

The disc reading time may exceed 30 seconds 

due to the complexity of the directory/file configura

-

tion.

  

The data disc menu and ID3 (MP3) information 

(includbing at least title, singer and album) appears 

on the TV screen.


Summary of Contents for SD-270EKB

Page 1: ...SD 270EKB SD 270EKE ...

Page 2: ...atus When a cart is used use caution when moving the cart apparatus combination to avoid injury from tip over 12 Unplug this apparatus during lightning storms or when unused for long periods of time 13 Refer all servicing to qualified service personnel Servicing is required when the apparatus has been damaged in any way such as power supply cord or plug is damaged liquid has been spilled or object...

Page 3: ...our hearing DON T leave equipment switched on when it is unattended unless it is specifically stated that it is designed for unat tended operation or has a stand by mode Switch off using the switch on the equipment and make sure that your family know how to do this Special arrangements may need to be made for infirm or handicapped people DON T continue to operate the equipment if you are in any do...

Page 4: ...tion for future reference Be aware that this equipment is still powered when in standby mode To disconnect this equipment completely from the mains power pull out the power plug from the wall outlet The use of the symbol indicates that this product may not be treated as household waste By ensuring this product is disposed of correctly you will help prevent potential negative consequences for the e...

Page 5: ...ting disc playback 13 Basic playback control 13 Operations for video playback DVD VCD SVCD 14 Selecting various repeat functions 14 Viewing the disc playback information 15 Special DVD Features 15 Special VCD and SVCD Feature 15 Playing a DivX Disc 16 Playing MP3 JPEG Kodak Picture CD 16 Using the Language setup menu 17 Using the Video setup menu 18 19 Using the Audio setup menu 19 Using the Ratin...

Page 6: ...ps It may not be possible to play CD R RW DVD R RW or DVD R DL in all cases due to the type of disc or condition of the recording If you are having trouble playing a certain disc remove the disc and try a different one Improperly formatted disc will not play on this DVD Player DANGER High voltage Do not open the device You run the risk of getting an electric shock The machine does not contain any ...

Page 7: ...DIO OUT L R jacks of the DVD player to the correspond ing AUDIO IN jacks on the TV cable supplied Using SCART socket A Use the scart cable to connect the DVD SCART OUT to the corresponding scart input socket on the TV cable not supplied If your DVD player will not be connected to a Stereo Introduction Connections ALL 4 Region U S A and Canada regions U K and Europe regions Asia Pacific Taiwan Kore...

Page 8: ...e Antenna In jack or labelled as 75 ohm or RF In you will need a RF modulator in order to view the DVD playback on the TV System or AV Receiver to hear better sound scart is enough for both audio and video connections Using Component Video Jacks Y PB PR IMPORTANT The progressive scan video quality is only pos sible when using Y PB PR and a progressive scan TV is required A Use the component video ...

Page 9: ...lect one of the video connections SCART IN CVBS VIDEO IN or COMPONENT VIDEO IN depending on the options available on your TV B Use the audio cables white red to connect AUDIO OUT L R jacks of the DVD Player to the corresponding AUDIO IN jacks on the stereo system cable not supplied Tip Analogue audio out will not have sound if DTS playback is selected Connecting to a Stereo System MAINS Connecting...

Page 10: ... to YPBPR input of a TV Video Out CVBS Connects to CVBS Video input of a TV Disc tray Place a disc here Display Shows information about the current status of the DVD Player IR Sensor Points the remote control towards this sensor MAINS Connects to a standard AC outlet Audio Out Left Right Connects to Audio input of a TV an amplifier re ceiver or stereo system COAXIAL Digital audio out Connects to c...

Page 11: ...se search 13 15 16 PREV NEXT Skip to previous or next chapter track 14 REPEAT Selects various repeat mode 15 A B Repeats playback from point A to B on a disc 14 SLOW Do a slow forward 14 CLEAR Delete the mistyped entries or cancel some functions REMOTE SIGNAL EMITTER 11 Point remote control to the sensor on the front panel 2ON STANDBY 8 13 To switch the DVD player to ON or standby mode T Search 15...

Page 12: ...at chooses different video modes Or tune the TV until you can see the signal from the RF modulator refer to your TV user manual C If you are using external equipment such as audio system or receiver turn it on and select the appropriate input source for the DVD player output Refer to the equipment user s manual for detail Setting up Progressive Scan feature for Progressive Scan TV only The progres...

Page 13: ...s OK Audio Subtitle and DVD menu language You can choose your own preferred language or soundtrack from audio subtitles and DVD menu languages If the language selected is not available on the disc the disc s default language will be used instead A Press SETUP B Press to select Language then press C Press to highlight one of the options below then press Audio Select this to change the disc soundtra...

Page 14: ... I 2ON STANDBY to turn on the DVD player C Press OPEN CLOSE ç to open the disc tray D Place a disc onto the disc tray with the label facing up then press OPEN CLOSE ç For double sided discs load the side which you want to play facing up E Playback may start automatically If not press PLAY PAUSE If a disc menu appears on the TV see Using the disc menu on page 14 If the parental control was activate...

Page 15: ...r video playback DVD VCD SVCD Using the disc menu Depending on the disc a menu may appear on the TV screen once you load in the disc To select a playback feature or item Use keys or number buttons 0 9 on the remote then press OK to start playback To access or remove the menu Press MENU on the remote Zooming In This function allows you to enlarge the picture on the TV screen and to pan through the ...

Page 16: ... OFF Track Playback Feature continued Time desired time of the current track Disc Time desired time of the disc PBC ON Time desired time of the current track For DVD Title Chapter Time desired time of the disc B Use the number buttons 0 9 to input a desired number or time This function only apply to DVD VCD CD SVCD C Press OK to confirm The playback skips to the chosen title chapter track time Ang...

Page 17: ... The toolkit has the following play mode items Filter Audio Photo Video Sets file filters Repeat Off Single All Off Resumes normal playback Single Repeat the current tracks files All Repeats files on the current folder or all tracks on the disc Helpful hint The operating features described here might not be possible for certain discs Always refer to the instructions supplied with the discs seconds...

Page 18: ...krainian Greek English and Modern Greek only Hebrew English and Modern Hebrew only B Use to select a setting and press OK to confirm Mode Normal Random This mode can also be toggled by using RANDOM button Normal Resumes Normal playback Random Playbacks track file in random order Edit Mode Program operation works only when Edit Mode is selected Program View To view tracks files in the Pro gram View...

Page 19: ... select a setting and press OK to con firm C If you select Personal then proceed to steps D G The setup menu appears Brightness 0 Contrast 0 Tint 0 Color 0 DVD Menu Options continued Using the Video setup menu A Press SETUP on the remote control The system setup menu appears B Press to select Video then press C Press to select an item then press to access Example Video Out The options for the sele...

Page 20: ...r example if you use the AUDIO OUT jacks to connect to a TV or stereo system B Use to select a setting and press OK to con firm Tip If Digital Output is set to All all audio settings except MUTE are invalid When playing MPEG MP3 and set Digital Output to ALL the player will output PCM signals Night Mode This mode optimises playback of sound at low volume High volume outputs will be softened and lo...

Page 21: ...ot recommended viewing for children under age 17 8 Adult Mature Material should be viewed only by adults due to graphic sexual material violence or language DVD Menu Options continued Helpful hint Press to go back to previous menu item Press SETUP to exit the menu item D Use to select a rating level and press OK to confirm Select 8 Adult to disable parental level and allow virtually all discs to p...

Page 22: ... registration code allows you to rent and pur chase movies using the DivX VOD service from the internet For more information visit website www divx com vod A In Misc press to select DivX Registration then press OK The registration code will appear B Use the registration code to rent or purchase the movies from DivX VOD Registration service at www divx com vod Follow the instructions and download t...

Page 23: ... Ω pin jack x 2 Audio output SCART 2 0 rms 680 Ω SCART socket x 1 Audio output COAXIAL DIGITAL 0 5 V p p 75 Ω pin jack x 1 Audio output ANALOG 2 0 V rms 680 Ω pin jacks L R x 1 Supplied Accessories Audio Video cable OPEN CLOSE DISPLAY 1 2 3 6 5 4 7 8 9 10 0 T SEARCH SETUP MENU RETURN TITLE OK F R F F PREV NEXT STEP STOP PLAY PAUSE REPEAT A B SUBTITLE ANGLE AUDIO ZOOM SLOW PROG RANDOM S E R 0268 ON...

Page 24: ...t to original for normal viewing Connect DVD Player directly to the TV Make sure the disc is compatible with the DVD player Ensure that the DVD Player s setting is set to match that of the disc and your TV Ajust the volume Check that the speakers are connected correctly Check the digital connections Check if your reciever can decode MPEG 2 or DTS and if not please make sure the digital output is s...

Reviews: