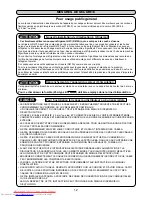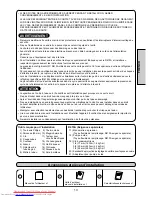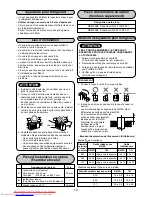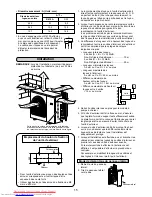
10
Red
Yellow
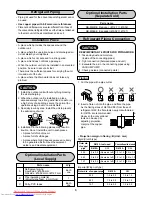
Check mode
Normal operation
Short
→
Open
Short
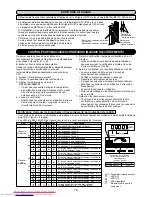
Miswiring (mispiping)
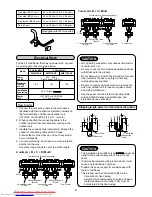
check connector
(Color:Red)
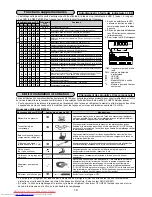
D800 D801 D802 D803 D804
LED
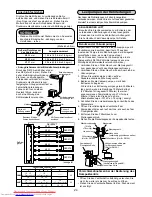
Miswiring (mispiping) check by LED Indication
• For this outdoor unit, the self-miswiring (mispiping) check is possible by using five LEDs (1 4 Red).
*
LEDs (D800 to D804) are provided on P.C. board of the inverter.
LED
During
check
D800 D801 D802 D803 D804
l
l
l
l
l
l
l
l
l
l
l
l
l
l
*
1
l
l
l
¤
l
l
l
l
¤
l
l
l
l
¤
l
*
1
l
l
l
¤
¤
¤
l
l
¤
l
¤
l
*
1
¤
l
l
¤
l
¤
¤
l
*
1
l
¤
l
¤
*
1
l
l
¤
¤
¤
¤
¤
l
¤
¤
l
¤
¤
l
¤
¤
l
¤
¤
¤
¤
¤
¤
¤
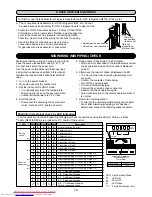
Description
Normal operation (no error)
Checking A unit
Checking B unit
Checking C unit
Checking D unit
Crush/Clog of Pipe A
Crush/Clog of Pipe B
Crush/Clog of Pipe C
Crush/Clog of Pipe D
Miswiring/Mispiping or Crush/Clog of Pipe A, B
Miswiring/Mispiping or Crush/Clog of Pipe A, C
Miswiring/Mispiping or Crush/Clog of Pipe A, D
Miswiring/Mispiping or Crush/Clog of Pipe B, C
Miswiring/Mispiping or Crush/Clog of Pipe B, D
Miswiring/Mispiping or Crush/Clog of Pipe C, D
A, B, C Miswiring/Mispiping
A, B, D Miswiring/Mispiping
A, C, D Miswiring/Mispiping
B, C, D Miswiring/Mispiping
A, B, C, D Miswiring/Mispiping
Packed valve keeps closed
LED : Light Emitting Diode
¤
: LED ON
l
: LED OFF
: LED Flash
*
1 : 4 units Multi model only
Result of
judgement
Check and Test Operation
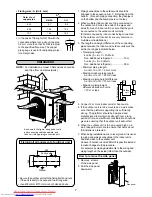
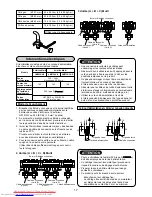
For R410A, use the leak detector exclusively manufactured for HFC refrigerant (R410A, R134a, etc.).
*
The conventional leak detector for HCFC refrigerant (R22, etc.) cannot
be used because its sensitivity for HFC refrigerant lowers to approx. 1/40.
• Pressure of R410A becomes approx. 1.6 times of that of R22.
If installation work is incompletely finished, a gas leakage may
occur in the cases such as pressure rise during operation.
Therefore, be sure to test the piping connections for leaking.
• Check the flare nut connections, valve stem cap
connections and service port cap connections
for gas leak with a leak detector or soap water.
• Service port cap connection
• Valve stem cap connection
Flare nut
connections
(Outdoor unit)
Flare nut
connections
(Indoor unit)
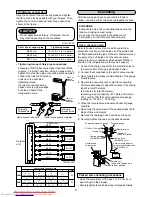
MISWIRING (MISPIPING) CHECK
5. During check (Check time 3 to 20 minutes).
• When an error described in the table below occurred
check operation stops and error code is displayed
on LED.
6. After check, the result of check is displayed on LED.
• The Comp. stop when miswiring (mispiping) error
occurred.
• Confirm the contents of table below.
• Turn off the power breaker.
• Correct miswiring/mispiping.
• Connect the miswiring check connector.
• Execute the check operation again.
• Automatically return to the normal operation when it
is normal.
7. Return to normal operation.
• To return to the normal operation during check opera-
tion or after miswiring (mispiping) error has been
determined, connect the miswiring check connector.
Make sure that the wiring and piping for each room
have the same alphabetical codes (A, B, C, D).
Connect and secure the power cord.
Use the power cord/cables with thickness, type
and protective devices specified in this manual.
Insulate the unused cords (conductors) with PVC
tape.
1. Turn on the power breaker.
2. Open side panel of the outdoor unit.
3. Set the indoor unit to COOL mode.
• It is unnecessary to set the temperature.
• Miswiring check can not be executed when
outdoor air temperature is 5°C or less.
4. Start the check
• Disconnect the miswiring check connector
(color : Red) from P.C. board of inverter.
Downloaded from AC-Manual.com Manuals

