background image

- 53 -

Getting

 Read

y

T

aking

Photographs

Pla
ying

Bac

k Ima

g

e

s

Other

Applications

Ad
ditional

Inf
ormation

Erasing

Ima

g

e

s

Hand

y

Functions

Zoom Photography (continued)

Digital Zoom Photography

To set the digital zoom:

1

Press the MENU button.

2

Use 

 or 

 to select [DIGITAL ZOOM] and press 

.

3

Use 

 or 

 to select [APPROVED] and press ENTER.

4

Press the MENU button.

5

To activate digital zoom, press the Zoom switch completely towards the "T" and hold it until the
image on the LCD expands.

Press the shutter button down halfway, and press it down fully. 

 Page 40

Memo

• The digital zoom photography is canceled by pressing the 

 button to turn the LCD monitor off. On

the LCD monitor display off status, the digital zoom photography is not possible as well.

• The digital zoom photography is not possible in the 16-frame multi mode.
• The Zoom switch setting is automatically canceled by either turning the camera OFF or by activation

of the Auto Power OFF function.

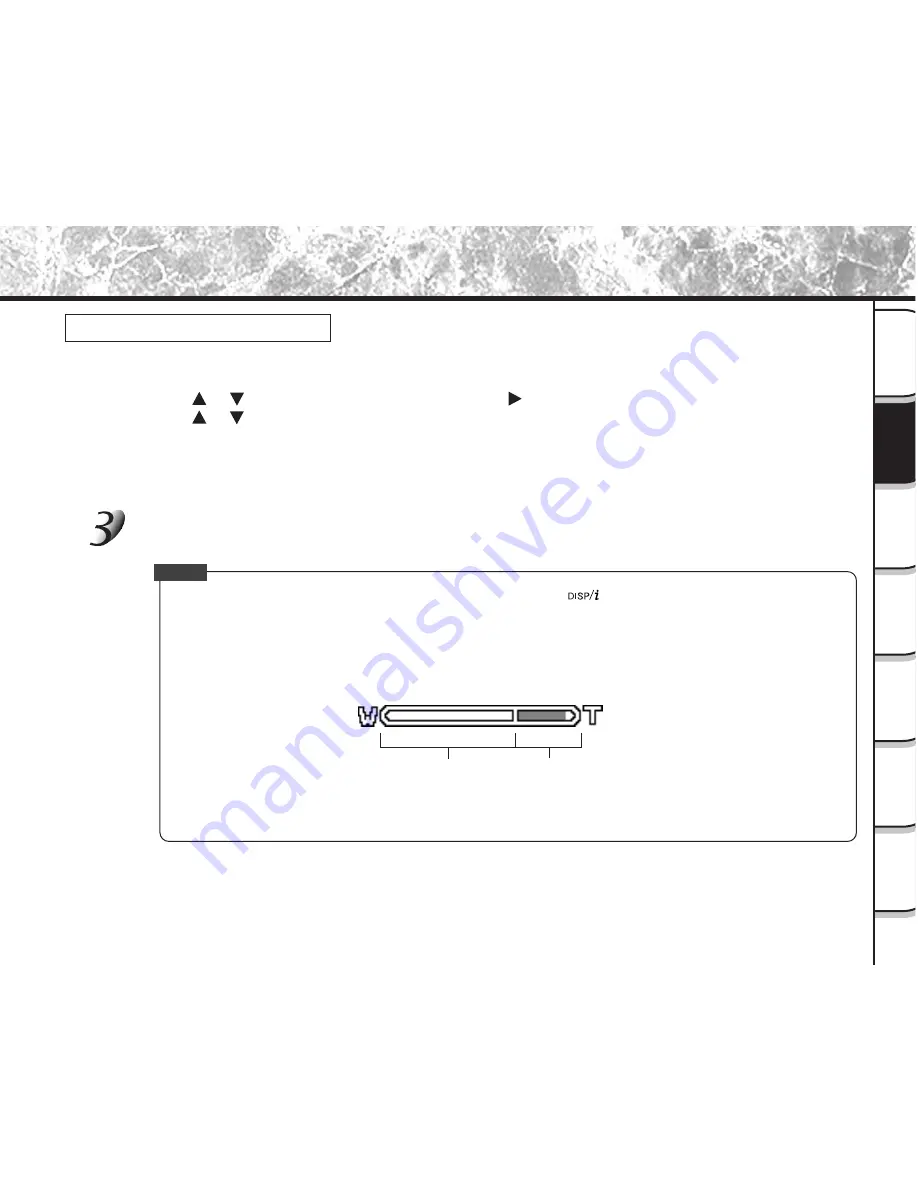
• You can check the zoom status in the LCD monitor.

• In movie mode, only the 2.2X digital zoom photography is possible.

Digital zoom

Optical zoom

1X to 2.8X

Summary of Contents for PDR-M81

Page 1: ...MODE D EMPLOI INSTRUCTION MANUAL DIGITAL STILL CAMERAPDR M81 ...

Page 2: ......

Page 3: ...this Instruction Manual carefully before you start using the camera Once you have finished reading this Instruction Manual keep it handy at all times PDR M81 E N G L I S H In the space provided below please record the model and Serial No of your camera Model No PDR M81 Serial No Please retain this information for future reference ...

Page 4: ......

Page 5: ... radio communications However there is no guarantee that interference will not occur in a particular installation If this equipment does cause harmful interference to radio or television reception which can be determined by turning the equipment off and on the user is encouraged to try to correct the interference by one or more of the following measures Change the direction of the radio or TV ante...

Page 6: ...e FCC regulations Violation of FCC regulations may cause the FCC to void your right to use the modified camera TOSHIBA AMERICA INFORMATION SYSTEMS INC Imaging Systems Division 9740 Irvine Boulevard Irvine California 92618 1697 Phone Number 800 288 1354 For customers in Canada CAUTION This Class B digital apparatus complies with Canadian ICES 003 Cet appareil numérique de la classe B est conforme à...

Page 7: ...nd Windows are registered trademarks of the Microsoft Corporation of the U S registered in the USA and other countries Windows is an abbreviated term referring to the Microsoft Windows Operating System SmartMediaTM is a trademark of Toshiba Corporation Other companies or product names are trademarks or registered trademarks of the respective companies Before Reading This Manual IMPORTANT Indicates...

Page 8: ...s learn about basic operation Taking photographs Let s get ready to use the PDR M81 P 19 to P 38 Turning the Power ON P 38 Photography P 41 Playing Back Photographed Images P 80 Erasing Images P 87 The camera automatically adjusts the focus and exposure settings P 47 P 49 Taking Portrait Shots P 47 P 49 Taking Landscape Shots P 47 P 49 Taking Shots of Moving Objects P 47 P 50 Taking Shots of Portr...

Page 9: ...ay P 117 Turning the LCD Monitor Display OFF P 117 Turning the Beep OFF P 111 Switching the Folder P 92 Setting the Color of Images Color Black and White Sepia P 77 Changing the Power OFF Time P 110 Changing the LCD Monitor Display Language P 112 Protecting Images P 106 Changing the size of Images P 94 Compressing Images P 96 Copying Images to another SmartMedia P 98 Print Information P 102 Displa...

Page 10: ... Turning the Power On Off 38 Turning the Power On 38 Turning the Power Off 38 Taking Photographs How to Hold Your Camera 39 How to Press the Shutter Button 40 Photography Auto Photography 41 Using the Viewfinder 41 Using the LCD Monitor 42 Setting the Image Size and Quality 44 Taking Photographs in Mode Auto Select mode 46 Taking Photographs in a Variety of Modes Mode 47 Automatically adjusts the ...

Page 11: ...matting the SmartMedia 91 Handy Functions About Folders 92 How to select the folder 92 Reducing the Image Size Resize 94 Compressing Images Quality 96 Copying Images 98 Print Information 102 Protecting Images 106 Protecting an Image 106 Removing the Protection 108 Other Applications Basic Settings mode 109 AUTO POWER OFF 110 SOUND 111 TIME DATE 111 OSD LANGUAGE 112 VIDEO OUT 112 QUALITY 112 SYSTEM...

Page 12: ...hazard that could result in bodily injury 1 or property damage 2 Exemption Clauses Toshiba Corporation bears no responsibility in the case of damages arising from earthquakes fire not liable to Toshiba Corporation operating by third parties other accidents or use under abnormal conditions including erroneous or improper operation and other problems Toshiba Corporation bears no responsibility for i...

Page 13: ... them to rupture ignite or heat up resulting in fire or major injury Do not strike the batteries with a hammer or step on drop or subject the batteries to strong impact Doing so might cause them to rupture ignite or heat up resulting in fire or major injury Use the batteries only for its originally intended purpose Using the batteries for any other purpose might cause it to rupture ignite or heat ...

Page 14: ...store of purchase or please contact the technical support number If the camera has fallen or its case is damaged immediately turn the power OFF and remove the batteries and AC adapter Continued use in this state might cause fire or electric shock For details on repair consult the store of purchase or please contact the technical support number Do not place the camera on inclined or unstable surfac...

Page 15: ...se you to fall over or result in a traffic accident Use only the specified batteries or the specified AC adapter Use of a battery or AC adapter other than specified might cause fire defects or malfunctions Keep the batteries out of the reach of children If a child swallows a battery this might result in poisoning If a child swallows a battery immediately consult a physician If battery fluid enters...

Page 16: ...ce it in cloth or blankets This might cause heat to build up and deform the case resulting in fire Use the camera in a well ventilated place Before you move the camera disconnect cords and cables Failure to do this might damage cords and cables resulting in fire or electric shock Do not drop or subject the camera to strong impact This might cause fire electric shock or malfunctions Before you carr...

Page 17: ...m your hand through the shoulder strap the camera might come into contact to other people and cause injury or damage to the camera or other objects Do not look at the sun through the camera viewfinder This may cause injury of the eyes Do not use the flash close to anyone s eyes This might cause damage to the person s eyesight Do not subject the LCD monitor to impact If the LCD monitor is impacted ...

Page 18: ...ric motors transformers or magnets Places contacting chemicals such as pesticides or next to rubber or vinyl products for long periods Do not expose the camera to sand or dust The PDR M81 is particularly sensitive to sand and dust If the camera comes into contact with sand or dust not only will the camera become damaged it will also no longer be repairable Pay special attention when using the came...

Page 19: ...loth Clean the body of the camera with a soft dry cloth Do not use volatile liquids such as paint thinner benzene or insecticide as these may react with the camera body and cause deformation or remove the coating Cautions on Magnetism Please note that credit cards cash cards magnetic commutation tickets floppy disks and the like are susceptible to magnetism Do not bring them close to the speaker o...

Page 20: ...s 50 degrees Fahrenheit 10 degrees Celsius or below can also affect the performance of the battery and decrease the number of pictures taken when compared to picture taking in warmer conditions The supplied Alkaline batteries are only for operation check when you buy your camera so the battery life may be short The use of manganese type batteries is not suitable for this product due to the low num...

Page 21: ...at specified Do not insert batteries in the wrong direction Do not charge heat open or short circuit the batteries Do not throw batteries into fire Do not charge the supplied batteries When using rechargeable batteries follow the instructions for the batteries and the charger for safe handling This camera can not charge the rechargeable batteries Do not leave dead or exhausted batteries in the cam...

Page 22: ...g into other terminals This might cause the camera to malfunction Before you disconnect the connector cable turn the camera OFF and then disconnect the cable holding it by its plug Do not disconnect the connector cable by pulling the actual cable Do not drop the AC adapter or subject it to strong impacts Do not use the AC adapter in very hot and humid locations Do not plug in the AC adapter while ...

Page 23: ...Handy Functions Accessories Make sure that you have all of the items below before you start using your camera Alkaline batteries 4 size AA SmartMedia 8MB 1 SmartMedia case 1 Shoulder strap 1 Software application 1 CD ROM Instruction Manual this manual Software Manual Camera case 1 Lens cap 1 AV cable 1 USB cable 1 ...

Page 24: ...Information Erasing Images Handy Functions Names of Parts Shutter button Lens Flash POWER button Viewfinder Built in microphone Speaker Self timer button Self timer lamp Flash button Image Quality button Status display P 23 Mode dial For enlarged view P 22 PC AV terminal DC IN 5V terminal ...

Page 25: ...LCD monitor MENU button Folder button Tripod mount Shoulder strap Lens cover attachment SmartMedia cover button Erase button FOCUS button Battery cover Tele Wide key Adjusts the zoom ENTER button Press the center of the button Use this button to fix a selection Press the side of the ENTER button with the proper to select options or change directions Use these buttons to select an item or an image ...

Page 26: ...ers images to a PC For details refer to the Software Manual Playback mode P 80 In this mode you can select image playback copy size change compression protect mode and writing of development printing information Auto Photography mode P 41 46 This mode enables automatic photography in accordance with the photographic conditions In this mode the exposure combination of shutter speed and aperture is ...

Page 27: ... setting Remaining battery power Image quality P 44 FINE NORMAL BASIC SmartMedia loaded symbol Flash photography P 56 Self timer photography P 55 Example of counter display The display varies according to the mode dial setting Time display In or mode Possible number of shots In or mode Possible photographic time In mode PC indication In mode No display Auto Red eye forced flash Forced flash Suppre...

Page 28: ...ulder strap around your neck Pass the end of the shoulder strap through the strap attachment on the camera Pass the shoulder strap through the loop and pull IMPORTANT When the camera is not in use be sure to attach the lens cap provided with your camera The lens cap can also be attached to the strap attachment following the above steps to prevent it s being lost Turn off the power to retract the l...

Page 29: ...ou load or remove the batteries be sure to turn the camera off If the battery is loaded or removed with the power on the date setting may return to its default or the camera settings may be reset SET UP Page 109 Manual Photography Page 58 Unlock the battery cover 1 slide it and open 2 Load the batteries in the battery compartment making sure that it is loaded in the correct direction as shown in t...

Page 30: ...formation Erasing Images Handy Functions Installing the batteries continued Close the battery cover slide it 1 and lock 2 Make sure that the battery cover is firmly closed Removing the Batteries Reverse the procedure for Loading the Batteries and remove the batteries Battery cover lock 1 2 ...

Page 31: ... in the batteries About the battery duration time The following shows the number of frames time capable of continuous photographing and playback on condition of using new alkaline batteries The battery duration time may vary depending on environmental temperature image size image quality or using frequency of zoom In photography mode using strobe every time in a normal temperature When LCD monitor...

Page 32: ...ansfer of data to a PC For details on handling the AC adapter be sure to read page 18 IMPORTANT Before you connect or disconnect the AC adapter be sure to turn the camera OFF If the AC adapter is connected or disconnected with the power ON camera settings may be reset SET UP Page 109 Manual Settings Page 58 or the camera may malfunction Insert the AC adapter connector plug into the DC IN 5V termin...

Page 33: ...s have been installed the camera lens unit automatically retracts and the power turns off Please turn on the power again to resume operation Batteries can be installed while the AC adapter is connected However if the AC adapter is disconnected after the batteries have been loaded the camera power is automatically turned off but the lens will remain extended If this happens please turn on the power...

Page 34: ...sed incorrectly by the user or a third party When the SmartMedia is exposed to static electricity or electrical noise When the SmartMedia is removed or the camera is turned off while recording data erasing data frame advance when images are being played back or during formatting of the SmartMedia We recommend copying and saving important data onto another storage medium floppy disk hard disk MO di...

Page 35: ...n a safe place Inserting a SmartMedia that is charged with static electricity into your camera may cause it to malfunction If this occurs switch the camera OFF and then ON again The SmartMedia may feel warm when it is removed from the camera after the camera is used for a long time This is normal and not a malfunction The SmartMedia has a limited service life If images can no longer be written or ...

Page 36: ...lease knob in the direction of the arrow 1 to open the cover 2 The cover opens 2 Gently insert the SmartMedia as far as it can go with the SmartMedia electrodes metal contacts facing the rear of the camera Firmly insert the SmartMediaTM as far as it can go Close the SmartMedia cover Before you use a new SmartMedia for the first time be sure to format the SmartMedia Page 91 1 2 Electrodes ...

Page 37: ...artMedia viewfinder LED is lit red This might damage the SmartMedia or corrupt the data on the SmartMedia Press the POWER button to turn the power off Turning the Power Off Page 38 Slide the SmartMediaTM cover release knob in the direction of the arrow 1 to open the cover 2 The cover opens 2 Push the SmartMediaTM in as far as it can go and pull it out with your fingers If you push SmartMediaTM onc...

Page 38: ...rite Protection To prevent valuable data from being erased attach the write protect sticker at the write protect area Data can no longer be recorded or erased from SmartMedia To write or erase data from SmartMedia peel off the sticker IMPORTANT The write protection may not function if the write protect sticker becomes dirty Use a soft dry cloth to wipe away any dirt Once a sticker is peeled off do...

Page 39: ... if it is set to OFF For details on the playback mode see page 116 In mode LCD Monitor Display during photography Possible number of shots at currently preset size and quality Mode dial setting Focus area when shutter button is pressed down halfway Macro photography Remaining battery power Slow shutter speed warning AE automatic exposure setting When AE is set green When AE is not set red Photogra...

Page 40: ...brightness from left to right and the vertical axis shows the number of pixels at each brightness level LCD Monitor Display during photography continued Manual photograpy Shutter speed Aperture Histogram Possible number of shots at currently preset size and quality Focus area when shutter button is pressed down halfway Macro photography Remaining battery power Slow shutter speed warning Exposure c...

Page 41: ... of detail in the subject image So the number of images that can be photographed after an image is recorded sometimes doesn t decrease The display is momentarily interrupted after recording an image or the mode is switched This does not affect photography Possible photographic time seconds at currently preset size and quality Mode dial setting Macro photography Remaining battery power Zoom state S...

Page 42: ...ography modes or the lens extends from the camera body When the camera is turned on the Auto Power OFF function becomes operational IMPORTANT If no operation is carried out for a fixed amount of time default about 1 minute the power is turned off to preserve battery life This is called Auto Power OFF To return to the normal state press the POWER button again About the Auto Power OFF Function Addit...

Page 43: ... Images Handy Functions How to Hold Your Camera When taking a photograph hold the camera firmly and prevent your finger or shoulder strap from covering the lens flash or flash sensor Right Camera held with both hands with your arms firmly held against the sides of your chest Wrong Fingers held over the lens ...

Page 44: ...ed exposure lighting press and hold the shutter button halfway Now with the shutter button still held halfway down you can turn the direction of the camera and frame your image with the focus and exposure locked Press the shutter button down fully to complete capturing of the image Moving the camera as you press the shutter button will result in a blurred image The PDR M81 uses an accurate auto fo...

Page 45: ... of taking photographs in this mode using the viewfinder and using the LCD monitor Using the Viewfinder Get ready to take the photograph Loading the batteries Page 25 and the SmartMedia Page 31 into the camera Press the POWER button to turn the power on Turning the Power On Page 38 Set the mode dial to Remove the lens cap beforehand If not an error message will be displayed 129 Turn the LCD monito...

Page 46: ...y 1 and press it down fully 2 Pressing the shutter button down halfway adjusts the exposure and pressing the shutter button down fully takes the shot If you shoot a still picture when preview is set to ON Page 77 the recorded image is displayed on screen for about two seconds The viewfinder LED turns red while image data is being recorded onto the SmartMedia Using the LCD Monitor Get ready to take...

Page 47: ...y adjusts the exposure and pressing the shutter button down fully takes the shot When the focus and exposure are correctly adjusted the viewfinder lamp lights green and the AF icon turns green If you shoot a still picture when preview is set to ON Page 77 the recorded image is displayed on screen for about two seconds The viewfinder LED turns red while image data is being recorded onto the SmartMe...

Page 48: ... to be used and the remaining amount of space in the SmartMedia Set the mode dial to or Press the image quality button to select the preset quality and size while viewing the indication on the status display To set the quality and size Page 112 Pressing the image quality button switches the quality and size settings in the following order Default setting Setting 1 FULL Setting 2 HALF Setting 3 SMA...

Page 49: ... image 160 x 120 pixel movie SMALL 720 x 480 pixel still image The larger size improves the quality of the image Higher quality images however take up more space reducing the number of images that can be taken or the possible photographic time Take the photograph For details on how to take photographs Photograph Memo To make the image smaller it is more effective to reduce the size first and then ...

Page 50: ...lect mode there are some settings that cannot be changed as the camera makes the settings automatically These settings vary according to the mode Focus photography Can be set Exposure compensation Cannot be specified set automatically About flash photography Flash can be set as required in this mode Automatically fixed to red eye auto Automatically fixed to slow synchro Flash photography is not po...

Page 51: ...on Erasing Images Handy Functions Taking Photographs in a Variety of Modes Mode Set the appropriate scene mode from automatically adjusts the focus and exposure settings portrait landscape sports night multi photography mode options Set the mode dial to Press ENTER is displayed on the LCD monitor ...

Page 52: ...rtrait Page 49 Landscape Page 49 Sports Page 50 Night Page 50 16 frame multi Page 51 Press ENTER The icon of the selected mode is displayed on the upper left side of the LCD monitor The camera is ready to take photographs Compose the picture press the shutter button down halfway and press it down fully Page 41 The camera takes the picture Memo Optimum print effect for a selected scene is available...

Page 53: ...phs in a Variety of Modes Mode continued Automatically adjusts the focus and exposure settings The camera automatically adjusts the focus and exposure settings to take photographs Portrait Select this option to make people stand out with the background out of focus Landscape Select this option to take photographs of distant scenery or landscapes ...

Page 54: ...st a dusk or night time background Memo When the Night mode is selected the flash mode is fixed to Slow Synchro the flash is fired at a slower shutter speed If you take a photograph with a dark background or at a dark place the shutter speed slows down and the slow shutter speed warning is displayed When the shutter is pressed halfway down the viewfinder LED blinks green and the slow shutter speed...

Page 55: ... saved as one image FULL size 2400 x 1600 pixels This mode is effective for continuously photographing moving subjects Memo Though zoom playback is not possible playback of multi image pictures Page 86 is possible Digital zoom photography is not possible Photographs cannot be taken at HALF size or SMALL size When HALF size or SMALL size is set before you select multi photography the setting is aut...

Page 56: ...the center of the screen and take photographs in the digital zoom mode with the focal distance increased by a factor of 2 2 Set the mode dial to or Compose the picture using the Zoom switch key Pressing the Zoom switch towards the T zooms in on the subject and enlarges the subject on the LCD monitor Pressing the Zoom switch towards the W provides a wider angle picture The lens position moves accor...

Page 57: ... image on the LCD expands Press the shutter button down halfway and press it down fully Page 40 Memo The digital zoom photography is canceled by pressing the button to turn the LCD monitor off On the LCD monitor display off status the digital zoom photography is not possible as well The digital zoom photography is not possible in the 16 frame multi mode The Zoom switch setting is automatically can...

Page 58: ...hy mode it may take time for the camera to focus In the macro photography mode you can not turn the LCD monitor off Set the mode dial to or Press the FOCUS button When you press the FOCUS button the focus modes are displayed in the following order on the LCD monitor When 1m or 3m is set the camera will focus on subjects in a distance of 1m 3 28 ft or 3m 9 84 ft to take photos Press the FOCUS butto...

Page 59: ...tter button down halfway and press it down fully Page 40 The self timer LED lights red and then flashes The photograph is then taken after the preset time 2 or 10 seconds When photographs are taken using the LCD monitor the count down is displayed To cancel photography midway press Memo Burst photography is not possible In movie mode press the shutter button down fully to stop recording If this op...

Page 60: ... In the mode flash photography can be set when is selected Press the flash button to set to the desired mode while viewing the LCD monitor or the status display When you press the flash button the available flash modes are displayed in the following order The icon for the mode that you selected is displayed in the LCD monitor or the status display No display Auto can be set when is selected in the...

Page 61: ...towards the camera Effectiveness is also increased if the distance between the subject and camera is kept as short as possible Forced Flash In this mode the flash always fires Use the Forced Flash mode when the subject is backlit or in artificial light fluorescent lighting etc The flash also fires during macro photography Suppressed Flash Use the Suppressed Flash mode when you are taking pictures ...

Page 62: ...ings These are called Manual settings which are saved even if the camera is turned off IMPORTANT Do not remove or load the batteries or disconnect or connect the AC adapter while the camera is on This might return the manual settings to their defaults If this happens manually set the conditions again Set the mode dial to The manual setting values are displayed on the left of the LCD monitor screen...

Page 63: ...menu press or to select options and press ENTER Pressing ENTER selects the setting To cancel press EXP Exposure control Page 60 W B White balance Page 60 A E Metering system Page 61 S C Single continuous or AEB photography mode Page 61 Press ENTER The camera is ready to take photographs Compose the picture press the shutter button down halfway and press it down fully Page 40 The camera takes the p...

Page 64: ...hotography in full manual mode Page 67 White Balance W B White Balance Additional Information Glossary The camera determines the white balance by averaging the various kinds of light that actually enters the lens This setting allows you to set in advance the white balance when taking photographs under specific lighting conditions AW Automatic adjustment default Photography outdoors Photography in ...

Page 65: ...e area of the screen By dividing the entire area of the screen the exposure level for each unit is calculated A well balanced exposure can be obtained Spot metering The exposure is measured in a very small area at the center of the screen It is possible to calculate the exposure of a subject without being affected by the surrounding environment Single continuous or AEB photography mode S C Photogr...

Page 66: ...o selecting in mode It is possible to change the white balance and the metering system in program mode Carry out steps 1 to 2 in Manual Settings page 58 Press or to select EXP Press to display option menu press or to select PRG and press ENTER Pressing ENTER selects the setting Press ENTER The camera is ready to take photographs Compose the picture press the shutter button down halfway and press i...

Page 67: ...value produces a portrait photo with an out of focus background The smaller the aperture value the more out of focus the background becomes A large aperture value produces sharp images on both close objects and distant objects like landscapes The larger the aperture value the larger the area for sharp images Carry out steps 1 to 2 in Manual Settings page 58 Press or to select EXP Press to display ...

Page 68: ... to its limit the shutter speed is displayed in red Photography however is possible in this state Press to reduce aperture size Press to increase aperture size Note The larger the F value the smaller the aperture size become and vice versa Exposure compensation Page 69 using or and manual setting Page 58 or film speed setting Page 78 using ENTER are also possible Compose the picture press the shut...

Page 69: ...g to the shutter speed A fast shutter speed produces a photograph that looks as if a moving subject is still A slow shutter speed produces as photograph that makes you feel that it is flowing Carry out steps 1 to 2 in Manual Settings page 58 Press or to select EXP Press to display option menu press or to select Tv and press ENTER Pressing ENTER selects the setting Press ENTER The camera is ready t...

Page 70: ...speed setting Page 78 using ENTER are also possible Compose the picture press the shutter button down halfway and press it down fully Page 40 The camera takes the picture Memo When the shutter speed is set to a speed of 0 7 second or slower photographs are taken as extended exposures Page 68 In AEB photography Page 71 or burst photography the shutter speed cannot be set to 0 7 second or longer If ...

Page 71: ...value Page 64 and pressing or to set the shutter speed value Page 66 separately are also possible Compose the picture press the shutter button down halfway and press it down fully Page 40 The camera takes the picture Memo When pressing or in the full manual mode the shutter speed is adjusted but the exposure compensation setting is not possible However the exposure value is displayed on the LCD mo...

Page 72: ...tography in the Full Manual Mode page 67 Press or in the Tv mode or press or in the M mode to set the shutter speed to 0 7 second or longer is displayed on the LCD monitor Compose the picture press the shutter button down halfway and press it down fully Page 40 The camera takes the picture at the set exposure time During the exposure the viewfinder LED turns orange It takes about twice the set tim...

Page 73: ...he screen Set the mode dial to Press or to adjust the exposure The setting range is as follows A larger value lightens the exposure and a smaller value darkens the exposure The value that you set is displayed on the LCD monitor Press to increase brighten exposure and to decrease darken exposure to side to side 2 0 1 5 1 0 0 5 0 default 0 5 1 0 1 5 2 0 Compose the picture press the shutter button d...

Page 74: ... scenes such as snowfields and highly reflective subjects Shots made up predominantly of sky Negative Compensation Spotlit subjects particularly against dark backgrounds Copying of printed text white characters on black paper Scenes with low reflectivity such as shots of green or dark foliage Memo When M is selected on the EXP option menu pressing or makes the shutter speed setting possible but do...

Page 75: ...select S C Press to display option menu press or to select AEB and press ENTER Pressing ENTER selects the setting Press ENTER The camera is ready to take photographs Compose the picture press the shutter button down halfway and press it down fully Page 40 The camera will automatically take a picture in 0 5 compensation 0 compensation and 0 5 compensation Memo If burst photography is selected when ...

Page 76: ...irectly to SmartMedia but are stored temporarily within the buffer memory After photography is finished check the images and record the selected ones to SmartMedia Carry out steps 1 to 2 in Manual Settings page 58 Press or to select S C Press to display option menu press or to select and press ENTER Pressing ENTER selects the setting Press ENTER is displayed on the LCD monitor The camera is ready ...

Page 77: ...played at the bottom right of the screen and the number in green is the image currently displayed The green indication also moves as you move the image to be displayed Use or to select the recording method The camera is set to erase all images immediately after photography 1 This setting is for saving and erasing the selected image Press or to select the image and press ENTER The red mark appears ...

Page 78: ...ased and the camera is then ready to take photographs Memo You can also carry out step 8 while verifying the image in step 7 Even if photography is terminated midway before capturing three images by releasing the shutter button images already photographed can be saved and erased by the above method The length of time to capture images varies according to the photographic conditions Self timer phot...

Page 79: ...own fully again If you do not do this photography is automatically stopped when there is no more free space on the SmartMedia or when the maximum size that a single movie can be recorded is reached Maximum photography time Page 124 Memo Flash photography is not possible The image size displayed on the LCD monitor becomes FULL 320 x 240 or HALF 160 x 120 The movie made in FULL size is displayed on ...

Page 80: ...he MENU button The RECORDING MENU is displayed Use or to select the desired item 1 and press The options 2 are displayed Note The image appearing through the lens will be displayed for LCD PREVIEW Page 77 COLOR Page 77 ISO Page 78 SHARPNESS Page 79 CONTRAST Page 79 DIGITAL ZOOM Page 79 LCD Page 79 Use or to select the desired setting from the tab menu 2 and press ENTER This saves the settings and ...

Page 81: ... resolution of preview images is low To check detailed areas and focus check it in the playback mode Page 80 To cancel preview press the shutter button halfway down again The three images that you took are displayed for about two seconds each in the AEB photography mode Page 71 OFF Do not display preview default ON Display preview COLOR Set the color of the image to be photographed STANDARD Standa...

Page 82: ...olor ISO400 In the mode During 2X the ISO will be automatically set between ISO100 and ISO200 During 4X ISO will be automatically set between ISO100 and ISO400 ISO Sets the color mode and photographic sensitivity at which the image is to be recorded Warning Noise increases when the ISO is changed to higher settings NORMAL Equivalent to color ISO100 default 2X High sensitive photography equivalent ...

Page 83: ...of the image to be photographed NORMAL Automatic standard setting default STRONG Strong contrast SOFT Soft contrast DIGITAL ZOOM Enlarges the center of the screen and takes photographs with apparent effect that the focal distance is set to twice the distance Zoom Photography Page 52 ON Enables digital zoom photography default OFF Disables digital zoom photography LCD Adjusts the brightness of the ...

Page 84: ... display Page 116 Press or to move forward and reverse to advance to next frame to go back one frame Holding down or moves forward or reverse continuously Press ENTER nine images are displayed simultaneously Thumbnail Display Page 83 Memo It is possible to play back any images in any folders by pressing or during playback For details of folder Page 92 Pressing at the last image displays the first ...

Page 85: ...so be played back Set the mode dial to The last recorded image appears on the LCD monitor To adjust the brightness of the LCD monitor Page 115 Changing the LCD monitor display Page 116 Press or to select the movie to play back Press Playback of the selected movie begins The user can control playback as shown on the table of the next page by pressing various buttons during playback a pause or stopp...

Page 86: ...layback for the duration that is held down 1 frame feed Each press of feeds the image by one frame 1 frame feed is continued for the duration that is held down Reverse 1 frame feed Each press of feeds the image in reverse by one frame 1 frame feed is continued for the duration that is held down Stop Playback returns to the start of the movie Increases the volume Decreases the volume ENTER Pressing...

Page 87: ...he desired image and display it in the regular display Set the mode dial to The last image frame appears on the LCD monitor Press ENTER Nine images are displayed simultaneously Use or to move the cursor to select the image to be displayed at regular size The cursor selected image is displayed with green frame Pressing the buttons continuously moves the cursor continuously Press ENTER The selected ...

Page 88: ... appears on the LCD monitor Use or to select the frame you want to enlarge You can also select the image by the same operation as for thumbnail playback Page 83 Adjust the zoom ratio by the Zoom switch Zoom switch Page 21 Pressing the Zoom switch to the T will enlarge the image To return to normal magnification press the Zoom switch towards W The image is displayed enlarged and a white frame and g...

Page 89: ...n The PLAYBACK MENU is displayed Use or to select SLIDE SHOW and press The slideshow begins and is displayed on the LCD monitor The next image is displayed every three seconds To quit the slideshow press ENTER The LCD monitor displays the image when ENTER is pressed The slideshow is repeated until ENTER is pressed Memo The Auto Power OFF function does not operate during automatic playback Auto pla...

Page 90: ...k the 16 images photographed in the multi photography mode in quick succession Set the mode dial to The last image frame appears on the LCD monitor Use or to select the images photographed in the multi photography mode You can also select the image by the same operation as for thumbnail display Page 83 Press the Zoom switch Page 21 towards T to begin playback Automatic playback begins ...

Page 91: ...the mode dial to or When is selected the last image frame or the thumbnail display appears on the LCD monitor When is selected use or to select the image to be erased When or is selected only the last recorded image can be erased Press the erase button The erase icon is displayed at the left of the screen Use or to select and press ENTER This erases the image and returns to the previous mode To ca...

Page 92: ...hen PROTECTED is displayed on the LCD monitor cancel the protection Page 108 or remove DPOF write protection Page 102 If you take a photograph after erasing an image a number continuing from the last photographed image is assigned as the image number Images can also be erased in the thumbnail mode In this case the camera enters the single frame playback frame playback mode and enters the thumbnail...

Page 93: ... 106 or when the SmartMedia is write protected Page 34 The folder to be erased differs according to the position of the mode dial Folder of images currently being played back or Folder of images currently being photographed About Folders Page 92 Set the mode dial to or Set the mode dial to the type of folder you want to erase When is selected the last image frame or the thumbnail display appears o...

Page 94: ...all folders recorded on the SmartMedia The images or folders are erased and the camera returns to the respective mode To cancel erasing of image data select and press ENTER When is selected NO IMAGE is displayed after all folders have been erased unless the SmartMedia contains protected images Memo When all images in a folder are erased that folder itself is also erased Erasing Folders All Images ...

Page 95: ... Set the mode dial to or When is selected the last image frame or the thumbnail display appears on the LCD monitor Hold down the erase button for two seconds The erase icon is displayed at the left of the screen Use or to select and press ENTER To cancel formatting select and press ENTER To reset the image number use or to select EXECUTE and press ENTER To cancel resetting of image numbers select ...

Page 96: ...folder as you like by the folder button How to select the folder Set the mode dial to The last image frame appears on the LCD monitor Press the folder button The FOLDER menu is displayed Use or to select desired folder and press ENTER The folder is selected When more than 6 folders exist move the cursor by or to the mark under of the list of folder numbers The next page appears Select a desired fo...

Page 97: ...ton will create a new folder The subsequently photographed images are recorded in that new folder When a new folder is created the frame No is assigned from 0001 To play back images photographed by another camera Proper playback may not be possible for some image size Images cannot be played back unless the file name and folder name are set correctly It is possible to play back any images in any f...

Page 98: ...Media has run out of storage space during photography increases space on SmartMedia so that you can continue taking photographs The following images cannot be resized SMALL size images Images taken with another camera Images taken in the multi photography mode Protected images Page 106 Movies Images cannot be resized when the SmartMedia is write protected Set the mode dial to The last image frame ...

Page 99: ...ge 44 To cancel the selection press ENTER again If you want to resize two or more images repeat the procedure for the necessary number of images When the Zoom switch is pressed toward T during image selection the image is displayed to fit the entire screen To redisplay the original image move the Zoom switch towards the W Zoom switch Page 21 Use or to select EXECUTE and press ENTER The screen indi...

Page 100: ...increases space on SmartMedia so that you can continue taking photographs The following images cannot be compressed BASIC image quality images Images taken with another camera Protected images Page 106 Movies Images cannot be compressed either when the SmartMedia is write protected Set the mode dial to The last image frame appears on the LCD monitor Press the MENU button The PLAYBACK MENU is displ...

Page 101: ...SIC Details of compression ratio Page 44 If you want to compress two or more images repeat the procedure for the necessary number of images When the Zoom switch is pressed toward T during image selection the image is displayed to fit the entire screen To redisplay the original image move the Zoom switch towards the W Zoom switch Page 21 Memo It is possible to play back any images in any folders by...

Page 102: ...tions Copies images stored on the SmartMedia This feature is useful when you want to copy an image from one SmartMedia to another Set the mode dial to The last image frame appears on the LCD monitor Press the MENU button The PLAYBACK MENU is displayed Use or to select COPY and press The COPY menu is displayed Copying Images ...

Page 103: ...s which have been selected and the remaining memory space The amount of memory space consumed is indicated in green When the Zoom switch is pressed toward T during image selection the image is displayed to fit the entire screen To redisplay the original image move the Zoom switch towards the W Zoom switch Page 21 Memo It is possible to play back any images in any folders by pressing or during play...

Page 104: ...s on the screen Replace the SmartMedia with another one When copying is completed the above screen is displayed When this screen is displayed you can replace the SmartMedia with the original one The camera need not be turned off for this operation IMPORTANT Do not remove the SmartMedia or turn the camera off while images are being copied until EXCHANGE CARD appears on the screen This might damage ...

Page 105: ...pied the frame No is not copied The frame No becomes Still images When the SmartMedia at the copy destination contains the folder xxxTOSHI a folder having the largest number of xxx incremented by 1 is created Example When there are folders 101TOSHI and 102TOSHI the folder 103TOSHI is created When there is no xxx TOSHI folder a new folder is created In each case the frame No is assigned from 0001 ...

Page 106: ... Digital Print Order Format file for images to be printed developed Additional Information Glossary This feature applies to still images only Printing can be done easily if you just take the SmartMedia containing the images and DPOF file to the photo lab Set the mode dial to Press the MENU button The PLAYBACK MENU is displayed Press or to select DPOF and press Press or to select SELECT IMAGE and p...

Page 107: ...he Zoom switch towards the W Zoom switch Page 21 2When you have finished this setting press ENTER The DATE screen is displayed The date of the image can be printed in the lower right corner of the picture 3Press or to select YES or NO and press ENTER If you want to print the date select YES and press ENTER If you do not want to print the date select NO and press ENTER The message CREATE DPOF FILE ...

Page 108: ...s ENTER The DPOF information file is created and the screen returns to the initial display when the operation ends To continue setting select CHANGE SETTINGS To quit setting without creating a DPOF file select CANCEL and press ENTER To end setting press or to select END and press ENTER To cancel confirmation of settings proceed to step 9 Print Information continued ...

Page 109: ...tomatically protected Write protection cannot be removed by regular methods Page 108 You can specify up to 99 prints or up to 999 frames in a single SmartMedia The maximum number of prints you can specify in a single SmartMedia is limited to 10000 Print Information continued Select the desired operation CONFIRM Press this to confirm the settings 1Press or to select CONFIRM and press ENTER 2After c...

Page 110: ...vents images from being erased IMPORTANT Formatting erases all the images on a SmartMedia regardless of whether they are protected or not To protect the entire SmartMedia see Write Protection Page 34 Protecting an Image Set the mode dial to The last image frame or the thumbnail display appears on the LCD monitor Press the MENU button The PLAYBACK MENU is displayed ...

Page 111: ...switch is pressed toward T during image selection the image is displayed to fit the entire screen To redisplay the original image move the Zoom switch towards the W Zoom switch Page 21 Memo It is possible to play back any images in any folders by pressing or during playback For details of folder Page 92 Use or to select EXECUTE and press ENTER To quit write protection select CANCEL and press ENTER...

Page 112: ...o To unprotect an image press ENTER again To remove the protection from two or more images repeat this procedure for the necessary number of images Memo It is possible to play back any images in any folders by pressing or during playback About Folders Page 92 Carry out step 5 in Protecting An Image Page 107 Memo To write protect another image write protection can be simultaneously carried out if s...

Page 113: ...UAGE VIDEO OUT QUALITY SYSTEM INFO The details set here are held in memory even if the camera is turned OFF Set the mode dial to The SETUP MENU appears Use or to select the item you want to set AUTO POWER OFF Selects the time for automatic power off P 110 SOUND Turns on and off the sound P 111 TIME DATE Setting the Time and Date P 111 OSD LANGUAGE Selecting the Monitor Display Language P 112 VIDEO...

Page 114: ...setting AUTO POWER OFF If no operation is carried out for a fixed amount of time default about one minute power consumption is set to its minimum state power almost turned off to prevent battery wear This is called the Auto Power OFF This setting allows you to set the time when the camera turns off automatically This function is not activated during automatic playback Page 85 or in the PC mode To ...

Page 115: ...to sound the beep tone ON Sounds the beep tone according to the operating state or operation default OFF Does not sound the beep tone in any state TIME DATE Sets the date and time Seconds cannot be set Using or to select the item you want to set and use or to set the value for each item Pressing advances the selection in the following order Select OK and press ENTER To quit setting select the CANC...

Page 116: ...NGLISH VIDEO OUT Sets the video output system according to the country in which your camera is used NTSC NTSC system Additional Information Glossary PAL PAL system Additional Information Glossary The default setting is different depending on the destination country area QUALITY The default size and quality of the image can be reset to the desired combination Carry out steps 1 to 2 in Basic Photogr...

Page 117: ... select the number you desired to set and press or ENTER The SIZE item is reversely displayed in white Press or to select the size you desired and press or ENTER The QUALITY item is reversely displayed in white Press or to select the quality you desired and press or ENTER The display returns to the Step 2 screen Basic Settings mode continued ...

Page 118: ...nal factory settings TIME DATE OSD LANGUAGE will not be reset Carry out steps 1 to 2 on page 109 Select SYSTEM INFO on the SETUP MENU and press The SYSTEM INFO menu is displayed Press or to select the item you desired to set and press ENTER FIRMWARE VER Displays the firmware version of this camera CARD INFO Displays the SmartMediaTM information RESET Returns settings to their defaults Basic Settin...

Page 119: ...rded image Set the mode dial to or Press the MENU button The RECORDING MENU or PLAYBACK MENU is displayed You can set the LCD monitor brightness in either of these menus Use or to select LCD and press The image and the LCD menu are displayed Use or to adjust the brightness Press to darken the LCD monitor or to lighten the LCD monitor The LCD monitor can be adjusted within the range 5 to 5 Default ...

Page 120: ...itch the display to show a list of detailed information size compression ratio shutter speed aperture etc or you can display histograms etc Set the mode dial to Press or to select the image Press the display info button Each press of the display info button switches the display format as follows Memo When playing back movie images switching is between standard and image only Standard Detailed info...

Page 121: ...switches the display format as follows OSD full display OSD display off LCD monitor off OSD full display LCD monitor off OSD display off Memo When any button is pressed while OSD display is off the monitor displays the alteration on the screen for two seconds When the LCD monitor is off the digital zoom function is forcibly canceled In the movie mode or macro photography mode the LCD monitor can n...

Page 122: ...can be taken however do not turn the power OFF Accessing of SmartMedia in progress When the image is not in focus Processing image Charging of flash in progress Photos cannot be taken at this moment Hardware malfunction Definitions of the Color of the Viewfinder LED The color of the viewfinder LED indicates the state of the camera The meaning of the LED color may differ according to the mode dial ...

Page 123: ...lable IMPORTANT Before you connect your camera to other equipment be sure to turn all other connected equipment OFF If you connect your camera to other equipment with the power still ON the screen may flicker or the image may not be displayed normally Connect the plug of the AV cable provided to the PC AV terminal on the camera Connect the plug of the AV cable to the video input terminal on the TV...

Page 124: ... How to play back images Page 80 Memo The image before the photograph is taken is slightly less clear than playback images This is because television displays images at a lower resolution The display unit varies according to the output system With the NTSC system images can be displayed simultaneously on the LCD monitor and TV during photography and playback With the PAL system images cannot be di...

Page 125: ... sold separately or floppy disk adapter sold separately Page 122 To transfer images to a PC software must be installed and special cables connected For details refer to the User s Guides for your PC and the Software Manual Using SmartMedia on a PC When you use SmartMedia do not change or erase folders or file names image data on the SmartMedia Doing so might prevent the SmartMedia from being used ...

Page 126: ...ssory you are using information current as of March 2000 SmartMedia 3 3 V 16MB SM M1600D 32MB SM M3200D 64MB SM M6400D 128M SM M1280D Floppy Disk Adapter FlashPath This adapter allows SmartMedia to be used as 3 5 floppy disk This adapter is inserted into the floppy disk drive on your PC allowing images recorded on the SmartMedia to be transferred to the PC AC Adapter For the US Canada PDR ACM1A Fo...

Page 127: ...tional Information Erasing Images Handy Functions Connecting to Other Devices SmartMedia Floppy disk adapter PC card adapter PC Printer Software application CD ROM provided USB cable provided PC AV AV cable provided DC IN 5V AC adapter sold separately Plug socket TV monitor PDR M81 ...

Page 128: ...LL size 720 x 480 pixels Movie Image Mode Standard movie photography time FULL size 320 x 240 pixels HALF size 160 x 120 pixels Conversion rules File Size max 8MB 16MB 32MB 1 5 1 4 1 3 5 1 7 5 1 6 1 5 1 15 1 12 1 10 5 Image Size FULL HALF SMALL Compression Ratio 64MB Compression Ratio 128MB FULL HALF SMALL FULL HALF SMALL 1536KB 480KB 192KB 1024KB 320KB 128KB 512KB 160KB 64KB 5 16 41 7 24 62 15 49...

Page 129: ... WIDE side setting Detection system Contrast detection system frame rate during detection 30 Hz Spot metering multi metering Program AE aperture priority AE shutter priority AE 2 0 EV to 2 0 EV in 0 5 EV increments F2 9 to F8 automatic selection manual selection possible 1 2 to 1 1 000 sec electronic shutter and mechanical shutter Maximum 15 sec for extended exposure photography Auto selected Manu...

Page 130: ...Audio Video cable or USB cable connections 4 x AA Alkaline Nickel Metal Hydride or Lithium battery or AC adapter PDR ACM1A sold separately 5 C 41 F to 40 C 104 F during operation 20 C 4 F to 60 C 140 F during storage 30 to 80 during operation no condensation 107 mm 4 2 W x 71 mm 2 8 H x 47 mm 1 8 D excluding protrusions Approx 240 g 8 5 oz excluding accessories battery and SmartMedia 1 The LCD mon...

Page 131: ...er supply AC230V 50Hz Rated Input Capacity 120 mA Rated Output DC5 0V 1 5A Operating temperature 0 C 40 C Storage temperature 10 C 70 C Dimensions 49 5 mm 1 9 W x 66 5 mm 2 6 H x 76 mm 3 0 D Weight Approx 130 g 4 5 oz Connector Cable Length Approx 2 m 6 6 ft AC adapter PDR ACM1E Power supply AC120V 50 60Hz Rated Input Capacity 18VA Rated Output DC5V 1 5A Operating temperature 0 C 32 F 40 C 104 F S...

Page 132: ...cording is not possible No SmartMedia is loaded SmartMedia is loaded incorrectly The SmartMedia is not initialized The SmartMedia format is incorrect The SmartMedia is not formatted initialized The SmartMedia format is incorrect The frame number has reached 999 9999 The image is write protected The image to apply the resize quality or other function does not exist There is not enough space on the ...

Page 133: ...es are recorded to the SmartMedia There is a parameter that is not supported in the DPOF setting file This is a confirmation for checking whether or not to remove DPOF write protection when clearing DPOF settings The zoom lens cannot be correctly set up Is the lens cap still attached to the lens Check the lens cap and turn the power ON again You tried to play back an image not supported on this ca...

Page 134: ...he size and quality to increase space on the SmartMedia Remove the write protection or replace with a new SmartMedia Format the SmartMedia Load a new SmartMedia Turn the power on again Causes The batteries are exhausted The AC adapter plug has come out of the power outlet The batteries are exhausted You are using the camera in extremely cold conditions The terminals are dirty The battery has reach...

Page 135: ...etting Set the flash to Auto Red Eye Reduction or Forced Flash mode Wait until charging is completed before pressing the shutter button Set the flash to Auto Red Eye Reduction or Forced Flash mode Replace with new batteries Move closer to the subject about 2 6 ft 0 8 m 9 7 ft 3 0 m WIDE side setting Select the folder containing images to play back Clean the lens Set the FOCUS photography according...

Page 136: ...ing continued Causes The camera is in the PC mode Both the battery and AC adapter are removed with the power still on Problem Nothing is displayed even through the LCD monitor is set to ON The set date and time disappears See Page P 41 P 58 P 75 P 80 P 111 Remedy Change the camera to the photography or playback mode Set the date and time again ...

Page 137: ...G compliant this format is compatible with TIFF and JPEG and can be used in image processing software for most personal computers JPEG A file format used for compressing and saving color images The compression ratio can be selected but the higher the compression ratio the worse image quality becomes This format is widely used in the paint software for PCs and on the Internet NTSC National Televisi...

Page 138: ...ate This is sometimes called initialization Exposure Compensation When the screen contains an extremely bright or dark object the camera automatically adjusts the brightness resulting in the subject being reproduced darker or lighter Exposure compensation adjusts for this The system prints the image of a digital still camera with function in high quality using a compatible printer When taking a ph...

Page 139: ...MEMO ...

Page 140: ...MEMO ...

Page 141: ...erica Information Systems Inc Toshiba Hong Kong Ltd Toshiba Systems France Toshiba Europe Gmbh Toshiba Consumer Products Italia Toshiba Singapore Pte Toshiba Europe Gmbh Swiss Branch Toshiba UK Ltd Toshiba America Information Systems Inc Phone number 800 829 8318 2956 0222 01 47 28 28 50 02131 158 01 039 6099342 270 7776 01 946 07 77 01932 828828 800 829 8318 e mail dsc support tais toshiba com NA...

Page 142: ...ce Centre Units 6 7 Admiralty Way Camberley Surret GU15 3DT U K For customers in the U S A Website for digital cameras www toshiba co uk Technical support is available on line or by calling 0115 9766958 9 00am to 6 00pm Mon to Fri 9 00am to 5 00pm Sat Sundays and Bank Hols not open or e mail us at enquiries toshiba tuk com For customers in the U K Address and telephone number are subject to change...

Reviews: