background image

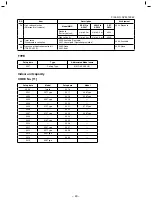
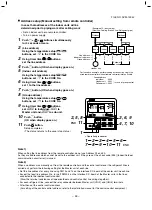
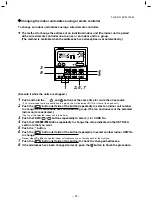
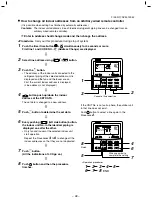
– 33 –

FILE NO. SVM-

16042

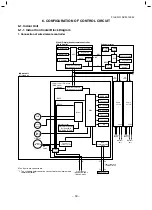
Power

 supply

CN67 (B

lack),


AC

22

0-2

40

V

Optional pow

er

 supply

CN309 (Y

ellow), 

AC220-240V

Power

 s

upply

 LED of

m

icroproc

ess

or

D501 (Red)

P

ow

er supply

 LE

D

of

 rem

ot

e cont

roller

D403 (Red)

PM

V ou

tpu

t

CN82 (B

lue),


DC12V

In

door/

O

ut

door cent

ral

cont

rol

co

m

m

unication LED

D503 (Y

ellow)

Application control 

kit

CN521 (Red),

DC12V

Output f

or 

FS 

unit

CN81 (B

lack),


DC12V

TC2 s

ens

or

CN101 

(Blac

k)

DC5V

Drain pum

p

CN504 (W

hit

e),


DC12V

TA sensor

CN104 (Y

ellow

),


DC5V

Ex

ter

nal static pr

es

sur

e

select 

SW

SW

50

1

CHK

CN71 (W

hi

te

),


DC5V

DI

S

P

CN72 (W

hi

te

),


DC5V

TCJ sensor

CN102 (Red),


DC5V

HA

(T10)

CN61 (Y

ellow), 

DC12V

DC fanm

otor

CN210

(W

hite)

TC1 s

ens

or

CN100 (B

row

n),


DC5V

Ind

oo

r/Ou

tdo

or


co

m

m

unication

CN40 (B

lue)

Rem

ot

cont

roller

CN41 (Blue),


DC20V

Float SW

CN34 (Red),


DC12V

Rem

ote cont

roller

com

m

unication LED

D504 (Green)

Louv

er

CN510 

(W

hite)

6-2. Indoor P.C. board

MCC-1643

Summary of Contents for MMC-AP0157HP1-E

Page 1: ...L AIR CONDITIONER MULTI TYPE FILE NO SVM 16042 INDOOR UNIT Ceiling type MMC AP0157HP1 E TR MMC AP0187HP1 E TR MMC AP0247HP1 E TR MMC AP0277HP1 E TR MMC AP0367HP1 E TR MMC AP0487HP1 E TR MMC AP0567HP1 E TR April 2016 ...

Page 2: ...ONTENTS SAFETY CAUTION 3 15 1 CONSTRUCTION VIEWS EXTERNAL VIEWS 1 1 MMC AP0157HP1 AP0187HP1 15 16 1 2 MMC AP0247HP1 AP0277HP1 1 3 MMC AP0367HP1 AP0567HP1 17 2 WIRING DIAGRAM 18 3 PARTS RATING 19 4 REFRIGERATION CYCLE DIAGRAM 20 5 CONTROL OUTLINE 21 6 CONFIGURATION OF CONTROL CIRCUIT 30 7 APPLIED CONTROL 38 8 TROUBLESHOOTING 55 9 DETACHMENTS 89 10 REPLACEMENT OF SERVICE P C BOARD 98 11 EXPLODED VIE...

Page 3: ...e related to this work s The qualified service person who is allowed to work at heights has been trained in matters relating to working at heights with the air conditioners made by Toshiba Carrier Corporation or alternatively he or she has been instructed in such matters by an individual or individuals who have been trained and is thus thoroughly acquainted with the knowledge related to this work ...

Page 4: ...as been executed Indicates possibilities assumed that a danger causing a death or serious injury of the repair engineers the third parties and the users due to troubles of the product after work when an incorrect work has been executed Indicates contents assumed that an injury or property damage may be caused on the repair engineers the third parties and the users due to troubles of the product af...

Page 5: ...ore servicing WARNING WARNING Moving parts Do not operate unit with grille removed Stop the unit before the servicing Moving parts Do not operate unit with grille removed Stop the unit before the servicing CAUTION CAUTION High temperature parts You might get burned when removing this panel High temperature parts You might get burned when removing this panel CAUTION CAUTION Do not touch the alumini...

Page 6: ...hecking the electric parts removing the cover of the electric parts box of Indoor Unit and or front panel of Outdoor Unit inevitably to determine the failure put a sign Do not enter around the site before the work Failure to do this may result in third person getting electric shock Place a Work in progress sign near the circuit breaker while the installation maintenance repair or removal work is b...

Page 7: ...sition may result in injury through contact with the rotation parts Only a qualified installer or qualified service person is allowed to remove the intake grille and do the work required Use wiring that meets the specifications in the Installation Manual and the stipulations in the local regulations and laws Use of wiring which does not meet the specifications may give rise to electric shocks elec...

Page 8: ... assemble the disassembled parts and connect and lead the removed wires as before Perform the work so that the cabinet or panel does not catch the inner wires If incorrect assembly or incorrect wire connection was done a disaster such as a leak or fire is caused at user s side After the work has finished be sure to use an insulation tester set 500V Megger to check the resistance is 1MΩ or more bet...

Page 9: ...unit is to be opened in order for the compressor or the area around this part to be repaired immediately after the air conditioner has been shut down set the circuit breaker to the OFF position and then wait at least 10 minutes before opening the service panel If you fail to heed this warning you will run the risk of burning yourself because the compressor pipes and other parts will be very hot to...

Page 10: ...cifications in the installation manual and the stipulations in the local regulations and laws Install the circuit breaker where it can be easily accessed by the agent Do not place any combustion appliance in a place where it is directly exposed to the wind of air conditioner otherwise it may cause imperfect combustion Explanations given to user If you have discovered that the fan grille is damaged...

Page 11: ...MC AP0247HP1 E MMC AP0277HP1 E MMC AP0367HP1 E MMC AP0487HP1 E MMC AP0567HP1 E MMC AP0157HP1 TR MMC AP0187HP1 TR MMC AP0247HP1 TR MMC AP0277HP1 TR MMC AP0367HP1 TR MMC AP0487HP1 TR MMC AP0567HP1 TR Commercial name Super Modular Multi System Air Conditioner Super Heat Recovery Multi System Air Conditioner MiNi Super Modular Multi System Air Conditioner MiNi SMMS series Complies with the provisions ...

Page 12: ...ting MMC AP0157HP1 E 23 MMC AP0187HP1 E 23 MMC AP0247HP1 E 29 MMC AP0277HP1 E 29 MMC AP0367HP1 E 35 MMC AP0487HP1 E 35 MMC AP0567HP1 E 35 MMC AP0157HP1 TR 23 MMC AP0187HP1 TR 23 MMC AP0247HP1 TR 29 MMC AP0277HP1 TR 29 MMC AP0367HP1 TR 35 MMC AP0487HP1 TR 35 MMC AP0567HP1 TR 35 Under 70 dBA ...

Page 13: ...ter and others do not mix in because pipes are affected by impurities such as water oxide scales oil etc Use the clean pipes Be sure to brazing with flowing nitrogen gas Never use gas other than nitrogen gas 4 For the earth protection use a vacuum pump for air purge 5 R410A refrigerant is azeotropic mixture type refrigerant Therefore use liquid type to charge the refrigerant If using gas for charg...

Page 14: ...pump Use vacuum pump by attaching vacuum pump adapter 7 Screwdriver h c n e r w y e k n o M r o r e n n a p S 8 h c n e r w e u q r o T 2 l l i r d e r o c e l o H 9 r e t t u c e p i P 3 m m 4 e d i s e t i s o p p O h c n e r w n o g a x e H 0 1 r e m a e R 4 e r u s a e m e p a T 1 1 r e d n e b e p i P 5 w a s l a t e M 2 1 l a i v l e v e L 6 Also prepare the following equipments for other in...

Page 15: ... 15 FILE NO SVM 16042 1 CONSTRUCTION VIEWS EXTERNAL VIEWS 1 1 Indoor Unit MMC AP0157HP AP0187HP ...

Page 16: ... 16 FILE NO SVM 16042 6 4 12 7 MMC AP0247HP AP0277HP ...

Page 17: ... 17 FILE NO SVM 16042 MMC AP0367HP to AP0567HP ...

Page 18: ... 18 FILE NO SVM 16042 2 WIRING DIAGRAM ...

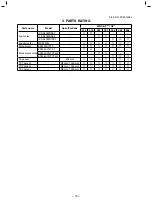
Page 19: ...P 015 018 024 027 036 048 056 Fan motor ICF 340WD94 1 ICF 340WD94 2 ICF 340WD139 1 Louver motor MP2423N Pulse motor EFM MD12TF Pulse motor valve EFM 40YGTF 1 EFM 40YGTCTH 2 EFM 60YGTCTH 1 TA sensor 518 mm TC1 sensor Ø4 mm 1000 mm TC2 sensor Ø6 mm 1000 mm TCJ sensor Ø6 mm 1000 mm ...

Page 20: ...82 6P Blue 1 Controls super heat in cooling operation 2 Controls under cool in heating operation 3 Recovers refrigerant oil in cooling operation 4 Recovers refrigerant oil in heating operation Connector CN104 2P Yellow 1 Detects indoor suction temperature Connector CN100 3P Brown 1 Controls PMV super heat in cooling operation Connector CN101 2P Black 1 Controls PMV under cool in heating operation ...

Page 21: ...roller command STOP FAN COOL DRY HEAT AUTO SHRM only Control outline Air conditioner stops Fan operation Cooling operation Dry operation Heating operation s Ta and Ts automatically select COOL HEAT operation mode for operation s The operation is performed as shown in the following figure according to Ta value at the first time only In the range of Ts 1 Ta Ts 1 Cooling thermo OFF Fan Setup air volu...

Page 22: ...ied out as shown below When 1 5 exceeds against Tsh 10 minutes OFF heating operation Thermo OFF exchanges to cooling operation Description in the parentheses shows an example of cooling ON OFF When 1 5 lowers against Tsc 10 minutes and after thermo OFF cooling operation Thermo OFF exchanges to heating operation 2 For the automatic capacity control after judgment of cooling heating see Item 4 3 For...

Page 23: ... on the difference boundary the air speed does not change HEAT Value in the parentheses indicates one when thermostat of the remote controller works Value without parentheses indicates one when thermo stat of the body works s If the air speed has been changed once it is not changed for 1 minute However when the air speed exchanged the air speed changes s When heating operation has started select a...

Page 24: ...tinued for 6 minutes the operation shifts to C zone s In defrost time the control point is set to 6 C TCJ Temperature of indoor heat exchanger sensor s In D and E zones priority is given to remote control ler air speed setup s In A zone is displayed 7 Prevention of cold air discharge E B A A zone OFF B zone Over 26 C below 28 C ULTRA LOW LL C zone Over 28 C below 30 C LOW L D zone Over 30 C below ...

Page 25: ...rforms the following controls when it received the cooling oil Refrigerant recovery signal from the outdoor unit 1 Opens PMV of the indoor unit with a constant opening degree 2 Operates the indoor fan and drain pump for approx 1 minute during recovery control and after finish of control The direction of the louver becomes horizontal direction s Recovery operation is usually performed every 2 hours...

Page 26: ...cooling operation including DRY operation 2 During operation of the drain pump if the float switch operates the drain pump continuously operates and a check code is illuminated 3 During stop status of the drain pump if the float switch operates the thermostat is forcedly off and this control operates the drain pump After continuous operation of the float switch for approx 5 minutes this control st...

Page 27: ...ecause the system performs Recovery operation for heating refrigerant Oil HEAT READY Displayed on the remote controller When the indoor fan stops in order to prevent discharge of cool air when heating operation started or during heating operation including the defrost operation during thermo OFF 1 Selection of the contents that can be operated by the remote controller at the indoor unit side is po...

Page 28: ... can be set up collectively or individually In case of refrigerant recovery control the louver position becomes horizontal 2 Swing setup s SWING is displayed and the following display is repeated In all operations Repeats s In group operation the louver positions can be set up collectively or individually 3 When the unit stopped or the warning was output the louver is automatically set to full clo...

Page 29: ...de air etc while the air conditioner stopped the indoor unit may operate as the fan motor stops Note If the fan lock was detected the operation of the indoor unit stops and the error is displayed Check code P12 20 Save operation 1 The function Save operation is not provided to the Super Modular Multi series models s If pushing SAVE button on the remote controller No function is displayed ...

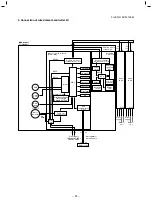
Page 30: ... 2 units Schedule timer Function setup LCD driver CPU Power circuit Power circuit EEPROM TA sensor TC1 sensor TC2 sensor TCJ sensor Float input HA Outdoor unit Fan motor control circuit Start Alarm Ready Thermostat ON COOL HEAT FAN BUS communication circuit Power circuit Remote controller communication circuit Remote controller communication circuit Display LCD Display LCD EEPROM Display LED Secon...

Page 31: ...t Start Alarm Ready Thermostat ON COOL HEAT FAN Emergent operation SW Function setup SW Display LED BUS communication circuit MCU EEPROM TA sensor TC1 sensor TC2 sensor TCJ sensor Float input HA Driver Buzzer Remote controller communication circuit Remote controller communication circuit CPU DC 280V Indoor unit 1 Header PMV Louver motor Indoor fan motor Drain pump L N U1 U2 U1 U2 Power supply 1Ø22...

Page 32: ...nication circuit MCU EEPROM TA sensor TC1 sensor TC2 sensor TCJ sensor Float input HA Driver Buzzer Remote controller communication circuit Remote controller communication circuit Remote controller communication circuit CPU DC 280V Indoor unit 1 Header PMV Louver motor Indoor fan motor Drain pump L N U1 U2 U1 U2 Power supply 1Ø220 240V 50Hz 1Ø220V 60Hz Indoor Outdoor communication Outdoor unit 1 C...

Page 33: ...21 Red DC12V Output for FS unit CN81 Black DC12V TC2 sensor CN101 Black DC5V Drain pump CN504 White DC12V TA sensor CN104 Yellow DC5V External static pressure select SW SW501 CHK CN71 White DC5V DISP CN72 White DC5V TCJ sensor CN102 Red DC5V HA T10 CN61 Yellow DC12V DC fanmotor CN210 White TC1 sensor CN100 Brown DC5V Indoor Outdoor communication CN40 Blue Remote controller CN41 Blue DC20V Float SW...

Page 34: ...ormal stop status ڦ Cooling Heating test run check The test run for cooling heating can be performed from either indoor remote controller or outdoor interface P C board 1 Start Finish operation of test run ۿ Test run from indoor remote controller Wired remote controller Refer to the below item of Test run of the wired remote controller Wireless remote controller Refer to the next page item of Test...

Page 35: ... changes to a forced cooling operation After approx 3 minutes a cooling operation starts forcedly Check cool air starts blowing If the operation does not start check wiring again 2 To stop a test operation push TEMPORARY button once again Approx 1 second s Check wiring piping of the indoor and outdoor units in forced cooling operation TEMPORARY button ...

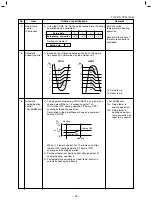
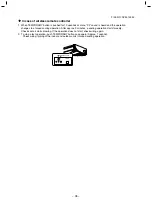
Page 36: ...ircuiting DISP pin CN72 on the indoor P C board in addition to short circuit of CHK pin CN71 on the indoor P C board the minimum opening degree 30pls can be set to the indoor PMV only When open DISP pin the maximum opening degree 1500pls can be obtained again How to clear Open CHK pin While the system is operating it stops once but automatically returns to operation after several minutes Fan motor...

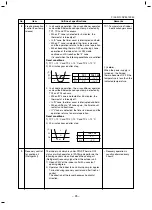
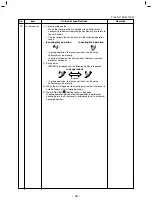
Page 37: ...put Permission Prohibition of remote controller operation stop is performed by input 4 Operation output Open collector Operation ON Answer back of HA 5 DC12V 6 Warning output Open collector Warning output ON CHK Operation check CN71 1 This check is used to check indoor operation Performs operation of indoor fan H Louver horizontal and Drain pump ON without communication with outdoor and remote con...

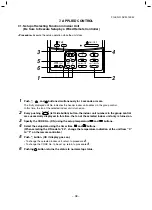
Page 38: ...a using the timer time and buttons When selecting the DN code to 33 change the temperature indication of the unit from C to F on the remote controller 5 Push SET button OK if display goes on s To change the selected indoor unit return to procedure 2 s To change the CODE No to be set up return to procedure 3 6 Pushing TEST button returns the status to normal stop status 1 6 5 2 4 3 SET TIME TIMER S...

Page 39: ...10 C Up to 6 recommended 0000 Provided 0001 Not provided Automatic selection from connected outdoor unit 0000 Heat pump 0001 Cooling only No display of AUTO HEAT 0007 Ceiling 0000 Unfixed 0001 to 0034 0001 No 1 unit to 0030 No 30 unit 0001 No 1 unit to 0064 No 64 unit 0000 Individual 0001 Header unit of group 0002 Follower unit of group 0000 No louver 0001 Swing only 0002 1 way Cassette type Ceili...

Page 40: ...ilable Operation prohibited 0000 Available F6 Presence of Application control kit TCB PCUC1E 0000 None 0001 Exist 0000 None TYPE Setup data Type Abbreviated Model name 0007 Ceiling Type MMC AP XXX HP Indoor unit capacity CODE No 11 Setup data Model Setup data Model 0000 Invalid 0016 0001 007 Type 0017 048 Type 0002 0018 056 Type 0003 009 Type 0019 0004 0020 0005 012 Type 0021 072 Type 0006 0022 00...

Page 41: ...g normal operation 3 Error signal Output during alarm Serial communication error or indoor outdoor protective device operation 2 Wiring diagram using remote control interface TCB IFCB 4E2 Input IFCB 4E2 No voltage ON OFF serial signal Output No voltage contact for operation error display Contact capacity Below Max AC240V 0 5A 1 2 3 4 5 6 CN61 T10 YEL 1 2 3 4 1 2 3 4 5 6 CN13 CN06 Start Stop input ...

Page 42: ...rs in group control are displayed successively In this time the fan of the selected indoor unit only turns on 3 Using the setup temp or button specify the CODE No 31 4 Using the timer time or button select the setup data At shipment The setup data are as follows Setup data Handling of operation of air to air heat exchanger or ventilating fan Unavailable At shipment Available 5 Push SET button OK i...

Page 43: ...ed forcedly Start Stop prohibited to remote controller Status that card is taken out from the card switch box When the card switch box does not perform the above contact operation convert it using a relay with b contact 2 Operation Handle the wired remote controller switch in the following procedure Use the wired remote controller switch during stop of the system 1 Push concurrently SET CL TEST bu...

Page 44: ...or Indoor Indoor Indoor Indoor unit Line address 1 Indoor unit address 1 Group address 1 1 2 2 1 3 2 2 1 2 2 2 2 Operation procedure 1 2 3 4 5 6 1 3 6 9 END 11 2 5 8 4 7 10 SET TIME TIMER SET TEST FILTER RESET TEMP CL FAN SAVE SWING FIX VENT MODE ON OFF UNIT LOUVER 7 8 9 10 11 END Note 1 When setting the line address from the remote controller do not use Address 29 and 30 As they are addresses whi...

Page 45: ...te controller Group control unit other unit numbers are also displayed every pushing UNIT LOUVER left side button button 2 To know the position of indoor unit by address s To confirm the unit No in the group control Follow to the procedure during operation in this procedure the indoor units in group control stop Procedure The indoor unit numbers in the group control are successively displayed and ...

Page 46: ...NIT LOUVER SWING FIX button 3 Determine the selected line address using SET button s The address of the indoor unit connected to the refrigerant piping of the selected outdoor unit is dis played and the fan and the louver are on 4 Every pushing UNIT LOUVER left side button button the indoor unit No in the identical piping is s Only fan and louver of the selected indoor unit start operation To sele...

Page 47: ...e first indicated UNIT No is that of the head unit 2 Push the UNIT LOUVER button left side of the button repeatedly to select an indoor unit number to change if 2 or more units are controlled in a group The fan and louvers of the selected indoor unit are activated The fan of the selected indoor unit is turned on 3 Push the TEMP buttons repeatedly to select for CODE No 4 Push the TIME buttons repea...

Page 48: ...ne address is not displayed 4 TIME button push up down the indoor address of the SET DATA The set data is changed to a new address 5 Push SET button to determine the set data 6 Every pushing UNIT LOUVER left side button button s Only fan and louver of the selected indoor unit start operation Repeat the Procedures 4 to 6 to change all the indoor addresses so that they are not duplicated 7 Push SET ...

Page 49: ... the mode to service monitor mode 2 Push TEMP button to set the CODE N to FF 3 The display of A part in the following figure is counted as with 5 seconds interval When appear the error was cleared However counting from is repeated on the display screen 4 When pushing TEST button the status becomes normal How to clear error of indoor unit The error of indoor unit is cleared by ON OFF button of the ...

Page 50: ... or more to call up the service monitor mode The service monitor goes on and firstly the temperature of the CODE No is displayed 1 2 3 4 Returns to normal display Operation procedure 2 4 1 3 SET TIME TIMER SET TEST FILTER RESET TEMP CL FAN SAVE SWING FIX VENT MODE ON OFF UNIT LOUVER 2 Push TEMP button to change CODE No to the CODE No to be monitored For display code refer to the following table 3 ...

Page 51: ...mperature TS Coil Temperature 1 TE Liquid Temperature TL Outdoor Temperature TO Low pressure saturation temperature TU Current of compressor 1 I1 Current of compressor 2 I2 PMV1 2 PMV3 Compressor 1 2 ON OFF Outdoor fan mode Horse power of outdoor unit 2 C C C C C A A pls pls HP 0024 24 C 0135 13 5 A 0050 500 pls 0050 500 pls 0031 Mode 31 0016 16HP 10 20 30 40 Discharge temperature of compressor 1 ...

Page 52: ... Coil Temperature 2 TE2 Liquid Temperature TL Outdoor Temperature TO PMV1 2 PMV4 Current of compressor 1 I1 Current of compressor 2 I2 Current of compressor 3 I3 Outdoor fan current IFan C C C C C pls pls A A A A 10 20 30 40 Detection pressure of high pressure sensor Pd Detection pressure of low pressure sensor Ps MPa 11 21 31 41 MPa 0123 1 23 MPa 12 22 32 42 Discharge temperature of compressor 1 ...

Page 53: ... Pressure release 5 5F 6F 7F 8F Horse power of outdoor unit HP 54 64 74 84 Heat sink temperature of compressor IPDU1 55 65 75 85 Heat sink temperature of compressor IPDU2 56 66 76 Heat sink temperature of compressor IPDU3 58 In heat cool collecting control 5 5A Discharge temperature release 5 0 Normal 1 In collecting control 0 Normal 1 In release control 5B Terminal unit release U2 U3 U4 outdoor u...

Page 54: ...goes on for 5 seconds at the first half during communication with the central controller s D503 flashes for 5 seconds with 0 2 second interval at the latter half during communication with outdoor unit Goes on for 0 1 second goes off for 0 1 second 4 D504 Green Remote controller communication s D504 goes on for 5 seconds at the first half during communication with remote controller 5 D14 Orange s I...

Page 55: ...n on remote controller is unavailable Check items s Is not delayed for 3 minutes 3 minutes after compressor OFF s Is not thermostat OFF s Is not the fan operating or timer s Is not the system initially communicating Heating operation cannot be performed under condition of outside temperature 21 C or higher Cooling operation cannot be performed under condition of outside temperature 5 C or lower s ...

Page 56: ...r temp sensor TCJ error Indoor heat exchanger temp sensor TC2 error Indoor heat exchanger temp sensor TC1 error Room tem Sensor TA error Indoor or other P C board error Duplicated setting of header in indoor group There is group cable in individual indoor unit Indoor group address is unset Indoor capacity is unset Duplicated central control system address External error was input in indoor Interlo...

Page 57: ...eck code display TCC LINK central C05 C06 C12 P30 Outdoor 7 segment Auxiliary code Block display Operation Timer Ready Flash Is not displayed In shared use of remote controller According to unit with alarm Abovementioned Main defective position Central control system communication send error Central control system communication receive error There are multiple network adapters Batched alarm of int...

Page 58: ...setting Indoor unit from other refrigerant line is detected while indoor automatic address setting is in progress E23 E23 Outdoor outdoor communication transmission error Signal cannot be transmitted to other outdoor units E25 E25 Duplicated follower outdoor address There is duplication in outdoor addresses set manually E26 Address of outdoor unit from which signal is not received normally E26 Dro...

Page 59: ...3 TK3 oil circuit error 04 TK4 oil circuit error 05 TK5 oil circuit error H16 Oil level detection circuit error No temperature change is detected by temperature sensor for oil level detection TK1 5 despite compressor having been started H25 H25 Outdoor discharge temperature sensor TD3 wiring error Wiring installation error or detachment of outdoor discharge temperature sensor TD3 has been detected...

Page 60: ...DU error 06 A3 IPDU2 Fan IPDU error 07 All IPDU error SMMS i Series 4 There are insufficient number of IPDUs P C boards in inverter box Error in number of IPDUs Indoor unit has been shut down for external error input in one refrigerant line detected by indoor unit Outdoor discharge temperature sensor TD1 has detected abnormally high temperature Outdoor discharge TD1 temperature error P04 P04 High ...

Page 61: ...e SW is activated Heat sink overheating error Temperature sensor built into IGBT TH detects overheating P20 P20 ALT High pressure protection activation High pressure Pd sensor detected a value over the criteria SMMS Series 1 04 Rotation difference error 06 Maximum rotation exceeded 08 Out of step 0A Idc activation 0C Fan lock 0d Lock 0E Sync error 0F Control error SMMS i Series 4 0 IGBT circuit 1 ...

Page 62: ...an error occurred 3 2 1 SET TIME TIMER SET TEST FILTER L L RESET TEMP CL FAN SAVE A A SWING FIX VENT MODE ON OFF UNIT LOUVER T Procedure 1 2 3 Description When pushing SET and TEST buttons simultaneously for 4 seconds or more the below display appears If Service Check is displayed the mode enters in the error history mode s 01 Error history order is displayed in CODE No window s Check Code is disp...

Page 63: ...ating or stop 1 Push and SET buttons in succession for 4 seconds or more 2 SERVICE CHECK goes on and Item code 01 goes on 3 When selecting flash the group number if there is the alarm history the UNIT number and the latest alarm history are displayed alternately In this time the temperature cannot be set up 4 To confirm the alarm history other than the latest one push temp set to select Item code ...

Page 64: ...tdoor unit Communication interruption between indoor and outdoor units Communication receiving error between indoor and outdoor units decrease of No of connected indoor units Communication sending error between indoor and outdoor units No indoor unit during setting of automatic address No of connected indoor units capacity over Error of No of center unit Disagreement of refrigerant pipe communicat...

Page 65: ...d and low pressure sensor Ps Misconnection of pressure sensor in outdoor unit Low pressure sensor Ps error Pressure sensor error in outdoor unit High pressure sensor Pd error Indoor unit EEPROM error Compressor break down Compressor lock Outdoor unit compressor system error Current detection circuit error Compressor 1 case thermo operation Low pressure Ps drop error Protections stop of outdoor uni...

Page 66: ...ration Timer Ready Simultaneous flash Operation Timer Ready Alternate flash Check code Cause of trouble occurrence During test run COOL HEAT disagreement Automatic cooling heating setup to automatic cooling heating unavailable model heating setup to cooling only model ...

Page 67: ...remote controller including wireless or network adaptor Check remote controller and network adaptor wiring E04 Indoor unit Indoor outdoor communication circuit error detected at indoor end Stop of corresponding unit Indoor unit is not receiving signal from outdoor unit Check order in which power was turned on for indoor and outdoor units Check indoor address setting Check indoor outdoor tie cable ...

Page 68: ...r indoor units is in progress Perform automatic address setting again after disconnecting communication cable to that refrigerant line E15 I F Indoor unit not found during automatic address setting All stop Indoor unit cannot be detected after indoor automatic address setting is started Check connection of indoor outdoor communication line Check for error in indoor power supply system Check for no...

Page 69: ...n outdoor units for bad contact or broken wire Check communication connectors on outdoor P C boards Check for defect in outdoor P C board I F Check termination resistance setting for communication between outdoor units E25 I F Duplicated follower outdoor address All stop There is duplication in outdoor addresses set manually Note Do not set outdoor addresses manually E26 Address of outdoor unit fr...

Page 70: ...door P C board F03 Indoor unit Indoor TC1 sensor error Stop of corresponding unit Sensor resistance is infinity or zero open short circuit Check connection of TC1 sensor connector and wiring Check resistance characteristics of TC1 sensor Check for defect in indoor P C board F04 I F TD1 sensor error All stop Sensor resistance is infinity or zero open short circuit Check connection of TD1 sensor con...

Page 71: ...3 IPDU P C board F15 I F Outdoor temperature sensor wiring error TE1 TL All stop During compressor operation in HEAT mode TE1 continuously provides temperature reading higher than indicated by TL by at least specified margin for 3 minutes or more Check installation of TE1 and TL sensors Check resistance characteristics of TE1 and TL sensors Check for outdoor P C board I F error F16 I F Outdoor pre...

Page 72: ...Check conductivity of case heater Check for refrigerant entrapment inside compressor Check for defect in outdoor P C board A3 IPDU Check outdoor MG CTT H03 H03 01 Compressor 1 side 02 Compressor 2 side 03 Compressor 3 side IPDU Current detection circuit error All stop Current flow of at least specified magnitude is detected despite inverter compressor having been shut turned off Check current dete...

Page 73: ... connection of TK1 sensor connector Check resistance characteristics of TK1 sensor Check for defect in outdoor P C board I F All stop Sensor resistance is infinity or zero open short circuit Check connection of TK2 sensor connector Check resistance characteristics of TK2 sensor Check for defect in outdoor P C board I F All stop Sensor resistance is infinity or zero open short circuit Check connect...

Page 74: ...oor PMV Check the four way valve error Check the refrigerant shortage H15 H15 I F TD2 sensor miswiring incomplete insertion All stop Air discharge temperature of TD2 does not increase despite compressor 2 being in operation Check installation of TD2 sensor Check connection of TD2 sensor connector and wiring Check resistance characteristics of TD2 sensor Check for defect in outdoor P C board I F Ch...

Page 75: ... the TK4 sensor resistant characteristics Check the misconnection of TK1 TK2 TK3 or TK4 Check the SV3E valve error Check the oil circuit capillary clogging and non return valve error Check the hibernating refrigerant in compressor SMMS i 4 series 01 TK1 oil circuit error 02 TK2 oil circuit error 03 TK3 oil circuit error 04 TK4 oil circuit error 05 TK5 oil circuit error I F Oil level detection circ...

Page 76: ...unit Check the miswiring of the communication line between indoor and outdoor L03 Indoor unit Duplicated indoor header unit Stop of corresponding unit There is more than one header unit in group Check for any change made to remote controller connection group individual since indoor address setting Check indoor addresses L04 L04 I F Duplicated outdoor line address All stop There is duplication in l...

Page 77: ...heck central control addresses Check network adaptor P C board applicable to AI NET L28 L28 I F Too many outdoor units connected All stop There are more than four outdoor units Check No of outdoor units connected Only up to 4 units per system allowed Check communication lines between outdoor units Check for defect in outdoor P C board I F L29 L29 SMMS Series 1 01 A3 IPDU1 error 02 A3 IPDU2 error 0...

Page 78: ...heck SV4 circuit wiring or installation error in SV41 SV42 or SV43 P04 P04 01 Compressor 1 side 02 Compressor 2 side 03 Compressor 3 side IPDU Activation of high pressure SW All stop High pressure SW is activated Check connection of high pressure SW connector Check for defect in Pd pressure sensor Check outdoor service valves gas side liquid side to confirm full opening Check for defect in outdoor...

Page 79: ...oltage Check outdoor fan system error Check heat sink cooling duct for clogging Check IGBT and heat sink for thermal performance for faulty installation e g mounting screws and thermal conductivity Check for defect in A3 IPDU faulty IGBT built in temperature sensor TH P10 P10 Detected indoor address Indoor unit Indoor overflow error All stop Float switch operates Float switch circuit is open circu...

Page 80: ...cuit for leakage 02 TD condition I F Gas leak detection TD condition All stop Protective shutdown due to sustained discharge temperature TD1 TD2 or TD3 at or above 108 C for at least 10 minutes is repeated four times or more Check for insufficiency in refrigerant quantity Check PMVs PMV 1 2 for clogging Check resistance characteristics of TD1 TD2 and TD3 sensors Check indoor filter for clogging Ch...

Page 81: ...iquid side to confirm full opening Check for defect in outdoor fan Check for defect in outdoor fan motor Check outdoor PMVs PMV1 2 4 for clogging Check indoor outdoor heat exchangers for clogging Check for short circuiting of outdoor suction discharge air flows Check SV2 circuit for clogging Check for defect in outdoor P C board I F Check for defect in indoor fan system possible cause of air flow ...

Page 82: ...is not performed properly Check the fan motor Check the connector connection for fan motor Check the error of IPDU board for fan All stop Sub code 06 External factors such as blast Position detection is not performed properly Restarted in 6 seconds Check the fan motor Check the error of IPDU board for fan All stop Sub code 04 External factors such as blast The difference between targeted rotation ...

Page 83: ...ration of the fan Check fan motor Check for defect in fan IPDU P C board All stop Sub code D The resistance value of the sensor is infinite or zero open or short circuit Check for defect in fan IPDU P C board All stop Sub code E Fan IPDU DC voltage protection circuit The DC voltage higher or lower than the specified value is detected Check power voltage of the main power supply Check for defect in...

Page 84: ...ine Check defect in P C boards of devices at other end of central control communication line C12 General purpose device I F Blanket alarm for general purpose device control interface Continued operation Error signal is input to control interface for general purpose devices Check error input P30 Differs according to nature of alarm causing error TCC LINK Group control follower unit error Continued ...

Page 85: ...ard not illuminated Red LED LD1 light on the external input output board flashes on and off Red LED LD1 of external input output board blinks No Yes Fault with the external input output board Replace No Lead wire is cut or fault of input output board Yes Check the operating status Repair of connector connection Yes Replacement of the connector s lead wire 8 5 Diagnostic Procedure for Each Check Co...

Page 86: ...ndoor P C board MCC 1643 If faulty Replace Disconnect the connector CN210 to the indoor P C board Is not connection error or disconnection on the connector CN210 of indoor unit P C board Does the fan turn smoothly when turned by hand Is each resistance value on the motor side of the fan motor connector CN210 of the indoor P C board correct Is F01 of the indoor P C board open Is R04 or R05 of the i...

Page 87: ... 2 5 2 1 1 8 1 5 1 3 1 1 1 0 0 8 0 7 Temperature C Temperature C 20 15 10 5 0 5 10 15 20 25 30 35 40 45 50 55 60 65 70 75 80 85 90 95 100 Indoor TC1 sensor 20 10 0 10 20 30 40 50 60 70 80 90 100 50 100 150 200 5 10 15 20 30 0 0 Resistance kΩ 10 C or below Resistance kΩ 10 C or above Resistance kΩ 115 2 84 2 62 3 46 6 35 2 26 9 20 7 16 1 12 6 10 0 8 0 6 4 5 2 4 2 3 5 2 8 2 4 2 0 1 6 1 4 1 2 Tempera...

Page 88: ...olonged Failure to clean the indoor outdoor units regularly will cause shortage of capacity freezing water leakage or trouble on the compressor Part name Heat exchanger Fan motor Filter Fan Suction Discharge grille Drain pan Face panel Louver External appearance Object Indoor Outdoor Contents of check Blocking with dust damage check Audibility for sound Visual check for dirt and breakage Visual ch...

Page 89: ...ile gently pushing it There are two air intake grilles 2 Attachment 1 Attach the hinge of air intake grille in square hole of body 2 Close the air intake grille and then fix it securely while sliding knob closed side CLOSE 3 Fix the screws of air intake grille fixing knob on a side of each filter Electric parts 1 Detachment box cover 1 Loosen the screw of the electric parts box cover Ø4 x 10 2 pcs...

Page 90: ...or connecting wire and remote controller wire from each terminal block 3 Remove the connectors which connected from the control P C board to other parts NOTE First unlock the housing and then remove the connectors 2 Attachment 1 Attach the electric parts box and then perform wiring as original NOTE Check there is no missing or contact failure on the connectors 3 2 3 4 P C board Electric parts box ...

Page 91: ...an Heat exchanger side Partition plate Shaft Square hole Front side screw Support plate Fixing screw 1 Perform works of 1 of 1 1 of 2 and 1 of 3 2 Remove connectors for fan motor wiring from control P C board CN210 Motor power supply 7P White 3 Remove the support plate AP024 to AP056 type only Ø4 x 10 1 pc The screw on a front side is removed and it detaches it from the square hole on the back sid...

Page 92: ...oupling inserted by the work of 4 is set to the ditch of the shaft and it fixes with hexagonal screw hole NOTE Be sure to use a torque wrench for fixing and tighten with 4 9N m or more 7 The fan is positioned so that the fan may become a center for fan case upper and it fixes with the hexagonal screw hole NOTE Be sure to use a torque wrench for fixing and tighten with 4 9N m or more Coupling Fan c...

Page 93: ...unlock the housing and then remove the connectors 3 Remove the fixing screws of the fixing plate 2 pcs at the side of the fan motor Ø5 x 10 2 pcs 4 While supporting the fan motor by hands remove the the fan motor 2 Attachment 1 Attach as before in fan motor 䊻㻌 motor fixing plate 䊻 fan 䊻㻌electric part box cover order Attach the connector then perform wiring as original 5 The fixing plate 6 Fan moto...

Page 94: ...e side cover One side Ø4 x 10 1 pc 3 Slide to the air discharge side remove the side cover 2 Attachment 1 Insert hooking claw of the side cover in the square hole on the main body Slide to the air intake side and attach the side cover 2 Fix the side cover by screws One side Ø4 x 10 1 pc 7 Screw The side cover Direction of slide ...

Page 95: ...d remove the under panel NOTE When you remove forcibly which may result in the product breaks 6 When you remove the signal receiving unit lap the end of flat head screw driver with vinyl tape and forcedly insert it into the groove at the side under circle mark on the cover 2 Attachment 1 Attach the under panel from air discharge side according to drain pan 2 Attach the screws as original position ...

Page 96: ...ulator stuck on air discharge side of the drain pan is peeled off and an inside shoulder screw is removed AP015 to AP027 type 1 pc AP036 to AP056 type 2 pcs When installing the heat insulator peeled off is used 5 Slide to the air discharge side remove the drain pan 2 Attachment 1 The drain cap is surely inserted up to the drain pan root 2 Slide to the air discharge side hooking surely the frame on...

Page 97: ...and that binds the PMV lead wires 6 The main body of PMV is exposed cutting the butyl rubber with the cutter etc 7 Loosen the nuts fixing PMV with double spanner to remove PMV 2 Attachment 1 Mount PMV motor with a spanner wrench 2 Covers with the butyl rubber of the main body of PMV as before 3 Fasten the parts as before in order WKH IL LQJ SODWH ĺ WKH SDUWLWLRQ SODWH RI HYDSRUDWRU ĺ UDLQ SDQ ĺ 8Q...

Page 98: ...s removed Ø4 x 10 2 pcs 4 The screw of the partition plate is removed while holding the heat exchanger the partition plate is removed Ø4 x 10 4 pcs 5 The screw of the heat exchanger on the partition plate and the other side is removed while holding the heat exchanger and the heat exchanger is removed 2 Attachment 1 Attach as before in heat exchanger 䊻㻌 sensor 䊻 piping support 䊻 drain pan 䊻 under p...

Page 99: ...rm the cooling cycle confirmation through the trial operation Replacement procedures CASE 1 Before replacement the indoor unit can be turned on and the setting data can be read out by wired remote control operation EEPROM data read out 1 Replacement of P C board for Indoor unit servicing and power on 2 Writing the read out EEPROM data 3 Power reset for all indoor units connected to the remote cont...

Page 100: ...utton to return to the normal stop status It takes approx 1 min until the remote controller operation is available again CODE No required at least 1 The CODE No for the Indoor unit type and Indoor unit capacity are required to set the rotation number setting of the fan 2 If the system indoor group addresses are different from those before replacement the auto address setting mode starts and the ma...

Page 101: ...Push SET button The operation completes if the setting data is displayed 4 Change the CODE No DN to by pushing buttons for the temperature setting 5 Select the capacity by pushing buttons for the timer setting For example AP027 Type is set to 0012 Refer to table 3 6 Push SET button The setting completes if the setting data are displayed Fig 1 RBC AMT32E B In case that power of the indoor units can...

Page 102: ...uttons for the temperature setting As described above check the setting data and modify to the data put down in 1 Step 8 Repeat the steps 6 and 7 Step 9 After the setting completes push TEST button to return to the normal stop status It takes approx 1 min until the remote control operation is available again The CODE No DN are ranged from to The CODE No DN is not limited to be serial No Even after...

Page 103: ...ing on Type 0000 standard 0099 Not determined 0002 2 C flooring installation type 0 0000 Heat pump Depending on model type Depending on capacity type 0099 Not determined 0099 Not determined 0099 Not determined Depending on Type 0003 3 deg Ts 1 5 0000 None 0000 Thermo ON 0000 Not available 0000 Body sensor 0000 Standard 0000 Available 0075 75 0001 Enable 0000 None Table 2 Type CODE No 10 Table 3 In...

Page 104: ... 104 FILE NO SVM 16042 11 EXPLODED VIEWS AND PARTS LIST 11 1 MMC AP0157HP1 E MMC AP0187HP1 E MMC AP0157HP1 TR MMC AP0187HP1 TR ...

Page 105: ...R FLAP 1 1 1 1 021 43T22327 ASM FAN CASE D 2 2 2 2 022 43T22328 ASM FAN CASE U 2 2 2 2 023 43T21443 MOTOR FAN 1 1 1 1 024 43T46431 VALVE PMV 1 1 1 1 025 43T46416 MOTOR PMV 1 1 1 1 026 43T47386 STRAINER 1 1 1 1 027 43T46417 SHEET PMV 1 1 1 1 028 43T60446 LEAD MOT 1 1 1 1 029 43T62349 GROMMET 1 1 1 1 030 43T62350 GROMMET 1 1 1 1 031 43T70317 ASM HOSE 1 1 1 1 032 43T83313 HOSE BAND 2 2 2 2 033 43T793...

Page 106: ...47 SENSOR ASSY SERVICE 2 2 2 2 402 43T60435 SERV TERMINAL 1 1 1 1 403 43T60362 TERMINAL 1 1 1 1 404 43T62348 COVER E BOX 1 1 1 1 405 43T50351 HOLDER TA 1 1 1 1 406 43T61317 BASE CLAMP 1 1 1 1 407 43T6V442 PC BOARD ASSY 1 1 1 1 408 43459017 ASM PCB OP 1 1 1 1 409 43T50476 SERVICE SENSOR 1 1 1 1 410 43T50477 SERVICE SENSOR 1 1 1 1 ...

Page 107: ... 107 FILE NO SVM 16042 11 2 MMC AP0247HP1 E MMC AP0277HP1 E MMC AP0247HP1 TR MMC AP0277HP1 TR ...

Page 108: ... 3 3 3 3 023 43T22328 ASM FAN CASE U 3 3 3 3 024 43T22323 BEARING 1 1 1 1 025 43T22324 COUPLING 1 1 1 1 026 43T22325 SHAFT 1 1 1 1 027 43T21444 MOTOR FAN 1 1 1 1 028 43T46414 VALVE PMV 1 1 1 1 029 43T46416 MOTOR PMV 1 1 1 1 030 43T47386 STRAINER 1 1 1 1 031 43T46417 SHEET PMV 1 1 1 1 032 43T60446 LEAD MOT 1 1 1 1 033 43T62349 GROMMET 1 1 1 1 034 43T62350 GROMMET 1 1 1 1 035 43T70317 ASM HOSE 1 1 1...

Page 109: ...47 SENSOR ASSY SERVICE 2 2 2 2 402 43T60435 SERV TERMINAL 1 1 1 1 403 43T60362 TERMINAL 1 1 1 1 404 43T62348 COVER E BOX 1 1 1 1 405 43T50351 HOLDER TA 1 1 1 1 406 43T61317 BASE CLAMP 1 1 1 1 407 43T6V442 PC BOARD ASSY 1 1 1 1 408 43459017 ASM PCB OP 1 1 1 1 409 43T50476 SERVICE SENSOR 1 1 1 1 410 43T50477 SERVICE SENSOR 1 1 1 1 ...

Page 110: ... 110 FILE NO SVM 16042 11 3 MMC AP0367HP1 E MMC AP0487HP1 E MMC AP0567HP1 E MMC AP0367HP1 TR MMC AP0487HP1 TR MMC AP0567HP1 TR ...

Page 111: ... 4 4 4 4 023 43T22323 BEARING 1 1 1 1 1 1 024 43T22324 COUPLING 1 1 1 1 1 1 025 43T22326 SHAFT 1 1 1 1 1 1 026 43T21445 MOTOR FAN 1 1 1 1 1 1 027 43T46415 VALVE PMV 1 1 1 1 1 1 028 43T46416 MOTOR PMV 1 1 1 1 1 1 029 43T47386 STRAINER 1 1 1 1 1 1 030 43T46417 SHEET PMV 1 1 1 1 1 1 031 43T60446 LEAD MOT 1 1 1 1 1 1 032 43T62349 GROMMET 1 1 1 1 1 1 033 43T62350 GROMMET 1 1 1 1 1 1 034 43T70317 ASM HO...

Page 112: ...ASSY SERVICE 2 2 2 2 2 2 402 43T60435 SERV TERMINAL 1 1 1 1 1 1 403 43T60362 TERMINAL 1 1 1 1 1 1 404 43T62348 COVER E BOX 1 1 1 1 1 1 405 43T50351 HOLDER TA 1 1 1 1 1 1 406 43T61317 BASE CLAMP 1 1 1 1 1 1 407 43T6V442 PC BOARD ASSY 1 1 1 1 1 1 408 43459017 ASM PCB OP 1 1 1 1 1 1 409 43T50476 SERVICE SENSOR 1 1 1 1 1 1 410 43T50477 SERVICE SENSOR 1 1 1 1 1 1 ...

Page 113: ...in multi air conditioners is 0 3kg m3 NOTE 1 If there are 2 or more refrigerating systems in a single refrigerating device the amounts of refrigerant should be as charged in each independent device For the amount of charge in this example The possible amount of leaked refrigerant gas in rooms A B and C is 10kg The possible amount of leaked refrigerant gas in rooms D E and F is 15kg NOTE 2 The stan...

Page 114: ...TOSHIBA CARRIER THAILAND CO LTD 144 9 MOO 5 BANGKADI INDUSTRIAL PARK TIVANON ROAD TAMBOL BANGKADI AMPHUR MUANG PATHUMTHANI 12000 THAILAND ...

Reviews: