background image

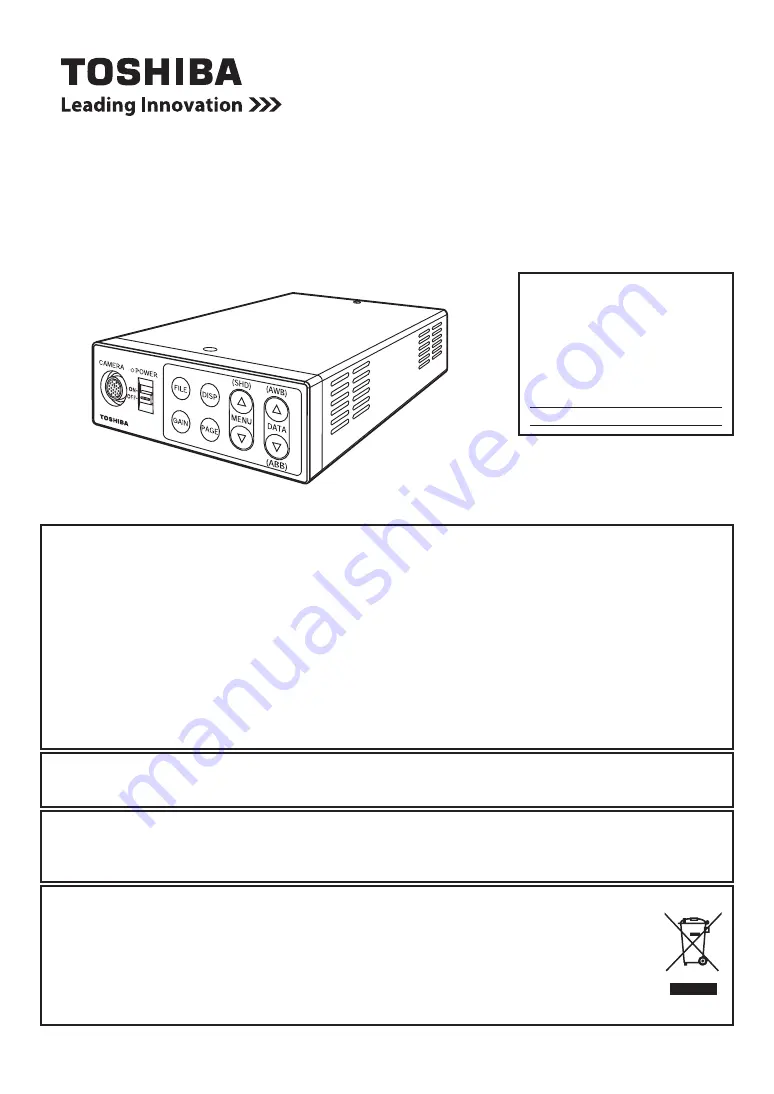
CAMERA CONTROL UNIT

IK-HD2E

INSTRUCTION MANUAL

FCC NOTICE

This equipment has been tested and found to comply with the limits for a Class A digital device, pursu-
ant to Part 15 of the FCC Rules. These limits are designed to provide reasonable protection against 
harmful interference when the equipment is operated in a commercial environment. This equipment 
generates, uses, and can radiate radio frequency energy and, if not installed and used in accordance 
with the instruction manual, may cause harmful interference to radio communications. Operation of this 
equipment in a residential area is likely to cause harmful interference in which case the user will be 
required to correct the interference at his own expense.

USER-INSTALLER CAUTION: Your authority to operate this FCC verified equipment could be voided if 
you make changes or modifications not expressly approved by the party responsible for compliance to 
Part 15 of the FCC Rules.

Canada ICES-003 Compliance Lable:

CAN ICES-3 A/NMB-3A

Following information is only for EU-member states:

In residential areas this product may cause radio interference, therefore this product must not be used 
in residential areas.

This manual is made from recycled paper.

For Customer Use

Enter below the Serial No. 
w h i c h   i s   l o c a t e d   o n   t h e  
bottom of the cabinet. Retain 
this information for future ref-
erence.
Model No.:   IK-HD2E
Serial No.:

Following information is only for EU-member states:

The use of the symbol indicates that this product may not be treated as household waste.  
By ensuring this product is disposed of correctly, you will help prevent potential negative 
consequences for the environment and human health, which could otherwise be caused by 
inappropriate waste handling of this product. For more detailed information about the take-
back and recycling of this product, please contact your supplier where you purchased the 
product or consult.

Summary of Contents for IK-HD2E

Page 1: ...ions not expressly approved by the party responsible for compliance to Part 15 of the FCC Rules Canada ICES 003 Compliance Lable CAN ICES 3 A NMB 3A Following information is only for EU member states In residential areas this product may cause radio interference therefore this product must not be used in residential areas This manual is made from recycled paper For Customer Use Enter below the Ser...

Page 2: ...ropping invasion of foreign objects etc may result in fire and or electrical shock Immediately disconnect the power source and contact your dealer Avoid installing in a shower room or a bathroom This may result in fire and or electrical shock Do not operate in places where the product may get wet This may result in fire and or electrical shock Do not repair disassemble and or modify by yourself Th...

Page 3: ... by the camera without permission from the copyright holder Please also note that transfer of an image or file covered by copyright is restricted to use within the scope permitted by the Copyright Law Protection of Personal Information Note the following instructions when installing 5 Do not cover the product with any material 5 Do not place the product on any inflammable material such as a carpet...

Page 4: ...hanging gain in MANUAL mode 4 PROCESS 4 1 Changing gamma correction ON OFF 4 2 Changing gamma correction level 4 3 Changing black gamma correction level 6 6 7 8 9 9 10 10 10 11 11 12 14 14 15 16 16 17 17 18 20 20 21 21 21 22 22 23 24 25 25 25 26 TABLE OF CONTENTS Limitation of Usage The product is not designed for any critical applications Critical applications means life support systems exhaust o...

Page 5: ... 30 7 6 Changing RS232C baud rate 8 Setting USER area 30 7 7 Changing OSD OUTPUT mode 30 31 2 External sync frequency range 3 Using the unit with external sync signal 3 1 H Horizontal phase adjustment 7 4 Synchro Scan Operation 1 Setting by 1H 8 BEFORE MAKING A SERVICE CALL 9 SPECIFICATIONS 10 EXTERNAL APPEARANCE DIAGRAM 32 32 32 32 32 33 34 35 9 Returning to factory settings 7 3 External Sync 1 E...

Page 6: ...g or storing the camera in the fol lowing places Installation without a tripod Do not drop jolt or vibrate as this may result in damage to the unit and cause problems Treat the camera cables carefully to prevent cable problems such as breaks in the cable and loose connections Keep the camera head and protection cap away from children as they may pose a choking hazard The protection cap protects th...

Page 7: ...ET E USER USER area is possible to set in 64 zones PRESET A ATW R PAINT 10 0 10 0 ATW B PAINT 10 0 10 0 MANUAL R GAIN 100 0 100 0 MANUAL B GAIN 100 0 100 0 Gamma correction ON OFF ON Gamma correction level 10 0 10 0 Black gamma correction level LOW NORMAL HIGH NORMAL Detail gain 7 OFF 0 7 0 Master pedestal 200 0 200 0 Red pedestal 100 0 100 0 Blue pedestal 100 0 100 0 Digital noise reduction DNR O...

Page 8: ...minates to indicate the unit is powered on 䐘 POWER switch Turns power on or off 䐙 FILE button To switch the scene files 䐚 GAIN button To change the gain mode 䐛 DISP button Changes the display mode 䐜 PAGE button To switch and select menus 䐝 MENU UP䟺SHD䟻button To select the function to be confirmed or changed on the menu Also used when performing auto shading correction 䐞 MENU DOWN SHD button To sel...

Page 9: ...terminal for HD SDI format video signal BNC connector 䐩KEY LOCK switch Enables disables buttons FORMAT switch Switches between 59 94i and 50i 䐙 to 䐠 Lens option IK HD1H 䟺option䟻 Camera Control unit Camera Cable for IK HD2E 䟺option䟻 HD monitor analog TV option DC power supply option DC power supply option DC IN 12V Y PB PR Three Coaxial Cables 75 option 䂿 IK HD2E 5 CONNECTION 5 5 1 1 Analog Connect...

Page 10: ...d to it 䝿 For DC power supply connecting to DC IN 12V terminal use UL listed and or CSA approved ungrounded type AC adaptor with the specifications described below Power supply voltage 䠌 12V DC 㼳10 Current rating 䠌 More than 1 5A Ripple voltage 䠌 Less than 50mV p p Connector 䠌 HR10A 7P 4S by HIROSE electronics Co Ltd Pins 1 2 䠌 12V Pins 3 4 䠌 GND 䝿 If the securing screw on the connector of the cam...

Page 11: ...iris 䝿 If the color bar pattern is displayed on the screen or if the index menu menu is displayed press the DISP button to disable the color bar pattern or the character display 䝿 Hold the DATA DOWN button for approx 1 second 䝿 When the black balance adjustment operation starts the character ABB blinks on the screen 䝿 When the black balance adjustment operation finishes the character ABB stops bli...

Page 12: ...e 䐖 AWB Automatic White Balance 䝿 Set the MODE to AWB on the WHT BAL menu Perform the C TEMP color temperature conversion setting if necessary Refer to the item 7 2 3 WHT BAL White Balance 3200K䠌Appropriate for indoor shooting 5600K䠌Appropriate for outdoor shooting 䝿 If the color bar pattern is displayed on the screen or if the index menu menu is displayed press the DISP button to disable the colo...

Page 13: ...th the C TEMP set to 3200K change the illumination or use a color temperature conversion filter AWB NG C TEMP HIGH Automatic white balance adjustment cannot be performed because the color temperature is too high If the C TEMP is set to 3200K set to 5600K If the message appears with the C TEMP set to 5600K change the illumination or use the color temperature conversion filter AWB NG Automatic white...

Page 14: ...3 84 8 8 7 6 4 1 1 46 3 9782 38 4 8 93 8 9842 8 3 438641 39 1 24 7 6 564 1 8 8 24 43 8 2 39 6 84 8 8 2 4 3 䐖 9842 8 3 438641 3 8 498598 7 14 3 7 9842 8 11 978 84 79 8 1 4 1 1 2 292 19 4 3 7 3 3 7 8 642 84 3 78 57 6 84 8 8 2 3 3 8 2 292 3 3 9842 8 3 438641 24 4 1 1 5 0 6 19 6 8 4 3 2 796 2 38 1 8 6 6 1 30 84 8 7 88 3 43 8 9842 8 7 988 6 6 84 8 8 2 3 3 8 7 88 3 3 24 䐗 39 1 3 3 9782 38 7 5 6 462 43 8...

Page 15: ...c shading correction operation finished however the correction necessary exceeds the camera s range so the maximum possible value is applied SHD NG LEVEL LOW Automatic shading correction cannot be performed because the video level is too low Adjust the video level by increasing the illumination or opening the lens iris SHD NG LEVEL HIGH Automatic shading correction cannot be performed because the ...

Page 16: ...ttons A menu is selected when pushing the PAGE button after moving the 䊲 on the screen by the MENU UP MENU DOWN button while the Index menu is displayed 7 MODE SETTING BY THE ON SCREEN DISPLAY 7 1 Using the Menus USER USER Area menu DATA UP DOWN DATA UP DOWN The screen is changed to the area screen by selecting AUTO in the 1 SHUTTER menu and AWB in the 3 WHT BAL menu in the setting screen For more...

Page 17: ...ata Up Down buttons to select the Shutter Mode AUTO MANUAL SS AUTO 䠌 The exposure time is controlled automatically to obtain the video level set MANUAL 䠌 It is possible to select the exposure time from eleven speed settings OFF 1 60s 1 100s 1 125s 1 250s 1 500s 1 1000s 1 3000s 1 5000s 1 10000s 1 30000s 1 50000s Note When setting a rapid shutter speed sensitivity degrades according to the speed Whe...

Page 18: ...P MENU DOWN buttons 䐗 Select the video level by pushing DATA UP DATA DOWN buttons DATA UP 㻃㻃㻃㻃㻃㻃㻃㻃The value increases by pushing 100 0 100 The value decreases by pushing 㻃㻃㻃㻃 DATA DOWN b Changing the automatic shutter detection ratio between peak and average value 䐖 Move the 䊲 to PEAK AVE by pushing MENU UP MENU DOWN buttons 䐗 Select the ratio between peak and average value by pushing DATA UP DATA...

Page 19: ...of the measurement light area selected by the automatic shutter 䐖 Set the 䊲 to AREA DISP by pushing MENU UP MENU DOWN buttons 䐗 Area screen appears by pushing DATA UP DATA DOWN buttons When AREA is set to USER the setting can be changed on the area menu When changing the area refer to the item 7 2 8 Setting USER area 䐘 Push the DISP button to return to the menu 䠭DATA UP䠯 PRESET A PRESET B PRESET C...

Page 20: ...s 1 1000s 1 3000s 1 5000s 1 10000s 1 30000s 1 50000s 䠭DATA DOWN䠯 Move up and down by pushing MENU UP DOWN Select the desired value by pushing DATA UP DOWN 䟺 䟺 䟺 䟺1䠀 䠀 䠀 䠀3䟻 䟻 䟻 䟻 Changing the setting in SS Synchro Scan mode Shutter mode AUTO MANUAL SS 1 SHUTTER FILE A Synchro scan setting MODE SS 1 1125H 560 1125H OFF SYNCHRO SCAN OFF MODE SS a Changing the shutter speed setting 䐖 Move the 䊲 to SY...

Page 21: ...DOWN buttons 䐗 Select the desired value of automatic maximum gain by pushing DATA UP DATA DOWN buttons 䠭DATA UP䠯 0dB 18dB 䠭DATA DOWN䠯 䟺 䟺 䟺 䟺2䠀 䠀 䠀 䠀2䟻 䟻 䟻 䟻 Changing gain in MANUAL mode 2 GAIN FILE A Gain mode AUTO MANUAL OFF MODE MANUAL MANUAL 0dB Manual gain setting 0dB to 18dB 1dB step 䐖 Move the 䊲 to MANUAL by pushing MENU UP MENU DOWN buttons 䐗 Select the desired value of manual gain by push...

Page 22: ...to C TEMP by pushing MENU UP MENU DOWN buttons 䐗 Select either 3200K or 5600K by pushing DATA UP DATA DOWN buttons b Changing R PAINT 䐖 Move the 䊲 to R PAINT by pushing MENU UP MENU DOWN buttons 䐗 Select the desired value of red paint by pushing DATA UP DATA DOWN buttons 䠭DATA UP䠯 Red is increased 䟿10 0 10 Red is decreased 䠭DATA DOWN䠯 c Changing B PAINT 䐖 Move the 䊲 to B PAINT by pushing MENU UP M...

Page 23: ...sed 䠭DATA DOWN䠯 The available picture area is shown by the shading correction on the screen that is divided into 64 parts PRESET A PRESET B PRESET D PRESET C PRESET E USER Custom Selection Move up and down by pushing MENU UP DOWN Select the desired value by pushing DATA UP DOWN e Confirming the contents of the zone area selected by AWB 䐖 Set the 䊲 to AREA DISP by pushing MENU UP MENU DOWN buttons ...

Page 24: ...s 䠭DATA UP䠯 Red is increased 䟿10 0 10 Red is decreased 䠭DATA DOWN䠯 2 Changing the blue gain 䐖 Move the 䊲 to B GAIN by pushing MENU UP MENU DOWN buttons 䐗 Select the desired value of blue gain by pushing DATA UP DATA DOWN buttons 䠭DATA UP䠯 Blue is increased 䟿10 0 10 Blue is decreased 䠭DATA DOWN䠯 Move up and down by pushing MENU UP DOWN Select the desired value by pushing DATA UP DOWN b Changing B P...

Page 25: ...l setting 100 to 100 Red pedestal setting 100 to 100 Blue pedestal setting 100 to 100 Menu when GAMMA OFF is selected 䟺 䟺 䟺 䟺4䠀 䠀 䠀 䠀2䟻 䟻 䟻 䟻 Changing gamma correction level 䐖 Move the 䊲 to GAMMA by pushing MENU UP MENU DOWN buttons 䐗 Select the desired value of gamma correction level by pushing DATA UP DATA DOWN buttons 䠭DATA UP䠯 Correction amount becomes larger 䟿10 0 10 Correction amount becomes...

Page 26: ...䠄4䠊 䠊 䠊 䠊6䠅 䠅 䠅 䠅 Changing DNR Digital Noise Reduction 䐟 Move the 䊻 to DNR by pushing MENU UP MENU DOWN buttons 䐠 Select either ON or OFF by pushing DATA UP DATA DOWN buttons Note When DNR is set to ON noise is reduced but shooting a fast moving object may affect the video clarity b Changing R PED red pedestal a Changing master pedestal 䐟 Move the 䊻 to R PED by pushing MENU UP MENU DOWN buttons 䐠 ...

Page 27: ...ain setting Magenta gain setting 䟺 䟺 䟺 䟺5䠀 䠀 䠀 䠀1䟻 䟻 䟻 䟻 Changing Matrix color correction ON OFF 䐖 Move the 䊲 to MATRIX by pushing MENU UP MENU DOWN buttons 䐗 Select either ON or OFF by pushing DATA UP DATA DOWN buttons 䟺 䟺 䟺 䟺5䠀 䠀 䠀 䠀2䟻 䟻 䟻 䟻 Changing MATRIX setting 䐖 Move the 䊲 to the desired item by pushing MENU UP MENU DOWN buttons 䐗 Select the desired value of color by pushing DATA UP DATA DO...

Page 28: ... FILE A H PHASE 650 to 650 MODE EXT H PHASE 0 a Adjusting horizontal phase 䐖 Move the 䊲 to H PHASE by pushing MENU UP MENU DOWN buttons 䐗 Select the desired value of horizontal phase by pushing DATA UP DATA DOWN buttons 䠭DATA UP䠯 䟿650 0 650 䠭DATA DOWN䠯 If the phase difference is big keep pressing DATA UP DATA DOWN button for a while This will make the setting change by increments of ten Move up an...

Page 29: ...7䠀 䠀 䠀 䠀2䟻 䟻 䟻 䟻 Changing shading correction mode 䐖 Move the 䊲 to SHADING by pushing MENU UP MENU DOWN buttons 䐗 Select SET MANUAL or OFF by pushing DATA UP DATA DOWN buttons 䟺 䟺 䟺 䟺7䠀 䠀 䠀 䠀3䟻 䟻 䟻 䟻 Changing manual shading correction mode 䐖 Move the 䊲 to MANUAL by pushing MENU UP MENU DOWN buttons 䐗 Select the desired value of manual shading correction by pushing DATA UP DATA DOWN buttons 䠭DATA UP...

Page 30: ...r is selected at OUTPUT RGB SYNC change cannot be adjusted 7 OPTION FILE A 8 9 䟿126 125 OUTPUT RGB 232 7400 17200 RGB SYNC G SHADING OFF DTL OUT OFF BAUD RATE 9600bps OSD OUTPUT ALL ON 䟺 䟺 䟺 䟺7䠀 䠀 䠀 䠀6䟻 䟻 䟻 䟻 Changing RS232C baud rate 䟺 䟺 䟺 䟺7䠀 䠀 䠀 䠀7䟻 䟻 䟻 䟻 Changing OSD OUTPUT mode 䐖 䊲 䐗 7400 17200 䐖 䐗 㻃㻃䟼㻃 9 9 9 9 5 2 6 ...

Page 31: ...utomatic shutter and 7 2 3 1 e Confirming the contents of the measurement light area selected by AWB The display 㼏㼡㼞㼟㼛㼞 blinking moves up down right and left by pushing MENU UP MENU DOWN DATA UP DATA DOWN buttons 䐡 Select ON OFF for the zone Select ON effective or OFF ineffective by pushing PAGE button When ON is selected the display appears on the screen and when OFF is selected turns off 䐢 Push ...

Page 32: ...scilloscope and adjust H phase so that the H phases match Match the phase External Sync signal Camera Sync output H 33 716 䠽Hz 㼳 35 ppm V 59 94 Hz 㼳 35 ppm H 28 125 䠽Hz 㼳 35 ppm V 50 Hz 㼳 35 ppm The shutter speed can be set by the horizontal scanning period 1H 1 Setting by 1H 1 1125H to 560 1125H stands for the setting by the 1H and the shutter speed can be set by the 1H 7 4 Synchro Scan Operation...

Page 33: ...nected correctly 䡗 Is the shutter mode set correctly 䡗 Is the monitor on and in working condition Poor color 䡗 Is the monitor adjusted correctly 䡗 Is the white balance of the camera adjusted correctly in modes other than automatic tracking 䡗 Is the matrix color correction set correctly 䡗 䡗 Is the illumination sufficient Noise appears Is the camera cable connected securely 8 BEFORE MAKING SERVICE C...

Page 34: ...2 2 sensitivity䟽18 dB䟻 SN ratio 56 dB standard gain 0 dB DNR OFF Ambient temperature 32㼲 㼲 F to 40 0 F to 104 䉔 䉔 Ambient humidity Less than 90 non condensing Weight Approx 730 g 1 61 lbs External dimension 4 33 W 㽙1 57 H 㽙7 32 D excluding protrusions 110 W 㽙40 H 㽙186 D mm Scene file user memories 5 files A B C D E White balance ATW䟺Automatic tracing white balance䟻 AWB䟺Automatic white balance䟻㻏 MA...

Page 35: ...35 Unit mm inch 10 EXTERNAL APPEARANCE DIAGRAM 㻗㻗㻑㻙㻃㻾㻔㻑㻚㻙㼀 㻗㻓㻃㻾㻔㻑㻘㻛㼀 㻔㻛㻙㻃㻾㻚㻑㻖㻕㼀 㻔㻔㻓㻃㻾㻗㻑㻖㻖㼀 㻔㻛㻑㻛㻖 㻾㻓㻑㻚㻗㼀 㻙㻕㼳㻓㻑㻔㻃㻾㻕㻑㻗㻗㼳㻓㻑㻓㻓㻗㼀 㻗㻐㻰㻖㻃㻥㻧 㻕㻚㻃㻾㻔㻑㻓㻙㼀 㻔㻖㻜㼳㻓㻑㻔㻘㻃㻾㻘㻑㻗㻚㻕㼳㻓㻑㻓㻓㻙㼀 Front Rear ...

Page 36: ...36 Memo ...

Page 37: ... ANY DIRECT OR INDIRECT DAMAGES LOST PROFITS LOST SAVINGS OR OTHER SPECIAL INCIDENTAL EXEMPLARY OR CONSEQUENTIAL DAMAGES WHETHER FOR BREACH OF CONTRACT TORT OR OTHERWISE OR WHETHER AN ASP HAS BEEN ADVISED OF THE POSSIBILITY OF SUCH DAMAGES OR OF ANY CLAIM BY ANY OTHER PARTY SOME STATES DO NOT ALLOW THE EXCLUSION OR LIMITATION OF INCIDENTAL OR CONSEQUENTIAL DAMAGES FOR SOME PRODUCTS SO THE ABOVE LI...

Reviews: