background image

42

EN

Section 7 

 AIR10 Connect Program

Advanced Operation on Your Computer - AIR10 Connect

The camcorder can connect to your computer via WiFi or USB. Once you launch the [AIR10 Connect] 

application (for Windows

®

 based systems only) on your computer, it will search for your camcorder and 

connect to it. Then, you can operate more functions on your computer. 

There are several functions as below:

Transfer the files from the camcorder. ( 

• 


 )

Watch live streaming video from the 

• 

camcorder on your computer. 

 )

Use the camcorder as a wireless webcam for online video chatting. 

• 

 )

Configure your account information of the social web sites and save to the camcorder.

• 

 )

Synchronize the WiFi profile with your camcorder and set up a security password for opening [AIR10 

• 

Connect] application via Wi-Fi connection.( 

 )

Installing [AIR10 Connect]

To connect to the camcorder and launch [AIR10 Connect] application via WiFi correctly, you have 

to install this program firstly. It is a perfect platform for you to watch live streaming video from your 

camcorder and use the camcorder as a webcam for your online video chatting. The application also 

facility the configuration of the WiFi profiles and your social website account information.

Follow the steps below to install the [AIR10 Connect] on the computer. The program pack is bundled in 

the

camera and on the CD as backup.

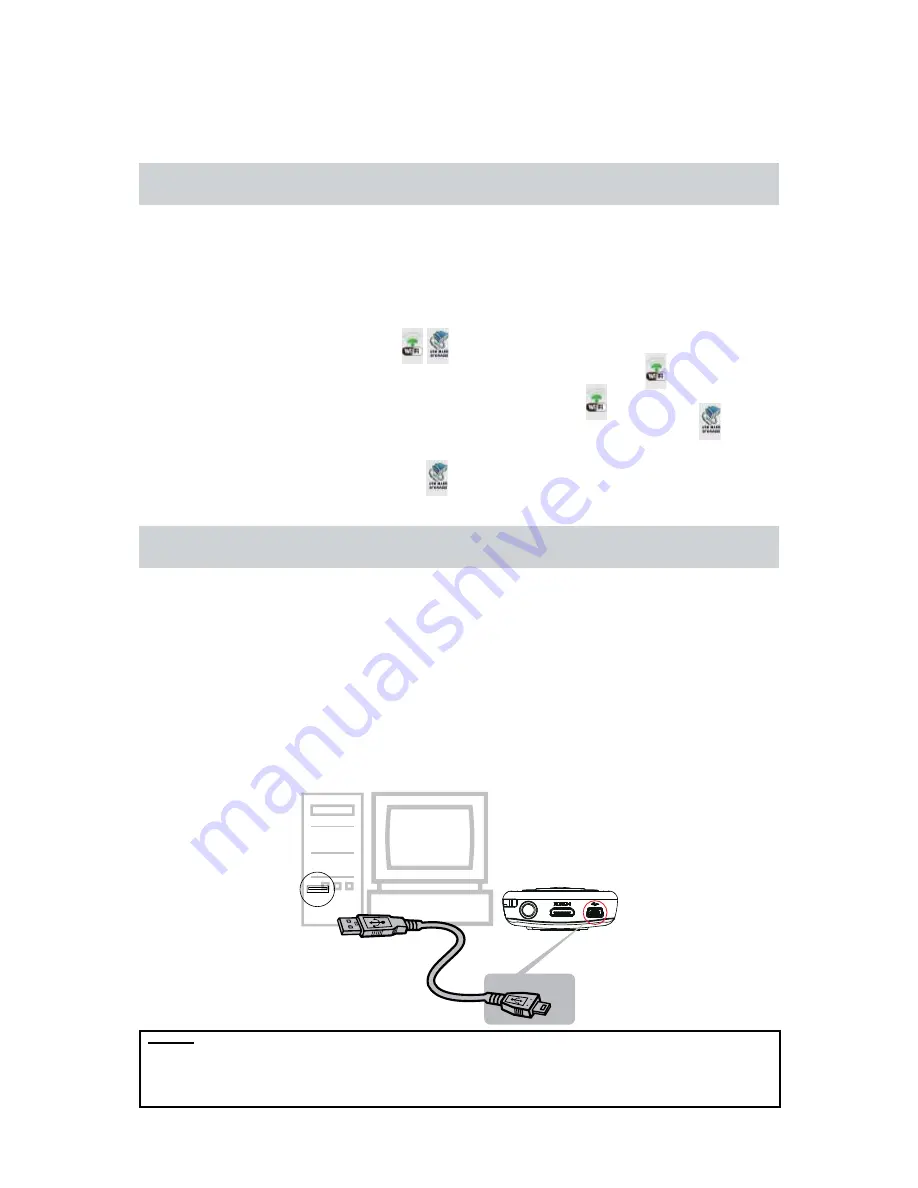
1. Connect the camcorder to your computer by using the supplied USB cable.

Via CD

Insert the 

1. 

bundled CD into your computer’s CD-ROM drive. The autorun screen appears.

Click on [ Install AIR10 Connect] to install the application.

2. 

Summary of Contents for CAMILEO AIR10

Page 1: ...User s Manual CAMILEO AIR10 ...

Page 2: ...Introduction Welcome and thank you for choosing a TOSHIBA product For your convenience your TOSHIBA product is furnished with two guides a a Quick Start Guide and b this comprehensive PDF User s Manual ...

Page 3: ...iew 9 Section 2 Getting Started 10 Loading the Battery 10 Charge your battery 10 Inserting and Removing an SD Card Optional 11 Turning the Camcorder On and Getting Started 12 Turning the Camcorder Off 12 Section 3 Record Mode 13 Button Function 13 LCD Monitor Information 14 Video Recording 16 Photo Recording 16 Using Digital Zoom 16 Options for Menu 17 Operations 17 Video Setting 18 Photo Setting ...

Page 4: ...ial Web Site 36 Broadcast live streaming on USTREAM 40 Section 7 AIR10 Connect Program 42 Advanced Operation on Your Computer AIR10 Connect 42 Installing AIR10 Connect 42 Using AIR10 Connect via WiFi Connection Infrastructure Mode 44 Using AIR10 Connect via USB Connection 47 Section 8 Viewing Photos and Videos on TV 50 Connecting to a High Definition 16 9 Wide TV 50 Section 9 Viewing Photos and Vid...

Page 5: ...tion 10 Specifications 52 Section 11 Troubleshooting 53 Section 12 Other Information 55 TOSHIBA Support 55 Operating Environment Conditions 55 Regulatory Information 55 Additional Information 58 About the battery pack 58 ...

Page 6: ...er and monitor live video from your camcorder ISO sensitivity and color balance can either be adjusted automatically or changed manually A 5 digital zoom helps you to control over the videos and photos you take The built in memory allows you to take photos and to record videos without a memory card The memory card slot allows users to increase the storage capacity Note Partial memory of the built ...

Page 7: ...or distortion 8 Use only the accessories supplied by the manufacturer 9 Keep the camcorder out of the reach of infants 10 Risk of explosion if battery is replaced by an incorrect type 11 Dispose of used batteries according to the instructions 12 System Requirements OS Microsoft Windows XP Vista 7 Hardware Intel AMD Dual Core CPU or above 1GB System memory and free 2GB System hard disk space 4x CD ...

Page 8: ...8 EN Front View MENU OK LCD Screen Return Exit Button Playback Button Tele Up Button Thumbnail Button Wide Down Button Delete Button Right Button Left Button Menu OK Button Video Button Photo Button ...

Page 9: ...9 EN Side View Bottom View Strap Hook Tripod Socket HDMI Port Mini USB 2 0 Port Speaker Lens Power Button Indicator light SD card Cover Battery Cover WiFi Button Internet Button Light Microphone ...

Page 10: ... battery You must use the supplied AC charger or the USB cable The camcorder must be turned OFF A blinking light will indicate active charging and a solid light indicates that charging is complete In AC charging Mode the full charge time is about 4 hours and the light will turn itself off automatically after 3 5 minutes when the charging is completed Actual charging time may vary It depends on the...

Page 11: ...an installed SD card press the card inwards to release it 2 When the card pops out gently remove it from its slot 3 Recommended memory capacity 1GB or above 4 Note When a memory card is fitted videos photos are saved on the card rather than on the built in memory Protecting Data on an SD Card SD Card is read only when it is locked No photos or videos can be recorded when the SD card is locked Make ...

Page 12: ...ideo In Record Mode press Video Button to record videos To stop recording press it again To take a photo In Record Mode press Photo Button to take photo To view stored videos and photos Press Playback Button to switch to the Playback mode Turning the Camcorder Off To turn off the camcorder Press Power Button for one second to turn off 2 ...

Page 13: ...1 Exit 2 MENU OK Tele Up Button Zoom In 1 Move between the option items 2 Wide Down Button Zoom Out 1 Move between the option items 2 Left Button Move between the option items 1 Right Button Move between the option items 1 Menu OK Button Menu ON 1 Validate the setting 2 Power Button Press down for one second to turn on or turn off the camcorder 1 WiFi Button Press to turn on off WiFi 1 Internet Bu...

Page 14: ...CD when videos and photos are recorded 1 Battery full power Battery medium power Battery low power Battery empty power DC power mode 2 Video Resolution FULL HD 1080 30 HD 720 60 HD 720 30 VGA 480 30 Photo Resolution High 16MP Standard 5MP Low 3MP 3 Digital Light On Light On ...

Page 15: ...rding time 25 The amount of photos that can still be taken at current resolution 321 Number of current photo 7 Motion Detection Video Record Mode Only 8 Zoom meter 1 5 5 Digital zoom Note Filter Black White Classic Negative can be previewed immediately without the indicator on the LCD screen Motion Detect and Zooming functions cannot be used simultaneously ...

Page 16: ...0x1080p 30 HD 720 60 1280x720p 60 HD 720 30 1280x720p 30 VGA 480 30 640x480p 30 Photo Recording In Photo Record Mode press the Photo Button to take photos Press the Playback Button to view the photos Three resolution settings are available Image Quality High 16 Mega Pixels 4608 x 3456 Standard 5 Mega Pixels 2592 x 1944 Low 3 Mega Pixels 2048 x 1536 Using Digital Zoom The digital zoom magnifies imag...

Page 17: ...information about Setup Please refer to Section 6 for the detailed information about WiFi Operations Operation Screen Press the Menu OK Button in the Record Mode 1 The main menu will show on the screen The options are Video Setting Photo Setting Effects 2 Setup and WiFi Use the Direction Button to select the desired option 3 and then press the OK Button to enter the submenu Use the Direction Butto...

Page 18: ... Light You can select the mode to brighten the area or to extend the brightness of the objects On The light will be turned on and provides light when recording Off The light is turned off Digital Light Extend the dynamic range for backlight and high contrast sense so that the objects will be brighter and clearer Operation Display Screen In the Video Setting menu select the Light 1 icon and then pr...

Page 19: ... the OK Button to enter its setting menu Select the desired option 2 and then press the OK Button to validate the setting Or press the Playback Button select the 3 Return icon to exit Stabilization Record with an effect of reducing the camcorder shake to result in more stable video Operation Display Screen In the Video Setting menu select the 1 Stabilization icon and then press the OK Button to en...

Page 20: ...s the Playback Button select the 3 Return icon to exit The camcorder will begin recording automatically 4 if movement is detected It stops recording when movement stops Continuous Play This option allows you to playback files continuously Operation Display Screen IntheVideoSettingmenu selectthe 1 Continuous Play icon and then press the OK Button to enter its setting menu Select the desired option 2...

Page 21: ...ings Light You can select the mode to brighten the area or to extend the brightness of the objects On The light will be turned on and provides light when recording Off The light is turned off Digital Light Extend the dynamic range for backlight and high contrast sense so that the objects will be brighter and clearer Operation Display Screen In the Photo Setting menu select the Light 1 icon and the...

Page 22: ...en press the OK Button to validate the setting Or press the Playback Button select the 3 Return icon to exit Self Timer The self timer allows you to take photos with a ten second time delay The Indicator light on the rear of the camcorder will also blink The speed of blinking will increase just before the photo is taken Operation Display Screen In the Photo Setting menu select the Self 1 Timer ico...

Page 23: ...ing Or press the Playback Button select the 3 Return icon to exit In Record Mode aim the camcorder at the 4 face s The face frame s will appear around the face Date Printing Imprint the date and time on the photo Operation Display Screen In the Photo Setting menu select the Date 1 Printing icon and then press the OK Button to enter its setting menu Select the desired option 2 and then press the OK...

Page 24: ... then press the OK Button to validate the setting Or press the Playback Button select the 3 Return icon to exit Note The image may become grainy with a higher ISO setting Slideshow Photos can be viewed one after another in a slideshow in a chosen interval of time 2 Seconds Display one photo every 2 seconds 5 Seconds Display one photo every 5 seconds 10 Seconds Display one photo every 10 seconds OF...

Page 25: ...tomatic adjustment Skin Shoot with an effect that makes skin tones more natural Night Use Night Mode for night scenes or low light conditions Backlight You can take shots when the bright light is behind the subject Operation Display Screen In the Effects menu select the Scene icon 1 and then press the OK Button to enter its setting menu Select the desired option 2 and then press the OK Button to v...

Page 26: ...tton to validate the setting Or press the Playback Button select the 3 Return icon to exit White Balance The camcorder adjusts the color balance of images automatically Three manual white balance settings are available Auto The camcorder automatically adjusts white balance Daylight Under outdoor condition Fluorescent Under fluorescent light condition Tungsten Under tungsten light condition Operatio...

Page 27: ...n Return to the previous screen 1 Exit 2 MENU OK Tele Up Button Go to the video photo thumbnail screen 1 When playing video press to increase volume 2 Wide Down Button Go to the delete screen 1 When playing video press to decrease volume 2 Left Button Go to the previous video photo 1 Right Button Go to the next video photo 1 Menu OK Button In Video Playback mode press to play pause the video 1 Val...

Page 28: ...k Mode Video Playback Mode Photo Playback Mode 1 Battery full power Battery medium power Battery low power Battery empty power DC power mode 2 Video Resolution FULL HD 1080 30 HD 720 60 HD 720 30 VGA 480 30 Photo Resolution High 16MP Standard 5MP Low 3MP 3 WiFi signal strength ...

Page 29: ... memory or on an SD Card Operation Display Screen In Video Record Mode press the Playback 1 Button to switch to the Video Playback Mode In Photo Record Mode press the Playback 1 Button to switch to the Photo Playback Mode Press the 2 Tele Up Button to go to the video photo thumbnail screen of videos and photos In 3 the thumbnail screen of videos and photos select the file and then press the OK Butt...

Page 30: ...ideo 4 press the Right Left Button to fast forward rewind then press the OK Button to stop Use the 5 Tele Up Wide Down Button to adjust the volume Press the Internet Button to select the current 6 video to upload to Internet Photo Playback Operation Display Screen In the 1 Photo Playback Mode use the Right Left Button to go to the next previous photo Press t 2 he OK Button to pause the slideshow P...

Page 31: ...ete screen Select 2 to delete the current file and then select to delete it Select to cancel and exit Select 3 to delete all files and select to delete them Select to cancel and exit Or 4 press the Return Exit Button to cancel the operation and exit Note Videos and Photos on a written protected memory card cannot be deleted ...

Page 32: ...ring your camcorder setup They are Menu Sound operation sound TV Language Time Setting Format Default Setting and Information shows the information of this camcorder Menu Sound Enable or disable the keypad tone and the operation sound Operation Display Screen In the 1 Setup menu select the Menu Sound icon and then press the OK Button to enter its setting menu Select the desired option 2 and then p...

Page 33: ...en press the OK Button to enter its setting menu Select the desired option 2 and then press the OK Button to validate the setting Or press the Playback Button select the 3 Return icon to exit Language Use this option to select the language of the user interface Operation Display Screen In the 1 Setup menu select the Language icon and then press the OK Button to enter its setting menu Select the de...

Page 34: ...ry or the SD card Yes Format the built in memory When there is no SD card in the camcorder SD card When there is an SD card in the camcorder No Do not format the built in memory When there is no SD card in the camcorder SD card When there is an SD card in the camcorder Operation Display Screen In the 1 Setup menu select the Format icon and then press the OK Button to enter its setting menu Select ...

Page 35: ...e Playback Button select the 3 Return icon to exit Note The WiFi setting such as profile of access points and account information of the websites will be erased The following table indicates the camcorder s default settings Setting Default Factory Setting Resolution Full HD 1080 30 for Video Standard 5M for Photo Light Off Stabilization On Motion Detection Off Continuous Play Off Self Timer Off Fac...

Page 36: ...eb Site Follow the step to connect to an available AP successfully Operation Screen Press the WiFi Button 1 The camcorder scans the available access point AP device and connects to it automatically You can also select the available access point Network manually by selecting WiFi in the Menu Mode If the 2 available AP Network requires the password or its profile is not saved yet the AP list shows on...

Page 37: ...the connection is 10 established the signal strength will show on the top of the screen The screen shown CONNECTION FAILED indicates 11 the camcorder does not connect to the AP Note This camcorder only supports the AP SSID named in English number symbols ASCII characters The possible reasons for CONNECTION FAILED could be 1 wrong password 2 you are not in the wireless network area of the AP 3 the ...

Page 38: ...bsites Operation Screen Press the Internet Button 1 The camcorder automatically connects to the network Some network require the authentication from the 2 network service provider NSP Please follow the instruction on the screen pressing the OK Button Return button or contact with the network service provider ...

Page 39: ...ing application Select the website you want to upload 6 Before you upload the file to the social website you have to set up your social website account information on the AIR10 Connect application and save to your camcorder please refer to next section for the detail Select the file you want to upload and then press 7 the OK Button to confirm it During uploading the status bar shown as the 8 screensh...

Page 40: ...ote If you do not have a account please sign up on the website first Make sure you create the channel on USTREAM website for your broadcast For detailed setup procedure please refer to USTREAM website Some AP routers do not allow you to connect to the network e g firewall You may be charged by the network service provider Please stay away from any electronic equipment since the radio frequency signa...

Page 41: ...s may not be allowed to access in certain regions or networks Configure through the AIR10 Connect application on your computer may required to enable WiFi uploading streaming features e g Select the channel for broadcasting on YouTube USTREAM Please avoid transferring the confidential files and setting your personal account information on the open networks or in public areas The data transferred via ...

Page 42: ...ur camcorder and set up a security password for opening AIR10 Connect application via Wi Fi connection Installing AIR10 Connect To connect to the camcorder and launch AIR10 Connect application via WiFi correctly you have to install this program firstly It is a perfect platform for you to watch live streaming video from your camcorder and use the camcorder as a webcam for your online video chatting ...

Page 43: ...ion at Start All 5 Program The main screen appears automatically on the desktop 6 When the installation is completed you can unplug the USB cable 7 Note If ArcSoft MediaImpression is not installed AIR10 Connect program will install the H 264 Codec ffdshow a free software under GPL license for viewing the videos correctly To work correctly on the video chatting you have to log out quit from the Ins...

Page 44: ...e access point Network 3 and connect to it Refer to page 36 for detailed instruction On your computer Make sure your computer is on the same wireless network Double click on the AIR10 Connect shortcut on the 4 desktop make sure the AIR10 Connect application is installed in your computer Thecamcorderconnectstoyourcomputerandthe AIR10 5 Connect main screen displays on your computer One task window m...

Page 45: ...Function Description Screen TRANSFER You can remote access the videos and photos stored in your camcorder You can transfer or delete the files on your computer LIVE VIDEO Watch live streaming from your camcorder on your computer The video resolution can be selected On the camcorder ...

Page 46: ...led AIR10 Connect for Windows based systems only is installed and the wireless LAN module of your computer is activated Make sure your computer connects with your access point AP correctly and your camcorder is in the same range of the WLAN For the much more stable video streaming when using LIVE VIDEO or VIDEO CHAT please make sure the WiFi signal strength shows 2 bars or above on the camcorder T...

Page 47: ...nd it at Start All Program The AIR10 Connect application serves 3 options while connecting via USB Function Description Screen TRANSFER You can access the videos and photos stored in your camcorder and upload files to the social websites Upload Select the videos photos on the 1 thumbnail screen Click on Upload 2 The website options appears 3 Select the website and check the 4 Username Email and pas...

Page 48: ...u ever create more than one account informations on the same computer you can select the account in the drop down list Click on 3 Save to save this account information to your camcorder You can delete the information by 4 clicking on Remove For USTREAM setup you may choose the channel You MUST set up your account information of the social websites on the computer by this AIR10 Connect application ...

Page 49: ...WiVideo application Create a password in the 1 Password field and type again in the Confirm field Check on Enable Security to 2 enable it Then you will be asked to type the password before accessing AIR10 Connect application via WiFi connection next time Note LIVE VIDEO and VIDEO CHAT are not available during USB connecting Some social websites may not be allowed to access in certain regions or netwo...

Page 50: ...HDMI Out port 1 Connect the other end of the cable to a television 2 Set the video input source of your TV to HDMI 3 The steps for viewing stored videos and photos on an HDTV are exactly the same as for viewing them 4 on the LCD monitor 16 9 Note The camcorder cannot run menu setting and thumbnail screen when it is connected to an HDTV ...

Page 51: ...will find they already have this software installed on their computer To install the bundled software Insert the 1 bundled CD into your computer s CD ROM drive The autorun screen appears Choose the application you want to install 2 Follow the on screen instructions to complete the installation 3 Note Detailed information can be found in the online help of ArcSoft MediaImpression Transferring Photos...

Page 52: ... support up to 64GB Image resolution HIGH 16MP 16 Mega Pixels 4608 x 3456 Interpolated STANDARD 5MP 5 Mega Pixels 2592x1944 LOW 3MP 3 Mega Pixels 2048x1536 Video resolution FULL HD 1080 30 1920X1080 30fps HD 720 60 1280X720 60fps HD 720 30 1280X720 30fps VGA 480 30 640X480 30fps White balance Auto Manual Daylight Fluorescent Tungsten ISO Auto 800 1600 Self timer 10 seconds delay Light Light ON Lig...

Page 53: ...rn on How do I charge battery You must use the supplied AC charger or the USB cable The camcorder must be turned OFF A blinking light will indicate active charging and a solid light indicates that charging is complete In AC charging Mode the full charge time is about 4 hours and the light will turn itself off automatically after 3 5 minutes when the charging is completed Actual charging time may v...

Page 54: ...h to the AP you want to connect The AP router or the computer is not turned on Turn the AP router or your computer on The camcorder is not in the wireless network service area or weak network signal Please make sure the AP router is able to access the Internet The camcorder does not support the type of encryption used on the AP This model only supports WEP WPA WPA2 personal type of encryption but ...

Page 55: ...ese limits are designed to provide reasonable protection against harmful interference in a residential installation This equipment generates uses and can radiate radio frequency energy and if not installed and used in accordance with the instructions may cause harmful interference to radio communications However there is no guarantee that interference will not occur in a particular installation If...

Page 56: ...oduct category for a so called Residential Commercial Light Industry Environment Any other working environment has not been verified by Toshiba and the use of this product in these working environments is maybe restricted or cannot be recommended Possible consequences of the use of this product in non verified working environments can be Disturbances of other products or of this product in the nearb...

Page 57: ...accumulators can be disposed of with the product They will be separated at the recycling centres The black bar indicates that the product was placed on the market after August 13 2005 By participating in separate collection of products and batteries you will help to assure the proper disposal of products and batteries and thus help to prevent potential negative consequences for the environment and...

Page 58: ...cements The battery pack is lithium ion batteries which can explode if not replaced used handled or disposed of properly Dispose of the battery as required by local ordinances or regulations Charge the battery pack only in an ambient temperature between 5 and 35 degrees Celsius Otherwise the electrolyte solution might leak battery pack performance might deteriorate and the battery life might be sh...

Page 59: ...59 EN 73 EN 0970AA212L A01S For more information please visit www toshiba multimedia com AIR10_UM_V01_0411 ...

Reviews: