E
ng
lis
h
Optional Connection
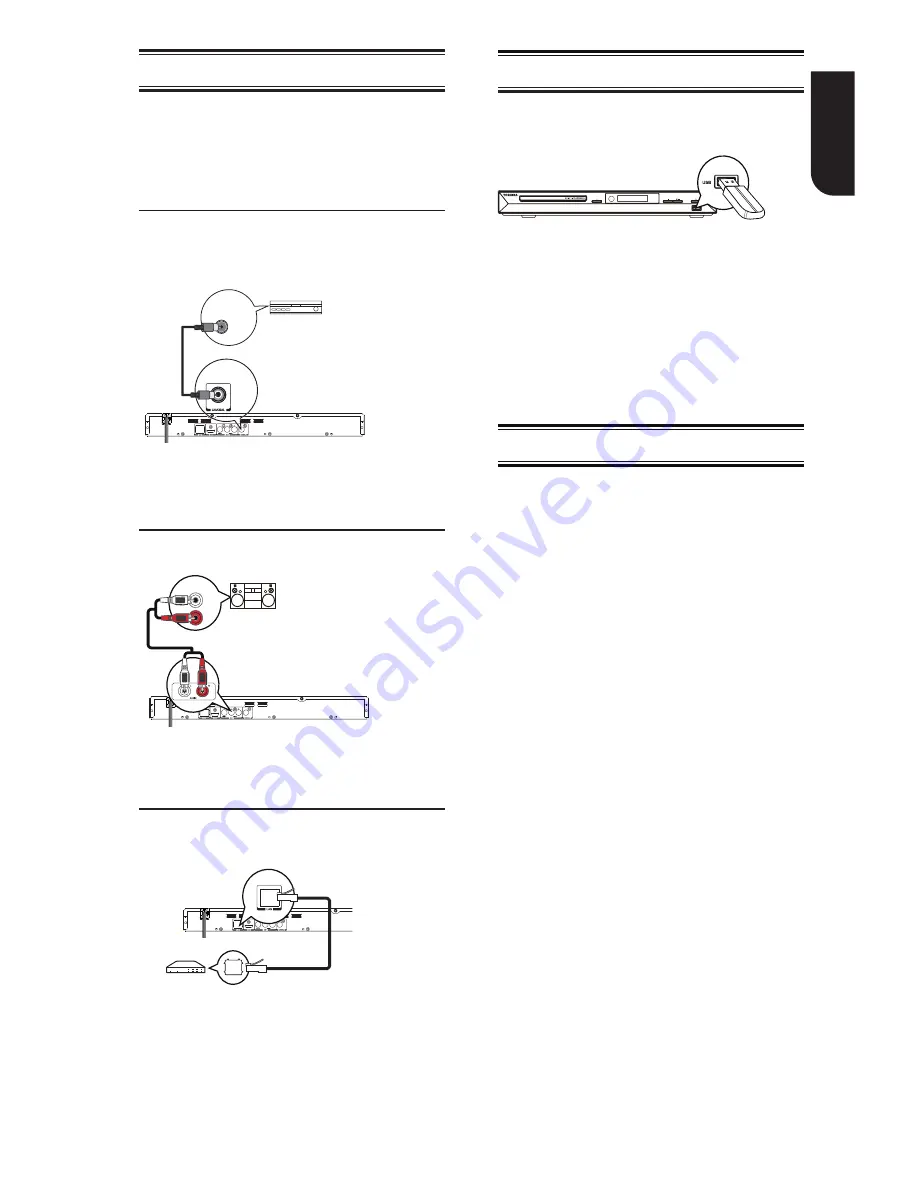
Option 1:
Connect to digital amplifier/
receiver
Option 2:
.Connect.to.analogue.stereo.
system
Option 3:
.Connect.to.network
Option 1: Connect to the digital
amplifer/receiver
Route.the.sound.from.this.player.to.other.
device.to.enhance.audio.output.
COAXIAL
DIGITAL AUDIO
INPUT
1..Connect.a.coaxial.cable.from.the.
COAXIAL.jack.on.this.product.to.the.
COAXIAL.jack.on.the.device.
Option 2: Connect to an analogue
stereo system
AUDIO IN
1..Connect.the.audio.cable.from.the.
analogue.AUDIO.OUT.jacks.on.this.product.
to.the.audio.input.jacks.on.the.system.
Option 3: Connect to network
Connect.this.product.to.the.nework.to.
enjoy.BD-Live.bonus.content.
1..Connect.the.network.cable.from.the.LAN.
jack.on.the.product.to.the.LAN.jack.on.the.
network.system.
C
onnect USB device
A.USB.device.provides.an.additional.
memory.to.software.upgrade.and.enjoy.
BD-Live.bonus.content.
USB
1..Connect.the.USB.Flash.device.to.the.
USB
.jack.on.this.product.
Notes:
- Connect a USB Flash device only to the
USB
jack on this product.
- When you enjoy BD-live bonus content, as
your local storage, use a 1 GB or larger USB
memory.
- TOSHIBA does not guarantee 100%
compatibility with all USB Flash devices.
Connect Power
1..Connect.the.AC.power.cable.to:
....-.the.wall.socket.
....•.The.product.is.ready.to.be.set.up.for.use.
Notes:
– Before connecting the AC power cord, ensure
you have completed all other connections.
– Risk of product damage! Ensure that the power
supply voltage corresponds to the voltage printed
on the back of the unit.
– The type plate is located on the back of the unit.


