background image

30

Record Mode

Menu options/operations

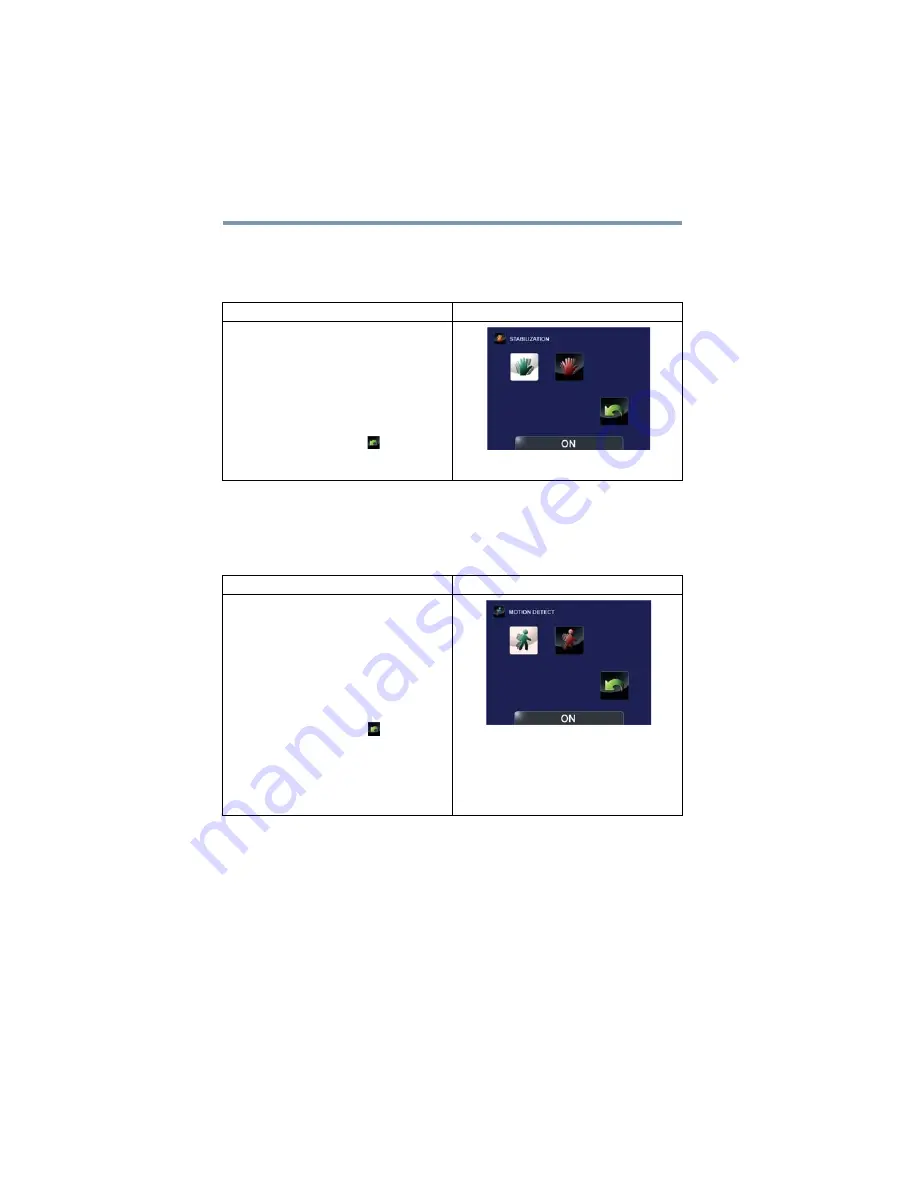
Stabilization

Your camcorder provides a feature that steadies the image to help 
reduce blurry photos and create clearer videos.

Motion detection

This option allows the camcorder to automatically record videos 
when the camcorder detects movement.

Operation

Screen

1

In the Video Setting menu, select the 
Stabilization icon, and then press the 
OK button to enter the settings menu.

2

Use the Directional buttons to select 
the desired option.

3

Press the OK button to validate the 
new setting.

4

Select the Return/Exit (

) icon, and 

then press the OK button, or press 
the Return/Exit button to exit.

Operation

Screen

1

In the Video Setting menu, select the 
Motion Detect icon, and then press 
the OK button to enter the settings 
menu.

2

Use the Directional buttons to select 
the desired option.

3

Press the OK button to validate the 
new setting.

4

Select the Return/Exit (

) icon, and 

then press the OK button, or press 
the Return/Exit button to exit.

The camcorder will begin recording 
automatically if movement is detected. It 
stops recording when movement stops.

Summary of Contents for Air10 4GB SD Card

Page 1: ...GMAA00363011 02 12 CAMILEO AIR10 User sGuide ...

Page 2: ...rference to radioortelevision reception which can be determined by turning the equipment OFF and ON the user is encouraged to try to correct the interference by one or more of the following measures Reorient or relocate the receiving antenna Increase the separation between the equipment and receiver Connect the equipment into an outlet on a circuit different from that to which the receiver is conn...

Page 3: ...of infants 11 Risk of explosion if battery is replaced by an incorrect type 12 Dispose of used batteries according to the instructions About the battery Use only batteries recommended by TOSHIBA as replacements The battery is a lithium ion battery which can explode if not replaced used handled or disposed of properly Dispose of the battery as required by local ordinances or regulations Charge the ...

Page 4: ...ous injury Indicates a potentially hazardous situation which if not avoided could result in death or serious injury Indicates a potentially hazardous situation which if not avoided may result in minor or moderate injury Indicates a potentially hazardous situation which if not avoided may result in property damage Provides important information Additional Information Copyright 2012 TOSHIBA CORPORAT...

Page 5: ...trademarks of HDMI Licensing LLC Intel Intel Core Celeron Centrino and Pentium are trademarks or registered trademarks of Intel Corporation or its subsidiaries in the United States and other countries Microsoft Windows and Windows Vista are either registered trademarks or trademarks of Microsoft Corporation in the United States and or other countries Picasa is a trademark of Google Inc Secure Digi...

Page 6: ...w 12 Rear view 13 Chapter 2 Getting Started 14 Charging the battery 14 Charging the battery 16 Inserting and removing an SD Card optional 21 Protecting data on an SD Card 22 Turning the camcorder on and getting started 22 Turning off the camcorder 22 Chapter 3 Record Mode 23 Button functions 23 LCD screen information 24 Notification icons 25 Video recording 26 ...

Page 7: ...yback 43 Delete a file in Playback mode 44 Chapter 5 Camcorder Settings 45 Setup menu 45 Menu Sound 46 TV 46 Language 47 Time settings 47 Format 48 Default setting 49 Chapter 6 CAMILEO AIR10 Connect 50 Advanced operations on your computer CAMILEO AIR10 Connect 50 Installing CAMILEO AIR10 Connect 50 Using CAMILEO AIR10 Connect via Wi Fi Infrastructure mode 52 Using CAMILEO AIR10 Connect via USB 55 ...

Page 8: ... Videos on a Computer 67 Transferring photos or videos to a computer 67 Chapter 10 Specifications 68 Operating Environment Conditions 69 Chapter 11 Troubleshooting 70 Chapter 12 Other Information 73 Toshiba Support 73 Before you call 73 Contacting Toshiba 74 Toshiba s technical support Web site 74 Toshiba voice contact 74 Warranty 74 Online Warranty Information 74 Warranty Service 74 ...

Page 9: ...ng you to easily upload or stream videos captured by the camcorder to the Internet for Windows based systems only High quality photos up to 16 Megapixels interpolated Color LCD screen for easy viewing of photos and videos Video recording at full HD resolution of 1920 x1080p HDTV connectivity via an HDMI cable HDMI cable sold separately Easy playback of recorded high definition videos on wide scree...

Page 10: ...le and friendly platform to manage the files in the camcorder and control the interaction with your camcorder via either WiFi or USB connection ArcSoft MediaImpression is a user friendly application that helps you manage your media edit and playback video and upload your files to websites easily Preinstalled in the camcorder A portion of the built in memory is used for firmware to operate the camc...

Page 11: ...2 GB free HDD space 4x CD ROM Drive Available USB 2 0 port 16 bit color display Wi Fi capability The LCD screen is manufactured using extremely high precision technology However some tiny black and or bright dots white red blue or green may appear on the LCD screen These dots are a normal result of the manufacturing process and do not affect the recording NOTE ...

Page 12: ...page 23 and Playback mode operations on page 42 Underside view Sample Illustration Underside view Power button Wi Fi button Press to turn ON OFF Internet button Press to display the Light Microphone Multi indicator Battery cover Speaker SD Card cover social networking site Lens upload menu Wi Fi Strap hook Tripod socket Mini HDMI port Mini USB 2 0 port ...

Page 13: ... Delete button In Record mode Zoom out In Playback mode Go to the delete screen When playing a video press to decrease volume Move between option items During playback Go to previous video photo In Record mode Zoom in In Playback mode Go to the video photo thumbnail screen When playing a video press to increase volume Move between option items Right button In Playback mode Go to the next video pho...

Page 14: ...ng the battery The battery comes pre installed in the camcorder and must be charged before use however you must remove the protective film on the battery 1 Slide the battery cover off Sample Illustration Front view 2 Remove the battery ...

Page 15: ... Illustration Removing the protective film 4 Reinsert the battery face up making sure it is lined up with the correct polarity marks Sample Illustration Inserting the battery 5 Reinstall the battery cover Protective film Li ion battery Li ion battery Polarity marks Battery cover ...

Page 16: ...nnecting the cable A blinking light indicates active charging and a solid light indicates that charging is complete In AC charging mode the solid light will turn off automatically after a few minutes It may take up to 8 5 hours to charge the battery via USB and up to 4 hours via AC adaptor Actual time may vary Sample Illustration Charging the battery Be sure to remove the protective film on the le...

Page 17: ...never transporting it to avoid exposing the terminals to another conductive object which could result in serious injury Always cover the metal terminals with insulating tape when disposing of the battery to prevent accidental short circuiting which could result in serious injury Never drive a nail or any other sharp object into the battery hit battery with a hammer or other object or step on it Do...

Page 18: ...rect battery Always use the battery supplied Other batteries have different voltage and terminal polarities Use of non conforming batteries could generate smoke or cause fire or rupture possibly resulting in serious injury Battery safety Never allow caustic electrolyte fluid leaked from the battery to contact your eyes body or clothing Use appropriate protective gloves when handling a damaged batt...

Page 19: ...ble minor injury due to heat exposure Do not turn on the product s power again until an authorized Toshiba service provider has checked it for safety Continued use could cause a fire or rupture possibly resulting in serious injury or product failure including but not limited to the loss of data Disposal of used batteries Always dispose of used batteries in compliance with all applicable laws and r...

Page 20: ...rst turning OFF the power and disconnecting the AC adaptor AC adaptor may be sold separately Inserting the battery When installing a battery or before moving the product always make sure the battery is inserted correctly and securely If the battery falls out while you are carrying the product you could be injured or the battery could be damaged Do not use an impaired or exhausted battery Never con...

Page 21: ...apacity by using an optional SD SDHC SDXC memory card 1 Open the SD Card cover 2 Insert the SD Card into the slot until it locks into place as shown below 3 Once inserted close the SD Card cover Sample Illustration Inserting and removing an SD Card When a memory card is inserted videos and photos are saved to the card rather than the built in memory NOTE To remove the SD Card press inward to relea...

Page 22: ...Sample Illustration Protecting data on an SD Card Turning the camcorder on and getting started To turn ON the camcorder press the Power button for approximately one second To record videos In Record mode press the Video button Press it again to stop recording To take a photo In Record mode press the Photo button To view recorded videos photos Press the Playback button Turning off the camcorder Pre...

Page 23: ... functions Video button 1 Press to begin recording 2 Press it again to stop recording Photo button Press to take a photo Playback button Switch between Record Playback mode Return Exit button 1 Return to the previous screen 2 Exit ...

Page 24: ... Image LCD screen indicators Zoom in Up button 1 Zoom in 2 Move between option items Zoom out Down button 1 Zoom out 2 Move between the option items Left button Move between the option items Right button Move between the option items Menu OK button 1 Menu ON 2 Validate the setting Power button Press for approximately one second to turn the camcorder ON OFF 4 3 2 1 6 8 7 5 ...

Page 25: ...ower Battery Low power Battery No power AC power mode 2 Video Resolution Full HD 1080p 30 HD60 720p 60 HD30 720p 30 VGA 430p 30 Photo resolution High 16MP Standard 5MP Low 3MP 3 Digital light ON Light ON 4 Video Record mode Stabilization ON Photo Record mode Self timer ON 5 Wi Fi signal strength ...

Page 26: ... button to view a recorded video The resolution settings available are 6 Recording time remaining Pause Recording The remaining amount of photos that can be taken at the current resolution settings Current number of photos taken NOTE Maximum number of photos shown is 9999 however more photos may be recorded 7 Motion Detection Video Record mode only 8 Zoom meter 1x 5x 5x Digital zoom Video Quality ...

Page 27: ...he digital zoom ranges from 1x to 5x Menu options operations Please see Camcorder Settings on page 45 or Wi Fi Functions on page 58 for more information about Setup Image Quality High 16 MP 4608 x 3456 Standard 5 MP 2592 x 1944 Low 3 MP 2048 x 1536 Video Setting Photo Setting Effects Setup Wi Fi Light Resolution Stabilization Motion Detect Continuous Play Light Resolution Self Timer Face Tracking ...

Page 28: ... buttons to select the specific option you want to change 4 Press the OK button to validate the new setting 5 Select the Return Exit icon and then press the OK button or press the Return Exit button to exit Operation Screen 1 In Record mode Press the MENU OK button The Menu screen appears 2 Use the Directional buttons to select the Video Setting icon and then press the OK button to enter the setti...

Page 29: ...rn Exit button to exit Full HD 1080 30 Records videos at 1920 x 1080p 30 fps resolution HD 720 60 Records videos at 1280 x 720p 60 fps resolution HD 720 30 Records videos at 1280 x 720p 30 fps resolution VGA 480 30 Records videos at 640 x 480p 30 fps resolution Operation Screen 1 In the Video Setting menu select the Resolution icon and then press the OK button to enter the settings menu 2 Use the ...

Page 30: ... buttons to select the desired option 3 Press the OK button to validate the new setting 4 Select the Return Exit icon and then press the OK button or press the Return Exit button to exit Operation Screen 1 In the Video Setting menu select the Motion Detect icon and then press the OK button to enter the settings menu 2 Use the Directional buttons to select the desired option 3 Press the OK button t...

Page 31: ...he OK button to validate the new setting 4 Select the Return Exit icon and then press the OK button or press the Return Exit button to exit Operation Screen 1 In Record mode press the MENU OK button The Menu screen appears 2 Use the Directional buttons to select the Photo Setting icon and then press the OK button to enter the settings menu The Photo Setting menu appears 3 The Photo Setting menu op...

Page 32: ...d then press the OK button or press the Return Exit button to exit High 16M Takes photos at 4608 x 3456 16 MP quality Standard 5M Takes photos at 2592 x 1944 5 MP quality Low 3M Takes photos at 2048 x 1536 3 MP quality Operation Screen 1 In the Photo Setting menu select the Resolution icon and then press the OK button to enter the settings menu 2 Use the Directional buttons to select the desired o...

Page 33: ... icon and then press the OK button to enter the settings menu 2 Use the Directional buttons to select the desired option 3 Press the OK button to validate the new setting 4 Select the Return Exit icon and then press the OK button or press the Return Exit button to exit Operation Screen 1 In the Photo Setting menu select the Face Tracking icon and then press the OK button to enter the settings menu...

Page 34: ...t moving at a high rate of speed Operation Screen 1 In the Photo Setting menu select the Date Printing icon and then press the OK button to enter the settings menu 2 Use the Directional buttons to select the desired option 3 Press the OK button to validate the new setting 4 Select the Return Exit icon and then press the OK button or press the Return Exit button to exit When this function is activa...

Page 35: ...validate the new setting 4 Select the Return Exit icon and then press the OK button or press the Return Exit button to exit 2 seconds Displays one photo every two seconds 5 seconds Displays one photo every five seconds 10 seconds Displays one photo every ten seconds OFF Disables Slideshow Operation Screen 1 In the Photo Setting menu select the Slideshow icon and then press the OK button to enter t...

Page 36: ...the settings menu The Effects menu appears 3 The Effects menu options are Scene Filter and White Balance Auto Automatically adjusts to current conditions Skin Adjusts skin tones to appear more natural Night Use in low light conditions or at night Backlight Use when the subject is brightly lit from behind Operation Screen 1 In the Effects Setting menu select the Scene icon and then press the OK but...

Page 37: ...ite The image is converted to black and white Classic The image is converted to sepia Negative The image is converted to a negative of the original Operation Screen 1 In the Effects Setting menu select the Filter icon and then press the OK button to enter the settings menu 2 Use the Directional buttons to select the desired option 3 Press the OK button to validate the new setting 4 Select the Retu...

Page 38: ...conditions Fluorescent Use in Fluorescent lighting Tungsten Use in tungsten lighting Operation Screen 1 In the Effects Setting menu select the White Balance icon and then press the OK button to enter the settings menu 2 Use the Directional buttons to select the desired option 3 Press the OK button to validate the new setting 4 Select the Return Exit icon and then press the OK button or press the R...

Page 39: ...ve the following functions in Playback mode Video button Press to switch to Video Playback mode Photo Button Press to switch to Photo Playback mode Playback button Switch between Record Playback mode Return Exit button 1 Return to the previous screen 2 Exit ...

Page 40: ...thumbnail screen 2 Press to increase volume during video playback Down button 1 View the Delete screen 2 Press to decrease volume during video playback Left button View the previous video photo Right button View the next video photo Menu OK button Press to play pause a video Onscreen notification icons Sample Image Video playback Sample Image Photo playback 1 2 4 5 3 6 1 2 3 ...

Page 41: ...p 60 HD30 720p 30 VGA 430p 30 Photo resolution High 16MP Standard 5MP Low 3MP 3 Wi Fi signal strength 4 Playback time counter Current number of photos taken The remaining amount of photos that can be taken at the current resolution settings NOTE Maximum number of photos shown is 9999 however more photos may be recorded 5 Volume control 6 Current number Total number of videos 00 03 12 12 25 2 2 ...

Page 42: ...n memory or on an SD Card use the Playback mode Operation Screen 1 In Video Photo Record mode press the Playback button to switch to Video Photo Playback mode 2 Press the Up button to view the video photo thumbnail screen 3 Select the video photo file and then press the OK button 4 Or press the Playback button to exit ...

Page 43: ...o fast forward rewind 4 Press the OK button to stop 5 Use the Up Down buttons to adjust the volume 6 Press the Internet button to select and tag the current video to upload to the Internet for Windows based systems only Operation Screen 1 In Photo Playback mode use the Right Left buttons to view the next previous photo 2 Press the OK button to pause the slideshow 3 Press the Internet button to sel...

Page 44: ... 1 In Playback mode press the Down button to view the delete screen 2 Select the icon and then select the icon to delete the current video photo 3 Select the Return Exit icon and then press the OK button or press the Return Exit button to cancel and exit 4 Select the icon and then select the icon to delete all video photo files 5 Select the Return Exit icon and then press the OK button or press th...

Page 45: ...ENU OK button The Menu screen appears 2 Use the Directional buttons to select the Setup icon and then press the OK button to enter the settings menu 3 The Setup Menu options are Menu Sound operation sound TV Language Time Setting Format Default Setting and Information scroll down to view ...

Page 46: ... select the desired option 3 Press the OK button to validate the new setting 4 Select the Return Exit icon and then press the OK button or press the Return Exit button to exit NTSC 60Hz USA Canada Japan South Korea Taiwan etc PAL 50Hz UK Europe China Australia Singapore Hong Kong etc Operation Screen 1 In the Setup menu select the TV icon and then press the OK button to enter the settings menu 2 U...

Page 47: ...e new setting 4 Select the Return Exit icon and then press the OK button or press the Return Exit button to exit Operation Screen 1 In the Setup menu select the Time Setting icon and then press the OK button to enter the settings menu 2 Use the Right Left buttons to select the Year Month Day Hour or Minute 3 Use the Up Down buttons to adjust the numeric value 4 Select the icon and then press the O...

Page 48: ...ry when no SD Card is installed or delete all videos and photos on the installed SD Card No Do not delete all videos and photos in the built in memory when no SD Card is installed or do not delete all videos and photos on the installed SD Card Operation Screen 1 In the Setup menu select the Format icon and then press the OK button to enter the settings menu 2 Use the Directional buttons to select ...

Page 49: ...ess the OK button to enter the settings menu 2 Choosing Yes performs the operation and No cancels the operation 3 Select the Return Exit icon and then press the OK button or press the Return Exit button to exit Setting Default Factory Setting Resolution Video Full HD 1080 30 Photo Standard 5M Light OFF Stabilization ON Motion Detection OFF Continuous Play OFF Self Timer OFF Face Tracking OFF Date ...

Page 50: ...n operate more functions on your computer Transfer files from the camcorder Watch live streaming video from the camcorder on your computer Use the camcorder as a wireless webcam for online video chatting Configure your account information on social networking sites and save them to the camcorder Synchronize your Wi Fi profile with your camcorder and set up a security password to open the CAMILEO A...

Page 51: ...er 2 When the USB connection is made to your computer for the first time up to three AutoPlay screens will appear on your computer CD Drive x AIR10_Connect CAMILEO AIR10 Connect Application DV x Internal memory of the camcorder Removable Disk x Only shows if an SD card is installed in the camcorder The AutoPlay screens may load on top of one another Simply drag them into view Check your taskbar if...

Page 52: ... to function properly you need to log out quit the Instant Message IM application before the installation During the installation a warning message may appear Click Continue Anyway Yes to go on the installation CAMILEO AIR10 Connect is for Windows based systems only Using CAMILEO AIR10 Connect via Wi Fi Infrastructure mode Follow the steps below to successfully connect to an available AP Operation...

Page 53: ... shortcut for CAMILEO AIR10 Connect on the Windows desktop The camcorder connects to your computer and the CAMILEO AIR10 Connect main screen displays on your computer screen NOTE If more than one Wi Fi device is connected to your computer you may be asked to select the camcorder Function Description Screen Transfer You can remote access the videos and photos stored in your camcorder You can transf...

Page 54: ...e your camcorder as a wireless webcam for online video chatting NOTE You must first select this device as your Webcam in the camera audio setting You will need to select Virtual Camera as your webcam and Virtual Audio Device as your microphone for online video chatting Function Description Screen ...

Page 55: ...when using LIVE VIDEO or VIDEO CHAT make sure the Wi Fi signal strength shows 2 bars or above on the camcorder To improve the Wi Fi signal strength move the camcorder closer to your access point If the camcorder is located too far away from your computer or the AP device it may take longer to connect to the network The signal and the radio frequency may have interference The zoom function is not a...

Page 56: ...the social networking site 4 Click OK to upload Account Setup Set up your social networking site account information and save it to your camcorder 1 Select the social networking site tab you wish to configure 2 Enter your Username email and password of the specific social networking site 3 Click Save to save this account information to your camcorder 4 Click Remove to delete the account informatio...

Page 57: ... Wi Fi profile on your computer with your camcorder 1 Click Add to camcorder to add the Wi Fi profile on your computer to your camcorder 2 Click Up Down Remove to sort the priority of the Wi Fi profiles on your camcorder NOTE Make sure your computer is equipped with a wireless LAN adapter and connects with your access point AP correctly otherwise the SSID field will be blank Camcorder Setting Crea...

Page 58: ...ve streaming on USTREAM Web site On your computer with the CAMILEO AIR10 Connect application Windows based systems only you can Download the files from the camcorder to your computer Watch live streaming video from the camcorder on your computer Use the camcorder as a wireless webcam for online video chatting ...

Page 59: ...the profile has not yet been setup the AP list screen appears Existing profile An already saved AP profile Secured network Requires a password to gain access to the AP Signal strength Down cursor Indicates more than four available access points Press the Down button to advance to the next page 3 Select the desired available AP and then press the OK button If the selected AP requires password authe...

Page 60: ...r does not support the type of encryption used on the AP This model only supports WEP WPA WPA2 personal type of encryption but not up to enterprise level 4 your network requires PPPoE account password information You can only enter text in English regardless of the OSD language Operation Screen The Connection OK screen appears and indicates that the connection is established The signal strength ap...

Page 61: ...automatically connects to the network 2 Some networks require authentication from the network s service provider NSP Follow the onscreen instructions 3 Select the Return Exit icon and then press the OK button or press the Return Exit button to exit 4 If a successful connection cannot be made contact the network service provider The camcorder will try to connect to the Internet for one minute befor...

Page 62: ...ablished the camcorder automatically connects to the network and launches the built in uploading application 5 Select the Web site you wish to upload to Youmustfirstsetupyoursocial networking site information with the CAMILEO AIR10 Connect application and save it to your camcorder For more information see CAMILEO AIR10 Connect on page 50 6 Select the file you wish to upload and then press the OK b...

Page 63: ... is no Internet connection please establish an Internet connection and try again The camcorder will try to upload files to the Internet for one minute before the No Internet Connection notice appears Operation Screen 1 Follow steps 1 5 in the previous section 2 Use the Directional buttons to select the USTREAM icon on the listed Web site screen 3 Select the Return Exit icon and then press the OK b...

Page 64: ...on on your computer may require Wi Fi connection to enable the uploading streaming features e g select the broadcasting channel in YouTube USTREAM Avoid transferring confidential files and setting your personal account information on an open network or in public areas Make sure you create the channel on the USTREAM Web site for your broadcast For detailed setup procedure refer to the USTREAM Web s...

Page 65: ...s or videos from your camcorder on a TV 1 Connect the mini HDMI cable mini HDMI cable required sold separately to your camcorder s mini HDMI out port 2 Connect the other end of the cable to a television 3 Set the video input source of your TV to HDMI Sample Image Connecting a high definition TV 16 9 ...

Page 66: ...rder is connected to an HDTV Some functions may not be accessible while the camcorder is connected to an HDTV Installing bundled software The CD ROM supplied with your camcorder contains two software applications To install the bundled software 1 Insert the CD ROM into your computer s optical disc drive The autorun screen appears 2 Click Install Application Software Follow the onscreen instruction...

Page 67: ...e computer and camcorder with the supplied mini USB 2 0 cable The multi indicator light blinks 2 To access photos and videos on your SD Card Videos and photos can be found on your computer at My Computer SD DCIM 100MEDIA path will vary depending on name of SD Card 3 To access photos and videos in the camcorder s internal memory Videos and photos can be found on your computer at My Computer DV DCIM...

Page 68: ...to Full HD 1080 30 43 3 in 110cm infinity Zoom 1x 5x 5x Digital zoom Shutter Electronic LCD screen 2 in 5 08cm LCD screen Storage media Built in 128MB memory partial memory is used for firmware code SD SDHC SDXC card slot support up to 64GB Image resolution High 4608 x 3456 16MP Interpolated Standard 2592 x 1944 5MP Low 2048 x 1536 3MP Video resolution Full HD 1080 30 1920 x 1080 30fps HD 720 60 1...

Page 69: ...escent Tungsten ISO Auto 800 1600 Self timer 10 second delay Light Light ON Light OFF Digital Light ON File format Photo JPG Video MP4 H 264 Image play Single image Slideshow PC interface Mini USB 2 0 port TV out Mini HDMI Wi Fi 802 11 a b g Wi Fi CERTIFIED Battery Lithium ion rechargeable battery Dimensions 2 2 W x 4 3 H x 0 75 in D 56 W x 108 H x 19mm D Weight 3 0 oz 86g without battery 3 9 oz 1...

Page 70: ...o not display smoothly and the camcorder s LCD screen displays the marking The means the SD Card is low speed or contains corrupted files To solve this format the SD Card using the camcorder not a computer Format on page 48 The card has some problems and can not be recognized Change the card with another one Change the SD SDHC SDXC card to a high speed card The camcorder does not take videos photo...

Page 71: ...tings on page 47 Why do some of my indoor photos look blurry and dark The lighting may be poor Check your surroundings for a better lit area The camcorder extends photo exposure time under low light indoor conditions Keep the camcorder and the target subject steady for several seconds when taking photos see Photo setting options on page 31 Place the camcorder on a flat and steady surface or use a ...

Page 72: ...ion but not up to enterprise level Your network requires PPPoE account password information Some AP routers do not allow you to connect to the network e g firewall For more information see Wi Fi Functions on page 58 Uploading files takes a long time Uploading files may take a few minutes depending on the size of the files and the wireless network signal strength Either reduce the file size increas...

Page 73: ...stigate other sources of assistance first Try the following before contacting Toshiba Review the documentation supplied with your product If a problem occurs when you are running software applications consult the software documentation for troubleshooting suggestions Contact the software company s technical support department for assistance Consult the reseller or dealer from whom you purchased yo...

Page 74: ...es at 949 583 3305 Warranty Online Warranty Information This product is covered by a One 1 Year Standard Limited Warranty A copy of the warranty is included on the enclosed CD or can be viewed online at http pcsupport toshiba com accessories1yr Warranty Service Customers located in the fifty 50 United States and District of Columbia may obtain warranty service by visiting the Toshiba Acclaim Web s...

Reviews: