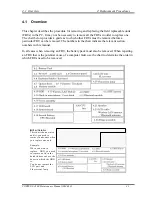
4.1 Overview
4 Replacement Procedures
PORTEGE A100 Maintenance Manual (960-460)
4-5
Assembly Procedures
After the computer has been disassembled and the part that caused the fault has been repaired
or replaced, the computer must be reassembled.
Take note of the following general points when assembling the computer.
θ
Take your time and follow the instructions carefully. Hurrying the assembly work
will only introduce new problems.
θ
Check that all cables and connectors are securely connected.
θ
Before fastening FRUs or other parts in place, ensure that no cables are caught on
screws or the FRU.
θ
Check that all latches are securely closed.
θ
Ensure that you have installed all FRUs correctly and do not have any screws left
over. Using an incorrect screw may damage the thread or screw head and result in the
FRU not being securely fastened in place.
After installing FRUs, check that the computer operates correctly.
Tools and Equipment
For your safety and the safety of the people around you, it is important that you use
Electrostatic Discharge (ESD) equipment. Correctly utilizing of the equipment increases the
percentage of successful repairs and saves on the cost of damaged or destroyed parts. The
following equipment is required for disassembly and assembly.
θ
One Philips screwdriver with type 0 bit (for FLAT BIND screws)
θ
One Philips screwdriver with type 1 bit (for screws other than above)
θ
Tweezers (for lifting screws)
θ
ESD mats (lay on work table or floor)
θ
An ESD wrist strap and heel grounder
θ
Anti-static carpet or flooring
θ
A pair of needle-nose pliers
Summary of Contents for A100 VA3 - Satellite - Pentium Dual Core 1.6 GHz
Page 10: ...Chapter 1 Hardware Overview ...
Page 11: ...1 Hardware Overview 1 ii PORTEGE A100 Maintenance Manual 960 460 1 Hardware Overview ...
Page 36: ...Chapter 2 Troubleshooting Procedures ...
Page 37: ...2 Troubleshooting Procedures 2 ii PORTEGE A100 Maintenance Manual 960 460 2 ...
Page 41: ...2 Troubleshooting Procedures 2 vi PORTEGE A100 Maintenance Manual 960 460 ...
Page 96: ...Chapter 3 Tests and Diagnostics ...
Page 97: ...3 Tests and Diagnostics 3 ii PORTEGE A100 Maintenance Manual 960 460 3 ...
Page 112: ...3 4 System Test 3 Tests and Diagnostics PORTEGE A100 Maintenance Manual 960 460 3 13 ...
Page 182: ...Chapter 4 Replacement Procedures ...
Page 183: ...4 Replacement Procedures 4 ii PORTEGE A100 Maintenance Manual 960 460 4 ...
Page 249: ...4 Replacement Procedures 4 25 Fluorescent lamp 4 62 PORTEGE A100 Maintenance Manual 960 460 ...
Page 265: ...Appendices ...
Page 266: ...Appendices App ii PORTEGE A100 Maintenance Manual 960 460 ...
Page 272: ...Appendices App viii PORTEGE A100 Maintenance Manual 960 460 ...
Page 278: ...Appendices Apx A Handling the LCD Module A 6 PORTEGE A100 Maintenance Manual 960 460 ...
Page 316: ...Appendices Apx E Key Layout E 2 PORTEGE A100 Maintenance Manual 960 460 ...
Page 318: ...Appendices Apx F BIOS KBC EC Update F 2 PORTEGE A100 Maintenance Manual 960 460 ...
Page 320: ...Appendices Apx G Reliability G 2 PORTEGE A100 Maintenance Manual 960 460 ...
Page 322: ...Appendices Apx H Key FD H 2 PORTEGE A100 Maintenance Manual 960 460 ...

