Intr
oduction
Connecting
y
our T
V
Using the
Remote Contr
ol
Setting up
y
our T
V
Using the T
V’s
F
eatur
es
Appendix
Index
40
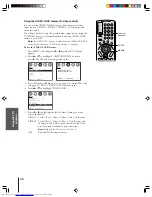
Using the VIDEO LOCK feature (V-Chip control)
You can use the VIDEO LOCK feature to lock the external video
input sources (VIDEO 1, VIDEO 2, VIDEO 3, ColorStream) and
channels 3 and 4.
You will not be able to view the external video input sources using the
TV/VIDEO button or Channel Numbers unless the VIDEO LOCK
feature is set to OFF.
Note:
The VIDEO LOCK feature is not affected by the ENABLE BLOCKING
setting (as described under “MPAA rating blocking” on page 36).
To use the VIDEO LOCK feature:
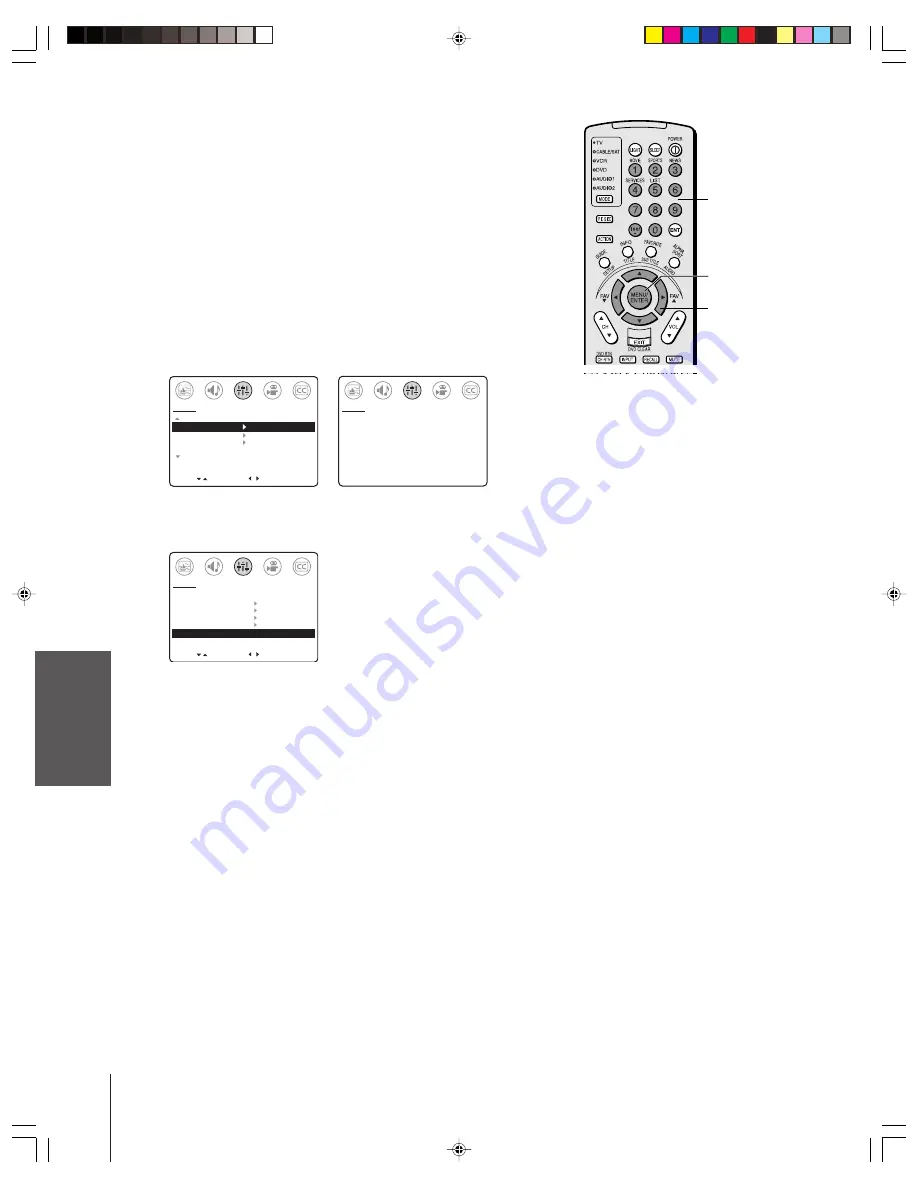
1. Press MENU, and then press
x
or
•
until the SET UP menu
appears.
2. Press
y
or
z
to highlight V-CHIP CONTROL, and then
press
•
. The PIN code entering screen opens.
MOVE
[ ]
[ ]
MORE
V-CHIP CONTROL
FAVORITE CH
CH LABEL
TIMER: 0
MIN
MORE
SET UP
START
SELECT [0–9] END [EXIT]
BLOCKING IS ACTIVE
PLEASE ENTER PIN CODE
_ _ _ _
SET UP
3. Press the Channel Numbers (0–9) to enter your 4-digit PIN code
(see page 35). The V-CHIP CONTROL menu opens.
4. Press
y
or
z
to highlight VIDEO LOCK.
MOVE
[ ]
[ ]
ENABLE BLOCKING
Y[N]
SET RATING
SET BLOCKING OPTIONS
NEW PIN CODE
BLOCK CHANNEL
VIDEO LOCK [VIDEO] VIDEO+ OFF
GAME TIMER
OFF
SET UP
SELECT
5. Press
x
or
•
to highlight the level of video locking you want,
as described below.
VIDEO : Locks Video 1, Video 2, Video 3, and ColorStream.
VIDEO+ : Locks Video 1, Video 2, Video 3, ColorStream, and
channels 3 and 4. This option should be used if you
use the antenna terminal to play videotapes.
Note:
Make sure the PIP is not on channel 3 or 4.
OFF
: Unlocks all video input sources.
Channel
Numbers
ENTER
yzx
•

