


12
CONNECTING YOUR TV
En
glis
h
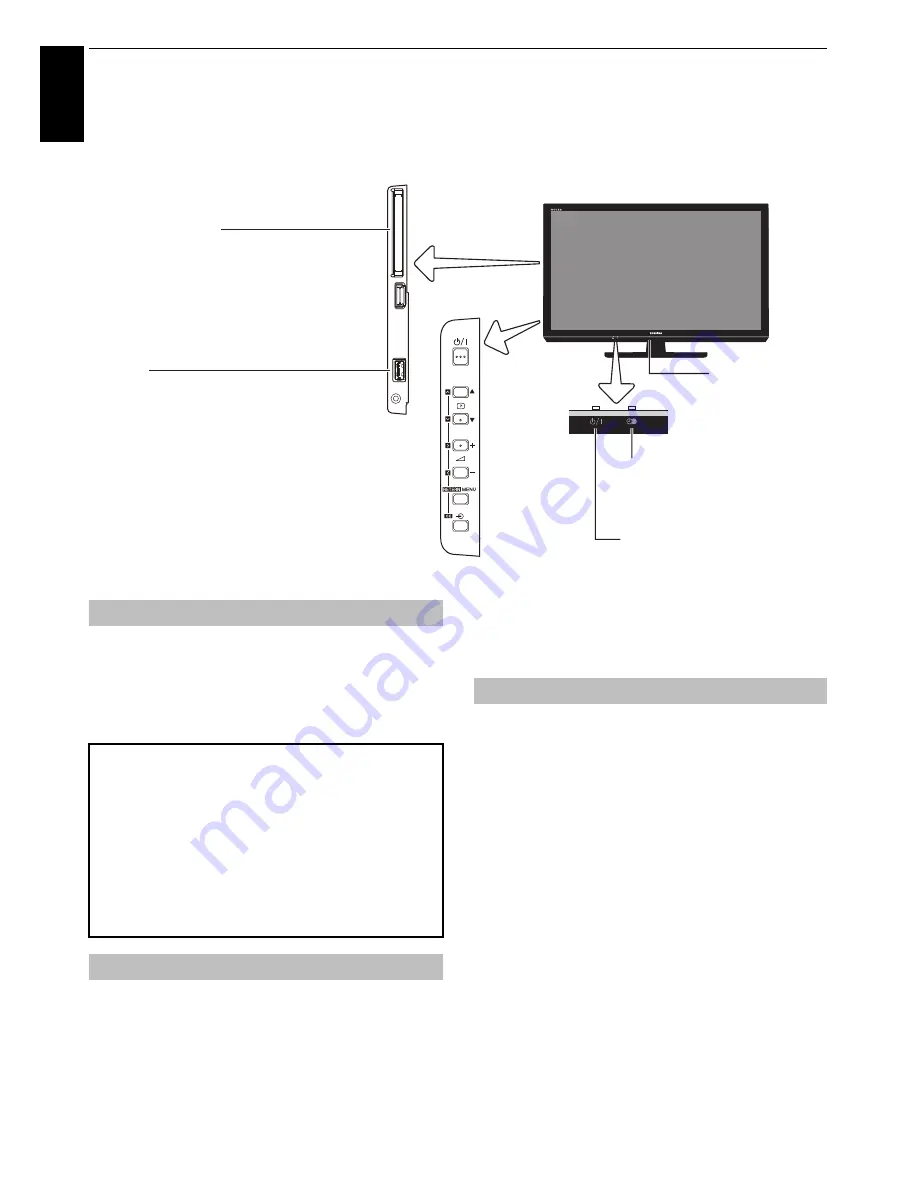
Controls and input connections
A wide variety of external equipment can be connected to the input sockets on the side of the television.
While all the necessary adjustments and controls for the television are made using the remote control, the
buttons on the television may be used for some functions
.
If the RED LED is not lit, check that the mains plug is
connected to the power supply and press
1
on the remote
control; it may take a few moments. The GREEN LED will be lit.
To put the television into Standby, press
1
on the remote
control. To view the television, press
1
again. The picture may
take a few seconds to appear.
Press
MENU
on the remote control to display the menu.
The menu appears as a list of five topics. As each symbol is
selected by pressing
C
or
c
on the remote control, its
respective options will appear below.
NOTE:
The same menu is displayed in DTV (Digital TV) and
ATV (Analogue TV) modes; however, where some items are
not available in a mode, they will appear greyed out.
To use the option, press
B
and
b
on the remote control to
move up and down and press
C
or
c
to select your desired
setting. Follow the on-screen instructions. The functions of
each menu are described in detail throughout the manual.
To alter the volume press –
2
+.
To alter the programme position press
b
p
B
.
Press
MENU
and
Bb
cC
to control the sound and picture
options.
Press
MENU
to finish.
The Media Player feature provides access to photo, movie and
music files stored on a USB storage device that is connected
via the USB port or on a network device.
NOTE:
The USB socket has limited functionality and Toshiba
can take no responsibility for damage to other connected
equipment.
The USB socket has to be used with the “TOSHIBA Dual Band
WLAN Adaptor WLM-10U2” in order to access a wireless network.
You must use the TOSHIBA Wireless LAN device to ensure
correct operation of this feature. This feature is available only
when the “TOSHIBA Dual Band WLAN Adaptor“ is used.
To select an external input, press
o
until the appropriate
input source is selected.
Please always refer to the owner’s manual of the equipment to be
connected for full details.
NOTE:
Interactive video games that involve shooting a “gun”
at an on-screen target may not work with this TV.
COMMON INTERFACE
The Co
mm
on Interface is for a Conditional Access
Module (CAM).
Contact a service provider.
The software updating of CI Plus CAM
m
ay be
auto
m
atically executed. At this ti
m
e, your
Recording/Re
m
inder progra
mm
ing will be
canceled.
A
m
bient
Light Sensor
RED LED – Standby
GREEN LED – Power on
ORANGE LED – Progra
mm
e
ti
m
er set (digital only)
RED LED – Progra
mm
e ti
m
er
Active (digital only)
USB port
Media Player / Wireless LAN adaptor ready for a
ho
m
e network
Control panel
ILLUSTRATION SHOWS 42RL853.
Switching on
For energy saving:
We recommend that you use the television with the factory
settings. The factory settings are for energy saving.
Unplugging the mains plug will cut energy use to zero for
all televisions. This is recommended when the television is
not being used for a long time, e.g. when on holiday.
Reducing the brightness of the screen will reduce energy use.
Energy efficiency cuts energy consumption and thus saves
money by reducing electricity bills.
NOTE:
Putting the television into standby mode will reduce
energy consumption, but will still draw some power.
Using the remote control
Using the controls and connections


