background image

Intr

oduction

Connecting

y

our T

V

Using the

Remote Contr

ol

Setting up

y

our T

V

Using the T

V

’s

F

eatur

es

Appendix

Index

20

(Continued from previous page)

Adding and erasing channels manually

After you automatically program the channels into the channel
memory (see previous page), you can manually add or erase specific
channels.

To manually add or erase channels:

1. Select the channel you want to add or erase. If you are adding a

channel, you must select the channel using the Channel Number
buttons on the remote control.

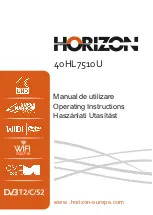
2. Press MENU, and then press 

x

 or 

 until the SET UP menu

appears.

3. Press 

y

 or 

z

 to highlight ADD/ERASE.

MOVE              SELECT [       ]

[       ]

LANGUAGE:

TV/CABLE:
CH PROGRAM

ADD/ERASE:

  MORE

[ENGLISH]  FRANCAIS ESPANOL

[TV] CABLE

[ADD] 

ERASE

SET UP

4. Press 

x

 or 

 to select ADD or ERASE, depending on the

function you want to perform.

5. Repeat steps 1–4 for other channels you want to add or erase.
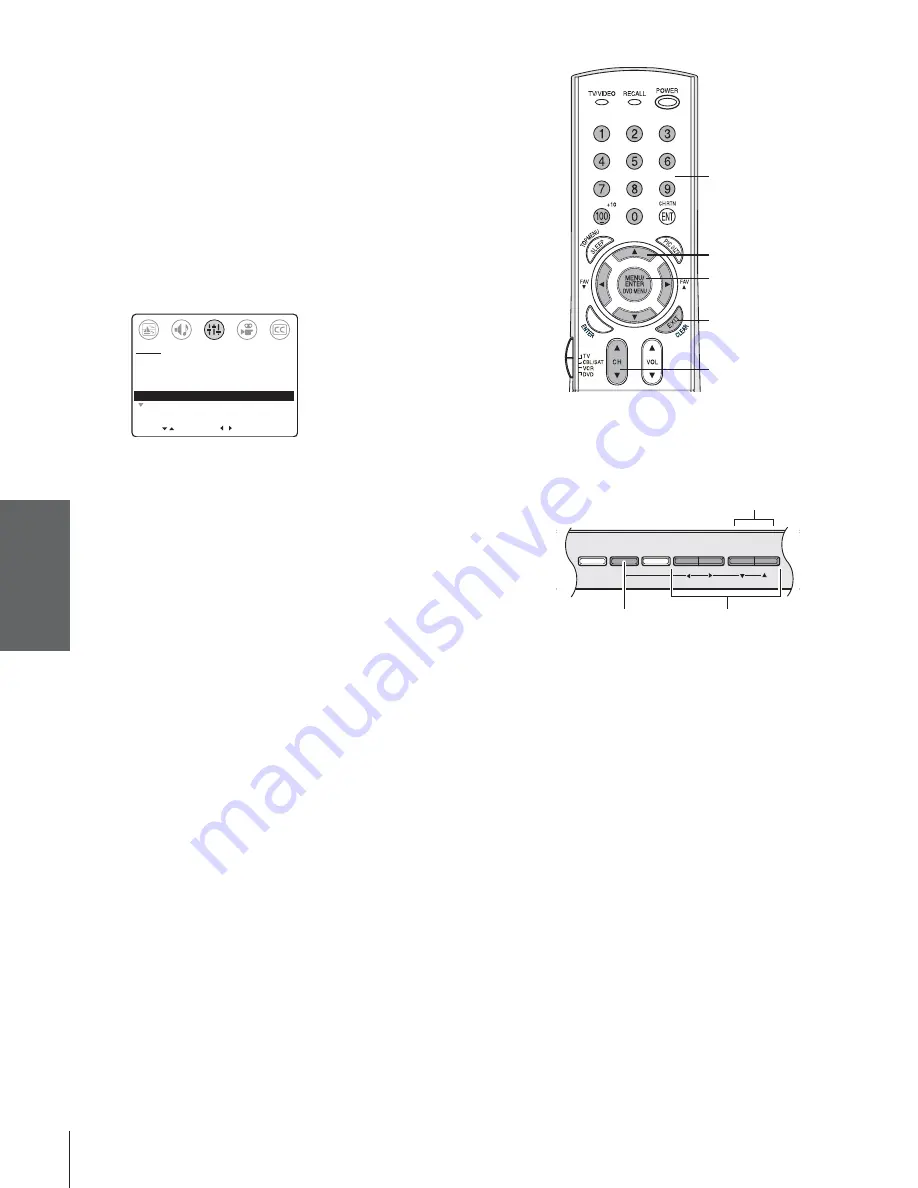
Changing channels

To change to the next programmed channel:

Press Channel 

y

 or 

z

 on the TV or remote control.

To change to a specific channel (programmed or unprogrammed):

Press the Channel Numbers (0–9 and 100).
For channels 100 and higher, press the 100 button and then the
next two numbers. For example, to select channel 125, press
100–2–5.

MENU

x


•zy

DEMO

MENU TV/VIDEO

VOLUME

CHANNEL

Channel 

zy

TV front panel

MENU

yzx


Channel 

yz

Channel
Numbers

EXIT

Summary of Contents for 32AF14

Page 1: ...these numbers in the spaces below Refer to these numbers whenever you communicate with your Toshiba dealer about this TV Model number Serial number 23566351 Introduction Connecting your TV Using the Remote Control Setting up your TV Using the TV s Features Appendix Index I S O 14001 FILE No A96 4 5 T O S H I B A A M E RICA CONSUMER PR O D U C T S L L C 32AF14 23566351 ...

Page 2: ... you 2500 Wilson Blvd Arlington VA 22201 U S A Tel 703 907 7600 Fax 703 907 7690 www CE org CEA is the Sponsor Producer and Manager of the International CES Safety Precautions WARNING TO REDUCE THE RISK OF FIRE OR ELECTRIC SHOCK DO NOT EXPOSE THIS APPLIANCE TO RAIN OR MOISTURE Dear Customer Thank you for purchasing this Toshiba TV This manual will help you use the many exciting features of your ne...

Page 3: ...uctions 5 Do not use this apparatus near water 6 Clean only with a dry cloth 7 Do not block any ventilation openings Install in accordance with the manufacturer s instructions 8 Do not install near any heat sources such as radiators heat registers stoves or other apparatus including amplifiers that produce heat 9 Do not defeat the safety purpose of the polarized or grounding type plug A polarized ...

Page 4: ...ensation to evaporate 31 For added protection of your TV from lightning and power surges always unplug the power cord and disconnect the antenna from the TV if you leave the TV unattended or unused for long periods of time 32 During normal use the TV may make occasional snapping or popping sounds This is normal especially when the unit is being turned on or off If these sounds become frequent or c...

Page 5: ...l settings 23 Switching between two channels 23 Programming your favorite channels 23 Labeling channels 24 Adjusting the picture 25 Adjusting the picture quality 25 Adjusting the color temperature 25 Selecting the picture preference mode 26 Using the SVM scan velocity modulation feature 26 Resetting your picture adjustments 27 Using the closed caption feature 28 Using the V CHIP parental control f...

Page 6: ... and keep this manual for future reference Exploring your new TV You can operate your TV using the buttons on the remote control or TV front panel behind the door The TV s front and back panels provide all the terminal connections you will need to connect other devices to your TV DEMO MENU TV VIDEO VOLUME CHANNEL VIDEO 3 IN VIDEO S VIDEO L MONO AUDIO R TV front VIDEO 3 A V IN with optional S video...

Page 7: ...the cables S Video cable is for use with video equipment that has S Video connectors Component video cables come in sets of three typically color coded red green and blue and are for use with video equipment that has component video connectors Your TV s ColorStream component video inputs are color coded in the same manner as the cables NOTE REGARDING PICTURE QUALITY When connecting video equipment...

Page 8: ...s connection allows you to watch and record basic and premium cable channels as well as watch videotapes Set the TV signal source to VIDEO 1 see Selecting the signal source on page 21 tune the VCR to channel 3 or 4 the same channel as the converter box output switch and use the cable converter box to change channels You will need three coaxial cables one set of standard A V cables Connecting a cab...

Page 9: ...VIDEO 1 and the VCR connected to VIDEO 2 The unauthorized recording use distribution or revision of television programs videotapes DVDs and other materials is prohibited under the Copyright Laws of the United States and other countries and may subject you to civil and criminal liability Connecting a DVD player or satellite receiver and a VCR This connection allows you to watch DVD satellite VCR or...

Page 10: ...no VCR connect L Mono to the VCR s AUDIO OUT terminal using only one audio cable If you have a VCR with S video use an S video cable instead of a standard video cable Do not connect a standard video cable and an S video cable to VIDEO 1 on the TV back or VIDEO 3 on the TV front at the same time or the picture performance will be unacceptable Stereo VCR TV DVD player with component video Connecting...

Page 11: ...ndard video cable for better picture quality Do not connect both a standard video cable and an S video cable to VIDEO 1 or VIDEO 3 at the same time or the picture performance will be unacceptable To dub or edit VCR 2 must select Line IN and the TV must select VIDEO 1 VCR 1 plays From Cable Cable Box or Antenna TV VCR 2 records Connecting two VCRs This connection allows you to record dub edit from ...

Page 12: ...connection also allows you to use external speakers To control the audio turn on the TV and the stereo amplifier and turn off the built in speakers See Turning off the built in speakers on page 39 You will need one coaxial cable one pair of standard audio cables DEMO MENU TV VIDEO VOLUME CHANNEL VIDEO 3 IN VIDEO S VIDEO L MONO AUDIO R VIDEO AUDIO OUT L R Connecting a camcorder This connection allo...

Page 13: ...mmed to operate You can program the TV remote control so it will operate the other device See pages 15 16 Installing the remote control batteries 1 Remove the battery cover from the back of the remote control Caution Dispose of batteries in a designated disposal area Do not throw batteries into a fire Do not mix battery types or combine used batteries with new ones Remove dead batteries immediatel...

Page 14: ...med into the Favorite Channel memory only TV VIDEO 21 EXIT 18 VOLUME st st T S 18 MENU 18 Channel numbers 20 POWER Device Switch 15 17 Set to TV to control the TV CHANNEL st 20 Access channels programmed into the TV s memory only VCR or DVD functions 17 SLEEP 40 DEMO MENU TV VIDEO VOLUME CHANNEL VIDEO 3 IN VIDEO S VIDEO L MONO AUDIO R TV Front VIDEO 3 A V IN 21 with optional S video POWER MENU 18 ...

Page 15: ...device that it is not preprogrammed to operate follow the steps below For details on using the remote control to operate the device see page 17 POWER Channel Numbers RECALL Device Switch Note Each time you change the batteries you must reprogram the remote control Some newer VCRs respond to either of two codes These VCRs have a switch labeled VCR1 VCR2 If your VCR has this kind of switch and does ...

Page 16: ...023 057 064 068 070 071 079 Fuji 004 041 Funai 018 073 Garrard 018 GE 001 002 009 040 042 048 056 Go Video 056 059 061 081 Goldstar 005 010 014 054 056 065 067 Gradiente 018 065 Harman Kardon 005 Hitachi 024 025 035 037 042 063 070 080 JBL 076 JC Penney 005 006 007 008 009 010 023 024 025 026 035 056 061 063 065 Jensen 024 025 037 050 JVC 005 006 007 014 037 043 050 062 063 068 082 Kenwood 005 006...

Page 17: ...ectly at the device CH st s selects the next higher channel t selects the next lower channel STOP Stops the tape or DVD PLAY Begins playback of a tape or DVD FF Fast forwards the tape or DVD Press during playback to view the picture moving rapidly forward REW Rewinds the tape or DVD Press during playback to view the picture moving rapidly backward TV VCR To view one program while recording another...

Page 18: ...IO MENU 1 AUDIO MENU 2 SET UP MENU 1 SET UP MENU 2 SET UP MENU 3 PREFERENCE MENU CLOSED CAPTION MENU Setting up your TV Learning about the menu system After you have installed the batteries and programmed the remote control you will need to set some preferences on the TV using the menu system You can access the menus using the buttons on your TV or remote control Press MENU to display the menu sys...

Page 19: ... your area and store them in the channel memory After the channels are stored automatically you can manually add or erase individual channels To program channels automatically 1 Press MENU and then press x or until the SET UP menu appears 2 Press y or z until TV CABLE is highlighted 3 Press x or to highlight either TV if you use an antenna or CABLE if you have cable service 4 Press z to highlight ...

Page 20: ... SET UP menu appears 3 Press y or z to highlight ADD ERASE MOVE SELECT LANGUAGE TV CABLE CH PROGRAM ADD ERASE MORE ENGLISH FRANCAIS ESPANOL TV CABLE ADD ERASE SET UP 4 Press x or to select ADD or ERASE depending on the function you want to perform 5 Repeat steps 1 4 for other channels you want to add or erase Changing channels To change to the next programmed channel Press Channel y or z on the TV...

Page 21: ... in purple on screen Pressing TV VIDEO on the remote control one time displays the current signal source To change the source continue pressing TV VIDEO or use the Channel Numbers to select 0 4 Pressing TV VIDEO on the TV one time changes the current signal source Continue pressing TV VIDEO to change the source Note When the ColorStream signal source is active the VIDEO OUT terminal outputs a blac...

Page 22: ...Displays the picture in normal conventional 4 3 format regardless of the signal type To use the NORMAL IMAGE SHAPE mode you must first adjust your DVD player s menu settings to normal conventional TV mode 4 3 aspect ratio 16 9 Compresses the signal to letterbox 16 9 mode with bars at the top and bottom of the screen regardless of the signal type To use the 16 9 IMAGE SHAPE mode you must first adju...

Page 23: ... press x or until the SET UP menu appears 3 Press y or z to highlight FAVORITE CH and then press to open the FAVORITE CH menu 4 Press x or to highlight SET press z and then press EXIT MOVE MORE V CHIP CONTROL FAVORITE CH CH LABEL TIMER 0 MIN MORE SET UP START SELECT FAVORITE CH SET CLEAR 2 5 6 11 0 0 0 0 0 0 0 0 TV CYAN CABLE BLUE SET UP SET 5 Repeat steps 1 4 for up to 12 channels To select your ...

Page 24: ...ghlight LABEL 6 Repeatedly press x or to select a character for the first space and then press MENU Repeat this step for all four characters MOVE CH LABEL SET CLEAR SET CLEAR LABEL E F G L SET UP MENU SET UP SELECT SET ENT 7 Repeat steps 1 6 for other channels you want to label To erase a channel label 1 Tune the TV to the channel whose label you want to erase Note You must be in CABLE mode to era...

Page 25: ...ture You can change the quality of the picture by selecting from three preset color temperatures cool medium and warm as described in the table below See note above right To adjust the color temperature 1 Press MENU and then press x or until the PREFERENCE menu appears 2 Press y or z to highlight COLOR TEMPERATURE 3 Press x or to highlight the mode you prefer MOVE COLOR TEMPERATURE COOL MEDIUM WAR...

Page 26: ... and then press x or until the PICTURE menu appears 2 Press y or z to highlight SVM 3 Press x or to highlight ON MOVE CONTRAST 50 BRIGHTNESS 50 SHARPNESS 50 COLOR 50 TINT 0 SVM ON OFF RESET PICTURE ADJUST To turn off the SVM feature Highlight OFF in step 3 above Note The SVM feature can sometimes make the picture look artificial If SVM is on and you want the video material you are watching to look...

Page 27: ...nter 50 Tint center 0 Color temperature Cool SVM ON Picture preference mode Sports Note The RESET function also returns your audio adjustments to their factory settings See Resetting your audio adjustments on page 38 To reset your picture and audio adjustments 1 Press MENU and then press x or until the PICTURE menu appears 2 Press y or z to highlight RESET and then press The screen displays the wo...

Page 28: ...s To use the closed caption feature 1 Tune the TV to the desired program or video 2 Press MENU and then press x or until the CLOSED CAPTION menu appears 3 Press z or y to highlight CC MOVE CC C1 C2 C3 C4 T1 T2 T3 T4 OFF CLOSED CAPTI0N SELECT 4 Press x or to highlight the closed caption mode you prefer as decribed below To view captions Highlight C1 C2 C3 or C4 C1 displays the primary language in y...

Page 29: ...or until the SET UP menu appears 2 Press y or z to highlight V CHIP CONTROL and then press MOVE MORE V CHIP CONTROL FAVORITE CH CH LABEL TIMER 0 MIN MORE SET UP START The PIN code entering screen BLOCKING RESET or BLOCKING ACTIVE appears as follows BLOCKING RESET status Press the Channel Number buttons 0 9 to store a new 4 digit PIN code BLOCKING ACTIVE status when the PIN code is already stored P...

Page 30: ...highlight MPAA RATING 8 Press to block X or x to unblock MOVE ENABLE BLOCKING Y N SET RATING SET BLOCKING OPTIONS NEW PIN CODE BLOCK CHANNEL SET UP SELECT MPAA RATING X NC17 R PG13 PG G x x YOUTH TV RATING Y7FV Y7 TV RATING MOVE SET UP SELECT Y Note The V Chip function is only available for the U S V Chip system The Canadian V Chip system Puce V is not supported MOVE ENABLE BLOCKING Y N SET RATING...

Page 31: ...V BACK TO V CHIP MENU TV RATING 9 Press to block X or x to unblock 10 Repeat steps 8 and 9 to set the next item To disable unblock TV and YOUTH TV rating blocking Follow steps 1 5 above but select N in step 5 to disable blocking Note This also will unblock MPAA rating blocking see previous page Press RECALL to display the rating of the TV program you are currently watching 6 CABLE STEREO SAP TV PG...

Page 32: ...u try to watch a TV program that exceeds the rating limits you set the TV will enter the block mode 2 To temporarily unblock the program and all other blocked programs press MUTE 3 Press the Channel Numbers 0 9 to enter your 4 digit PIN code If the wrong PIN code is entered the message Incorrect PIN code appears Enter the code again If the correct code is entered blocking will be disabled unblocke...

Page 33: ...N code entering screen opens MOVE MORE V CHIP CONTROL FAVORITE CH CH LABEL TIMER 0 MIN MORE SET UP START SELECT 0 9 END EXIT BLOCKING IS ACTIVE PLEASE ENTER PIN CODE _ _ _ _ SET UP 4 Press the Channel Numbers 0 9 to enter your 4 digit PIN code see page 29 The V CHIP CONTROL menu opens 5 Press y or z to highlight BLOCK CHANNEL and then press to open the BLOCK CHANNEL menu 6 Press x or to highlight ...

Page 34: ...ens 4 Press y or z to highlight NEW PIN CODE 5 Press the Channel Numbers 0 9 to enter a new 4 digit code The new PIN code is now active MOVE ENABLE BLOCKING Y N SET RATING SET BLOCKING OPTIONS NEW PIN CODE BLOCK CHANNEL SET UP SELECT SELECT 0 9 END EXIT PLEASE ENTER NEW PIN CODE _ _ _ _ SET UP Note You need to know your current PIN code to use the NEW PIN CODE feature If you do not remember your c...

Page 35: ... press x or until the AUDIO menu appears 2 Press y or z to highlight MTS 3 Press x or to highlight STR MOVE AUDIO SELECT MTS STR SAP MONO BASS 50 TREBLE 50 BALANCE 0 SURROUND ON OFF BBE ON OFF MORE You can leave your TV in STR mode because it automatically outputs the type of sound being broadcast stereo or monaural If the stereo sound is noisy select MONO to reduce the noise The word STR or SAP d...

Page 36: ...50 BALANCE 0 SURROUND ON OFF BBE ON OFF MORE To turn off the surround sound feature Highlight OFF in step 5 above Adjusting the sound quality You can change the quality of your TV s sound by adjusting the bass treble and balance To adjust the sound quality 1 Press MENU then press x or until the AUDIO menu appears 2 Press y or z to highlight the sound quality you want to adjust MOVE AUDIO ADJUST MT...

Page 37: ...re The BBE High Definition Sound feature enhances the clarity and detail of the sound from the TV s speakers providing improved speech intelligibility and musical realism To turn on the BBE High Definition Sound feature 1 Press MENU and then x or until the AUDIO menu appears 2 Press y or z to highlight BBE 3 Press x or to highlight ON MOVE AUDIO SELECT MTS STR SAP MONO BASS 50 TREBLE 50 BALANCE 0 ...

Page 38: ...UDIO MORE SPEAKERS ON OFF STABLE SOUND ON OFF To turn off the StableSound feature Highlight OFF in step 3 above Turning off the built in speakers Use this feature to turn off the TV speakers when you connect external speakers to your TV See Connecting an audio system on page 12 To turn off the built in speakers 1 Press MENU and then press x or until the AUDIO menu appears 2 Press y or z to highlig...

Page 39: ...see note at right To stop the DEMO mode Press DEMO or POWER on the TV or press RECALL EXIT or POWER on the remote control Understanding the auto power off feature The TV will automatically turn itself off after approximately 15 minutes if it is tuned to a vacant channel or a station that completes its broadcast for the day This feature does not work in VIDEO mode Understanding the last mode memory...

Page 40: ...Y 1 V p p 75 ohm negative sync C 0 286 V p p burst signal 75 ohm VIDEO AUDIO INPUT VIDEO 1 V p p 75 ohm negative sync AUDIO 150 mV rms 30 modulation equivalent 47 kohm ColorStream component video INPUT Y 1V p p 75 ohm PB 0 7 V p p 75 ohm PR 0 7 V p p 75 ohm AUDIO 150 mV rms 47 kohm VIDEO AUDIO OUTPUT VIDEO 1 V p p 75 ohm negative sync AUDIO 150mV rms 30 modulation equivalent 4 7 kohm Dimensions Wi...

Page 41: ...e look artificial If SVM is on and you want the video material you are watching to look more natural try turning off the SVM feature p 26 Make sure the remote control device switch is set to the correct position p 14 Black box on screen Set the CLOSED CAPTION feature to OFF p 28 Poor color or no color The station may have broadcast difficulties Try another channel Adjust the TINT and or COLOR in t...

Page 42: ...ANNEL feature Unblock the channel p 33 Closed caption problems If you select one of the caption modes C1 C2 C3 or C4 but the program you are watching is not closed captioned no captions will display on screen p 28 A closed caption signal may not display correctly in the following situations a when a videotape has been dubbed b when the signal reception is weak or c when the signal reception is non...

Page 43: ...ANTIES ARE SUBJECT TO THE FOLLOWING CONDITIONS 1 You must provide your bill of sale or other proof of purchase 2 All warranty servicing of this television must be performed by an Authorized TACP Service Station 3 These warranties from TACP are effective only if the television is purchased and operated in the U S A or Puerto Rico 4 Labor charges for installation setup adjustment of customer control...

Page 44: ...egister your product will not affect your rights under this warranty Your Responsibility THE ABOVE WARRANTIES ARE SUBJECT TO THE FOLLOWING CONDITIONS 1 You must provide your bill of sale or other proof of purchase 2 All warranty servicing of this television must be performed by an Authorized TCL Service Depot 3 These warranties from TCL are effective only if the television is purchased in Canada f...

Page 45: ...45 Introduction Connecting your TV Using the Remote Control Setting up your TV Using the TV s Features Appendix Index Notes ...

Page 46: ...46 Notes ...

Page 47: ... of the TV 6 L M Language selection 19 Last mode memory 40 Menu system 18 MTS feature 36 MUTE button 36 P PIC SIZE button 14 22 Picture adjustments Color temperature 25 Picture preference mode 26 Picture quality 25 Resetting 27 SVM 26 R RECALL button 40 Remote control Battery installation 13 Learning about the buttons 14 17 Programming 15 Remote control codes 15 16 Resetting picture and audio adju...

Page 48: ...KHAM ONTARIO L3R 8H2 CANADA TEL 905 470 5400 SERVICE CENTERS TORONTO 191 McNABB STREET MARKHAM ONTARIO L3R 8H2 CANADA TEL 905 470 5400 MONTREAL 18050 TRANS CANADA KIRKLAND QUEBEC H9J 4A1 CANADA TEL 514 390 7766 VANCOUVER 22171 FRASERWOOD WAY RICHMOND B C V6W 1J5 CANADA TEL 604 303 2500 MANUFACTURED BY TOSHIBA AMERICA CONSUMER PRODUCTS L L C ColorStream and Stablesound are registered trademark of T...

Reviews: