25
Appendix
Using the
TV
’s
Features
Setting up
y
our TV
Using the
Remote Contr
ol
Connecting
y
our TV
W
elcome to
T
oshiba
Impor
tant
Safeguar
ds
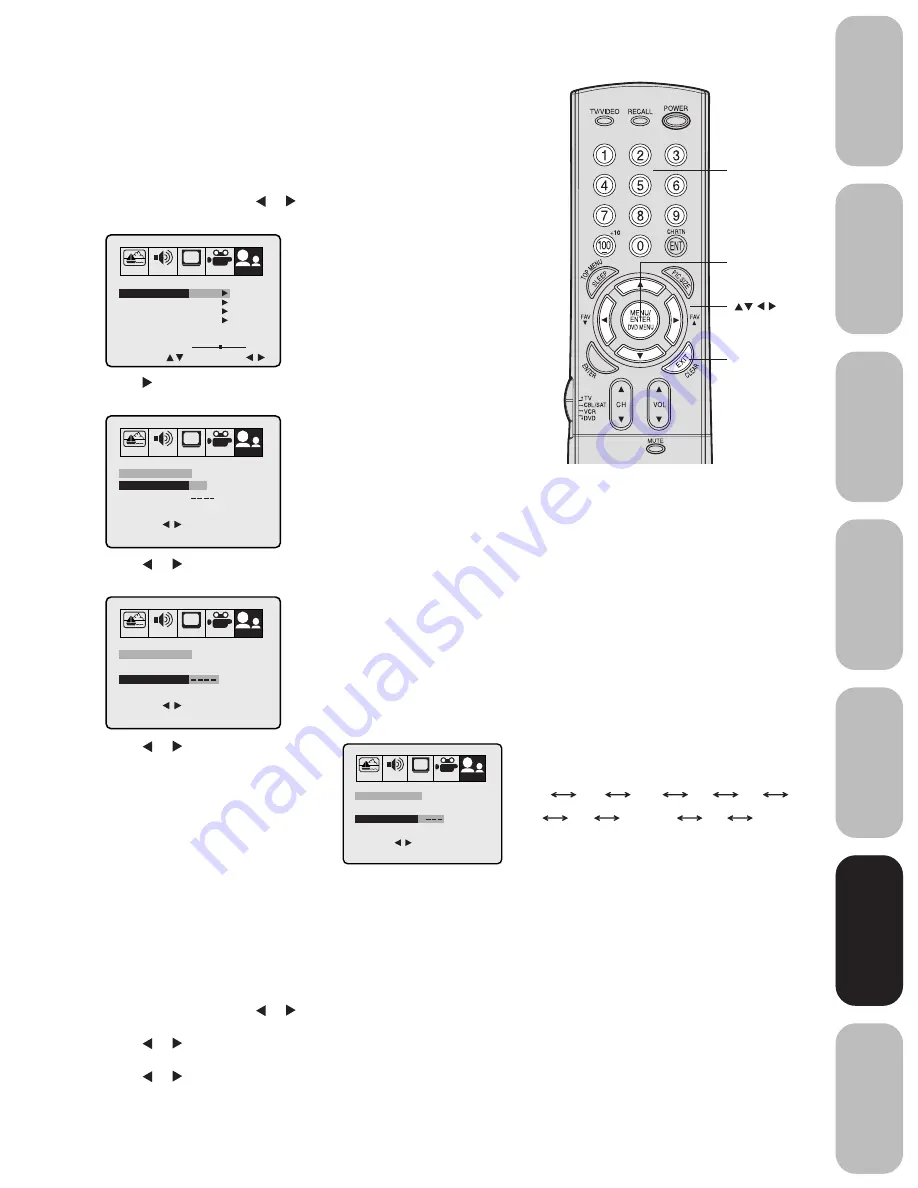
7. Press or to enter a character in
the first space. Press the button
repeatedly until the character you want
appears on the screen. Press ENTER.
8. Repeat step 7 to enter the rest of the
characters.
If you would like a blank space in the
label name, you must choose an empty
space from the list of characters; otherwise, a dash will appear in
that space.
9. Repeat steps 1-8 for other channels. You can assign a label to
each channel.
10. Press EXIT to clear the screen.
To erase channel labels:
1. Select a channel with a label.
2. Press MENU, then press or until the OPTION menu appears.
3. Press
▲
or
▼
to highlight CH LABEL.
4. Press or to display the CH LABEL menu.
SET/CLEAR will be highlighted.
5. Press or to highlight CLEAR.
6. Press ENTER.
7. Repeat steps 1-6 to erase other channel labels.
Note:
The character will change as below.
SPACE
–
0
9
+
• • •
–
• • •
A
Z
Labeling channels
Channel labels appear over the channel number display each time you
turn on the TV, select a channel, or press the Recall button. You can
choose any four characters to identify a channel.
To create channel labels:
1. Select a channel you want to label.
2. Press MENU, then press or until the OPTION menu appears.
3. Press
▲
or
▼
to highlight CH LABEL.
4. Press to display the CH LABEL menu. SET/CLEAR will be
highlighted.
5. Press or to highlight SET.
6. Press
▲
or
▼
to highlight LABEL.
PICTURE AUDIO
SETUP
CH
OPTION
MODE
SELECT
START
CH LABEL
START
START
DVD
FAVORITE CH
V-CHIP
LOCK
OFF
ON/OFF TIMER
COLORSTREAM
ENGLISH
LANGUAGE
START
START
IMAGE TILT
0
PICTURE AUDIO
SETUP
CH
OPTION
MODE
SET/CLEAR
SET CLEAR
CH LABEL : CH 12
LABEL
END
EXIT
SET
ENTER
SELECT
PICTURE AUDIO
SETUP
CH
OPTION
MODE
SET/CLEAR
SET
CH LABEL : CH 12
LABEL
END
EXIT
SET
ENTER
SELECT
PICTURE AUDIO
SETUP
CH
OPTION
MODE
SET/CLEAR
SET
A
CH LABEL : CH 12
LABEL
END
EXIT
SET
ENTER
SELECT
Menu/
Enter
Exit
Channel
Numbers
Using the
TV
’s
Features
3N10201A/E P18-30
09/04/2003, 12:56
25


