22
Using the TV’s features (General)
Cinema Mode
The frame rate of a movie film is generally 24 frames a
second whereas the movie software such as DVD, etc.
that you enjoy watching on television at home is 30 or
25 frames a second. The difference in frame rate may
cause flickers whilst viewing the films on television; set
the
Cinema Mode
to convert the signal to reproduce a
smooth motion and picture quality.
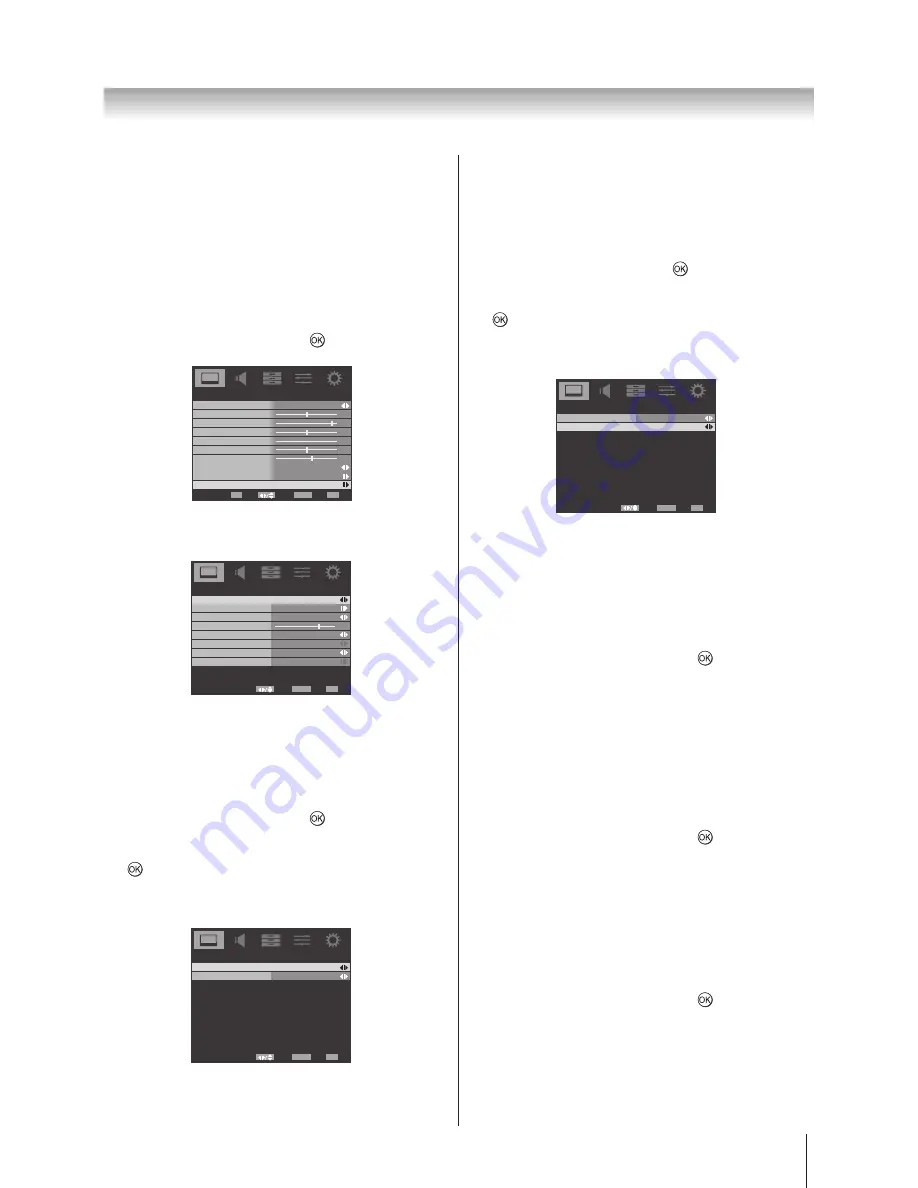
1 In the
PICTURE
menu, press ▲ or ▼ to highlight
Advanced Video
, press ► or
to select
.
Picture Mode
User
50
95
50
0
50
Brightness
Contrast
Colour
Tint
Sharpness
PICTURE
60
Back Light
Picture Size
Colour Temperature
Advanced Video
Wide
Select
Back
Exit
EXIT
Enter
OK
RETURN
2 Press ▲ or ▼ to highlight
Cinema Mode
, press ◄ or
► select
On
or
Off.
7
Advanced Video
Select
Back
Exit
EXIT
RETURN
On
Cinema Mode
Auto
Off
Off
NR
CTI
Adaptive Luma Control
On
Active Backlight
Blue Screen
3D Colour Management
Base Colour Adjustment
DNR
DNR
(Digital Noise Reduction) enables you to ‘soften’
the screen representation of a weak signal to reduce the
noise effect.
1 In the
PICTURE
menu, press ▲ or ▼ to highlight
Advanced Video
, press ► or
to select.
2 Press ▲ or ▼ to highlight
NR
and then press ► or
to select.
3 Select
DNR
. Press ◄ or ► to select
Low
,
Middle
,
High, Auto,
or
Off
.
NR
Select
Back
Exit
EXIT
RETURN
Auto
Low
DNR
MPEG NR
MPEG NR
If the receiving signal of MPEG is a grained noise
depending on the compression and conversion, the noise
may be reduced when using this function.
1 In the
PICTURE
menu, press ▲ or ▼ to highlight
Advanced Video
, press ► or
to select.
2 Press ▲ or ▼ to highlight
NR
and then press ► or
to select.
3 Select the
MPEG NR
, and press ◄ or ► to select
On
or
Off
.
NR
Select
Back
Exit
EXIT
RETURN
Auto
Low
DNR
MPEG NR
CTI
The colour transient improvement (CTI) involves the
detection and sharpening of edges around colour objects
on the screen.
1 In the
PICTURE
menu, press ▲ or ▼ to highlight
Advanced Video
and press ► or
to select.
2 Select the
CTI,
and press ◄ or ► to select
Auto
or
Off
.
Adaptive Luma Control
Automatically adjusts the brightness and contrast after
analyzing the input signal. This function enriches the
colours and the depth of the picture.
1 In the
PICTURE
menu, press ▲ or ▼ to highlight
Advanced Video
and press ► or
to select
.
2 Press
▲ or ▼ to highlight
Adaptive Luma Control
and then press ◄ or ► to select from
0
~
10
.
Active Backlight
When Active Backlight is activated, it will automatically
optimise the backlighting levels for dark scenes.
1 In the
PICTURE
menu, press ▲ or ▼ to highlight
Advanced Video
and press ► or
to select
.
2 Select the
Active Backlight
, and press ◄ or ► to
select
On
or
Off
.
Summary of Contents for 22AV700A
Page 47: ...46 Note Note ...
Page 48: ......


