background image

11

VIDEO  LOCK

〈 

+ / – / ENTER / MENU 


OFF
VIDEO
VIDEO+

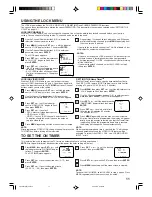
LOCKING VIDEO INPUT

With the VIDEO LOCK feature, you can lock out the input
source (VIDEO) and channels 3 and 4. You will not be able to
select the input sources with the 

TV/VIDEO

 button or Channel

buttons unless you clear the setting.

1

2

3

4

5


〈 


Press 

MENU

, then press 

SET +

 or 

 until the indicator

next to “LOCK” begins to flash, then press 

ENTER

.

Use the Channel Number buttons (0–9) to enter your
password, then press 

ENTER

. The LOCK menu appears.

Press 

SET +

 or 

– 

until the indicator

next to “VIDEO LOCK” begins to flash,
then press 

ENTER

.

Press 

SET +

 or 

 to select:

 OFF: Unlocks all video input sources.

 VIDEO: Locks VIDEO.

1

2

3

4

5

USING THE LOCK MENU

LOCK

〈 

+ / – / ENTER / MENU 


GAME TIMER

CH  LOCK
VIDEO  LOCK

CHANGE PASSWORD

1

2

3

4

6

The LOCK menu includes the CH LOCK, VIDEO LOCK, GAMETIMER and CHANGE PASSWORD functions.
You can use these functions after entering the correct PASSWORD. (This password is the same one selected under “SETTING THE
V-CHIP” on page 10.)

5

LOCKING CHANNELS

With the CH LOCK feature, you can lock specific channels. You will not be able to tune locked channels unless you clear the
setting. You can choose to lock up to nine TV channels and nine cable channels.

Use the Channel Number buttons (0–9) to display the
television channel you wish to lock.

Press 

MENU

, then press 

SET +

 or 

  until the indicator

next to “LOCK” begins to flash. Then press 

ENTER

.

Use the Channel Number buttons (0–9) to enter your
password, then press 

ENTER

.

The LOCK menu appears.

Press 

SET +

 or 

 until the indicator next

to “CH LOCK” begins to flash, then
press 

ENTER

.

Press 

SET +

 or 

 to select:

 INPUT to select the channel as one to

  be locked. Then press 

 ENTER

.

 ALL CLEAR to clear all channels from

  the list of locked channels. Then press

  ENTER

.

Repeat steps 1 through 5 to lock other channels. When you
are finished locking channels, press 

MENU

 repeatedly until

the menu screen is cleared.

NOTES:

• If you are accessing the LOCK menus or V-chip menus for the

first time, choose a four-digit number to be your password.

• After programming CH LOCK, change channels before turning

off the television.

• If you want to unlock channels, select ALL CLEAR in step 5,

then press 

ENTER

.

CH  LOCK

〈 

+ / – / ENTER / MENU 


CABLE
INPUT

ALL CLEAR

---   ---   ---

---   ---   ---

---   ---   ---

If you try to tune a locked channel, the TV will not display it, but
will display the nearest unlocked channel.

 VIDEO +: Locks VIDEO, channel 3 and channel 4.

  This option should be used if you use the antenna
  to play a video tape.

Press 

MENU

 repeatedly until the menu screen is cleared.

SETTING THE GameTimer

TM

With the GameTimer

TM

 feature, you can automatically activate

the VIDEO LOCK feature (VIDEO setting) to set a time limit for
playing a TV game (30, 60, 90, or 120  minutes).

Press 

MENU

, then press 

SET +

 or 

 until the indicator next to

“LOCK” begins to flash, then press 

ENTER

.

Use the Channel Number buttons (0–9) to enter your pass-
word, then press 

ENTER

. The LOCK menu appears.

Press 

SET +

  or  

 until the indicator next to

“GAMETIMER” begins to flash, then press

ENTER

.

Press 

SET +

 or 

 to select a time limit

(30 minutes, 60 minutes, 90 minutes,
120 minutes or OFF).

Press 

MENU

 repeatedly until the menu screen is cleared.

After the GameTimer is programmed, the display will appear
briefly every ten minutes to remind you that the GameTimer
is operating.  When the programmed end time is reached,
the display will change the channel automatically.

TO SET THE ON TIMER

1

2

3

4

5

This feature allows you to program the TV to turn on automatically at a set time and channel.

NOTE

: After a power failure or disconnection of the power, the timer setting will be lost.

Press 

MENU

, then press 

SET +

 or 

  until

the indicator next to “ON TIMER” begins
to flash. Then press 

ENTER

.

The ON TIMER menu appears.

Press 

SET +

 or 

 to set the desired hour (0–12), then

press 

ENTER

.

Press 

SET +

 or 

 to set the desired minute

(00, 05, 10, ...55), then press 

ENTER

.

NOTE:

To cancel the ON TIMER, select CANCEL in step 4 above. Press
MENU repeatedly until the menu screen is cleared.

Press 

SET +

  or 

  to set the desired

channel, then press 

ENTER

.

Press 

SET +

 or 

 to select the SET mode, then press 

ENTER

.

ON TIMER


+ / — / ENTER / MENU 


HOUR
MINUTE
CH 002

00h
00m
CANCEL

ON TIMER


+ / — / ENTER / MENU 


HOUR
MINUTE
CH 125

08h
15m
SET

Press 

MENU

 repeatedly until the menu screen is cleared.

6

NOTE:

After programming VIDEO LOCK, change channels or press the
TV/VIDEO key before turning off the television.

NOTE:

When the programmed end time is reached, the TV will change
channels automatically and the VIDEO LOCK feature will be
activated. To turn off the VIDEO LOCK, see “LOCKING VIDEO
INPUT,” at left.

 3X30321A[E] P08-12

22/12/05, 4:38 PM

11

Summary of Contents for 20AS26

Page 1: ...20AS26 3X30321A E COVER 22 12 05 4 37 PM 1 ...

Page 2: ...tructions follow this symbol ChildSafety The Issue If you are like most consumers you have a TV in your home Many homes in fact have more than one TV The home theater entertainment experience is a growing trend and larger TVs are popular purchases however they are not always supported on the proper TV stands Sometimes TVs are improperly secured or inappropriately situated on dressers bookcases she...

Page 3: ... has been exposed to rain or moisture does not operate normally or has been dropped 15 CAUTION To reduce the risk of electric shock do not use the polarized plug with an extension cord receptacle or other outlet unless the blades can be inserted completely to prevent blade exposure Wide plug Installation Care and Service Installation Follow these recommendations and precautions and heed all warnin...

Page 4: ...ation to evaporate 31 For added protection of your TV from lightning and power surges always unplug the power cord and disconnect the antenna from the TV if you leave the TV unattended or unused for long periods of time 32 During normal use the TV may make occasional snapping or popping sounds This is normal especially when the unit is being turned on or off If these sounds become frequent or cont...

Page 5: ...d captions or text on screen when available Lock feature This feature has three functions LOCKING CHANNELS LOCKING VIDEO INPUT and SETTING THE GameTimerTM Programmable ON Timer Allows you to program the TV to automatically turn on at a set time FRONT BACK 1 POWER indicator Lights up when the power is turned on 2 Remote Sensor Signals from the Remote Control unit are received here 3 POWER Button Pr...

Page 6: ...r or select information for on screen operations 14 1 2 Button Switches between captions channel 1 and captions channel 2 in the closed caption mode 15 CAP TEXT Button Press to switch between normal TV and the two closed caption modes captions or text when available REMOTE CONTROL 1 Open the battery compartment cover 2 Install two AAA penlight size batteries HOW TO INSTALL BATTERIES Before using t...

Page 7: ...e with scrambled premium channels If you subscribe to a cable service in which basic cable channels are unscrambled and premium channels require the use of a converter descrambler box you may wish to use a two set signal splitter sometimes called a two set coupler and an A B switch box from the cable installer or an electronics supply store Follow the connections shown at left With the switch in t...

Page 8: ...gits Example to select channel 12 press 012 Press the 2 digits in order Example to select channel 36 press 36 Press the 3 digits in order Example to select channel 120 press 120 1 2 3 4 CH CHANNEL and buttons Press and release CH CHANNEL or The channel automatically stops at the next channel programmed into the TV s memory Press and hold the button down to change channels more quickly For proper o...

Page 9: ...m red to green when a channel is added and the channel will be memorized If a memorized channel was selected step 4 the chan nel indication will be green To delete the channel from Press MENU repeatedly until the menu screen is cleared 6 memory press ENTER repeatedly until DEL appears on screen The channel indicator will change from green to red when a channel is deleted Repeat steps 4 and 5 for e...

Page 10: ... display closed captioned television programs When available closed captioning will display text on the screen for hearing impaired viewers or it will translate and display text in another language TO VIEW CLOSED CAPTIONS Press CAP TEXT on the remote control to switch between normal TV and the two closed caption modes captions and half screen Text Captions This closed caption mode will display tex...

Page 11: ...CH LOCK ENTER MENU CABLE INPUT ALL CLEAR If you try to tune a locked channel the TV will not display it but will display the nearest unlocked channel VIDEO Locks VIDEO channel 3 and channel 4 This option should be used if you use the antenna to play a video tape Press MENU repeatedly until the menu screen is cleared SETTING THE GameTimerTM With the GameTimerTM feature you can automatically activat...

Page 12: ...ent antenna Check for sources of possible interference Horizontal or diagonal bars on screen No reception above channel 13 Batteries are weak dead or inserted incorrectly Remote is out of range move closer to TV within 15 feet Make sure Remote is aimed at sensor Confirm there are no obstructions between the Remote and the TV Make sure the power cord is plugged in Make sure TV CABLE menu option is ...

Page 13: ...13 MEMO 3X30321A E P13 Back 22 12 05 4 38 PM 13 ...

Page 14: ... L L C PRINTED IN THAILAND LATIN AMERICAN DIVISION SIERRA CANDELA 111 6TO COL LOMAS DE CHAPULTEPEC MEXICO D F C P 11000 TEL 5 540 1008 D F 800 712 6764 OUTSIDE D F 1900 NORTHWEST 84th AVENUE MIAMI FL 33126 TEL 305 470 9355 3X30321A E P13 Back 22 12 05 4 38 PM 14 ...

Page 15: ...20AS26 3X30321A S COVER 22 12 05 4 38 PM 1 ...

Page 16: ...ga en mente estos consejos de seguridad mientras disfruta de su televisor ADVERTENCIA RIESGO DE DESCARGA ELÉCTRICA NO ABRIR El símbolo de rayo en un triángulo indica que el voltaje en el interior de este producto puede causar descargas eléctricas NO INTENTE REPARAR ESTE PRODUCTO USTED MISMO El símbolo de exclamación en un triángulo indica que el texto que sigue contiene instrucciones importantes d...

Page 17: ... todas las instrucciones 5 No use este aparato cerca del agua 6 Límpielo únicamente con un paño seco 7 No bloquee las rejillas de ventilación Instale el aparato de acuerdo con las instrucciones del fabricante 8 No instale el aparato cerca de fuentes de calor tales como radiadores salidas de calefacción cocinas y otros aparatos incluidos los amplificadores que producen calor 9 No anule el diseño de...

Page 18: ...a usar por períodos prolongados 32 Durante el uso normal es posible que el televisor haga ruidos de vez en cuando Esto es normal especialmente en el momento de encenderlo y apagarlo Si los ruidos se vuelven frecuentes o continuos desconecte el televisor y comuníquese con un centro de servicio autorizado de TOSHIBA 33 Posibles efectos adversos sobre el tubo de imagen del televisor Si una imagen fij...

Page 19: ...FICADOR de subtítulos Muestra leyendas cerradas o texto en pantalla cuando está disponible Recurso de bloqueo Este recurso tiene tres funciones el BLOQUEO DE CANALES el BLOQUEO DE LA ENTRADA DE VÍDEO y el AJUSTE DEL TEMPORIZADOR PARA JUEGOS DE TV Temporizador ON programable Le permite programar su TV para automáticamente encenderla a la hora programada UBICACION DE LOS CONTROLES DELANTERA TRASERA ...

Page 20: ...ás bajo 13 Botón ENTER Presiónelo para introducir o seleccionar la información de las operaciones en pantalla 14 Botón 1 2 Cambia entre el canal 1 de subtítulos y el canal 2 de subtítulos en el modo de subtítulos ocultos 15 Botón de subtítulos texto Presione para cambiar entre los modos de TV normal y los dos modos de Leyendas cerradas leyendas o texto cuando estén disponibles 1 Botón de POWER Par...

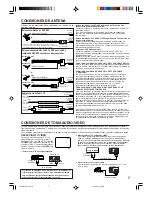
Page 21: ...ecodificador canal 3 ó 4 CONEXIONES DE TOMA AUDIO VIDEO 2 Para conectar el TV a un juego de VIDEO El TV puede utilizarse también como pantalla para muchos juegos de video Sin embargo debido a que existe una gran variedad de tipos diferentes de señales generadas por estos aparatos y diferentes requisitos de conexión correspondientes no se han incluido todas las posibilidades posibles en los diagram...

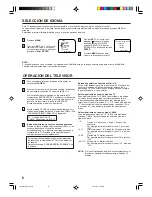
Page 22: ...s de canal en ascenso descenso Presione y libere el botón selector de canal CH en ascenso o descenso El canal se detiene automáticamente en el próximo canal programado en la memoria de la TV Presione y retenga el botón para cambiar los canales más rápidamente Para la operación apropiada asegúrese de programar los canales en la memoria de la TV antes de sintonizar los canales Consulte la sección PA...

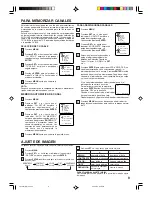
Page 23: ... en rojo Presione ENTER si usted desea añade el canal no memorizado Cuando un canal se añadio el indicador de canal cambiará de rojo a verde y el canal será memorizado Si un canal memorizado es seleccionado paso 4 el indicador de canal será en verde Para eliminar el canal de la memoria presione ENTER varias veces hasta que aparezca DEL en la pantalla Cuando el canal es borrado el indicador de cana...

Page 24: ...n aparecer faltas de ortografía o caracteres extraños durante la recepción de texto Esto es normal en este modo especialmente con los programas en vivo Esto se debe a que durante los programas en vivo los textos son ingresados sin edición ya que no hay tiempo para la misma Cuando las leyendas estén en pantalla puede ser que las indicaciones de funciones como volumen y silenciamiento no aparezcan y...

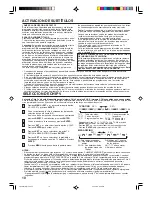
Page 25: ...saparezca la pantalla menu AJUSTE DEL TEMPORIZADOR PARA JUEGOS DE TV Con la función GameTimerTM puede activar automáticamente el modo VIDEO LOCK Ajuste de VÍDEO para ajustar un límite de tiempo al utilizar un juego de TV 30 60 90 ó 120 minutos Presione MENU y después pulse SET o hasta que el indicador esté junto a LOCK y después presione ENTER Use los botones de número de canal 0 9 para introducir...

Page 26: ...a y reoriente la antena Determine si hay posibles fuentes de interferencia Asegúrese de que el modo TV CABLE esté ajustado a la posición apropiada en la selección de menú de la pantalla Si está usando una antena revise las conexiones de la antena de UHF Las pilas están débiles o agotadas o han sido insertadas en forma incorrecta El remoto está fuera de la gama acérquese al TV dentro del entorno de...

Page 27: ...13 MEMO 3X30321A S P13 Back 22 12 05 4 39 PM 13 ...

Page 28: ...ducts L L C IMPRESO EN TAILANDIA LATIN AMERICAN DIVISION SIERRA CANDELA 111 6TO COL LOMAS DE CHAPULTEPEC MEXICO D F C P 11000 TEL 5 540 1008 D F 800 712 6764 OUTSIDE D F 1900 NORTHWEST 84th AVENUE MIAMI FL 33126 TEL 305 470 9355 3X30321A S P13 Back 22 12 05 4 39 PM 14 ...

Reviews: