


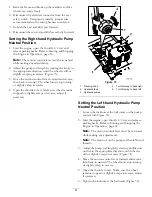


2. Check the distance between the two large washers,
it needs to be 10-1/2 inches (26.7 cm) for 60 inch
mower decks or 11–1/2 inches (29.2 cm) for 72 inch
mower decks (Figure 78).
3. Adjust this distance, by loosening the spring jam
nut and turning the nut in front of each spring
(Figure 78). Turning the nut clockwise will shorten
the spring; counter-clockwise will lengthen the
spring.
4. Lock the nut into position by tightening the spring
jam nut (Figure 78).
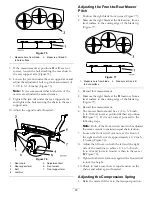
Figure 78
1.
10-1/2 inch (26.7 cm)
between the large washers
for 60 inch mower decks
6.
Lift nut
2.
Front nut
7.
Front support arm
3.
Spring jam nut
8.
Large washer
4.
Front swivel
9.
11–1/2 inch (29.2 cm)
between the large washers
for 72 inch mower decks
5.
Swivel jam nut
Servicing the Cutting Blades
Maintain sharp blades throughout the cutting season
because sharp blades cut cleanly without tearing or
shredding the grass blades. Tearing and shredding turns
grass brown at the edges, which slows growth and
increases the chance of disease.
Check the cutter blades daily for sharpness, and for any
wear or damage. File down any nicks and sharpen the
blades as necessary. If a blade is damaged or worn,
replace it immediately with a genuine Toro replacement
blade. For convenient sharpening and replacement, you
may want to keep extra blades on hand.
A worn or damaged blade can break, and a
piece of the blade could be thrown into the
operator’s or bystander’s area, resulting in
serious personal injury or death.
•
Inspect the blade periodically for wear or
damage.
•
Replace a worn or damaged blade.
Inspect and check the blades every 8 hours.
Before Inspecting or Servicing the
Blades
Park the machine on a level surface, disengage the blade
control (PTO), and set the parking brake. Turn the
ignition key to Off. Remove the key.
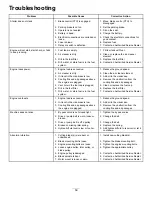
Inspecting the Blades
Service Interval:
Before each use or daily
1. Inspect the cutting edges (Figure 79). If the edges
are not sharp or have nicks, remove and sharpen the
blades. Refer to Sharpening the Blades.
2. Inspect the blades, especially the curved area
(Figure 79). If you notice any damage, wear, or a slot
forming in this area (Figure 79), immediately install a
new blade.
54