


Product Overview
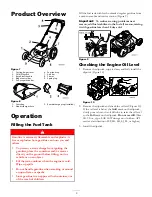
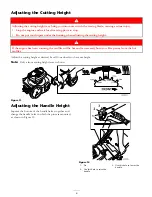
Figure 7
1. Cutting height lever
6. Fuel tank cap
2. Oil ll/Dipstick
7. Air lter
3. Recoil start handle
8. Primer
4. Blade control bar
9. Spark plug
5. Self-propel drive bar
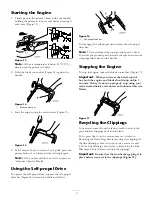
Figure 8
1. Grass bag
3. Rear discharge plug (installed)
2. Side discharge chute
Operation
Filling the Fuel Tank
Gasoline is extremely flammable and explosive. A
fire or explosion from gasoline can burn you and
others.
•
To prevent a static charge from igniting the
gasoline, place the container and/or mower
directly on the ground before filling, not in a
vehicle or on an object.
•
Fill the tank outdoors when the engine is cold.
Wipe up spills.
•
Do not handle gasoline when smoking or around
an open flame or sparks.
•
Store gasoline in an approved fuel container, out
of the reach of children.
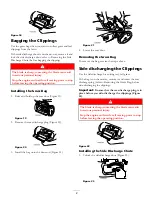
Fill the fuel tank with fresh unleaded regular gasoline from
a major name-brand service station (Figure 9).
Important:
To reduce starting problems next
season, add fuel stabilizer to the fuel all season, mixing
it with gasoline less than 30 days old.
Figure 9
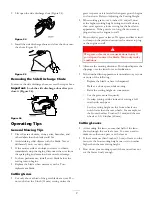
Checking the Engine Oil Level
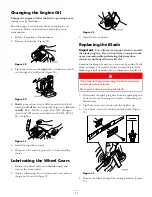
1. Remove the dipstick, wipe it clean, and fully install the
dipstick (Figure 10).
Figure 10
2. Remove the dipstick and check the oil level (Figure 10).
If the oil level is below the
Add
mark on the dipstick,
slowly pour oil into the oil fill tube to raise the oil level
to the
Full
mark on the dipstick.
Do not overfill.
(Max.
fill: 20 oz., type: SAE 30W detergent oil with an API
service classification of SF, SG, SH, SJ, SL, or higher.)
3. Install the dipstick.
5


