background image

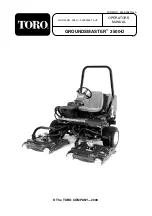
The Groundsmaster 3500-D was tested and certified
by TORO for compliance with the B71.4-1999
specifications of the American National Standards
Institute. Although hazard control and accident
prevention partially are dependent upon the design
and configuration of the machine, these factors are
also dependent upon the awareness, concern, and
proper training of the personnel involved in the
operation, transport, maintenance, and storage of
the machine. Improper use or maintenance by the
operator or owner of the machine can result in
injury. To reduce the potential for any injury,
comply with the following safety instructions.

Supervisor’s Responsibilities

1. 

Make sure operators are thoroughly trained and
familiar with the operator’s manual and all the
labels on the machine.

2. 

Be sure to establish your own special
procedures and work rules for unusual
operating conditions (e.g., slopes too steep for
machine operation.  Survey the complete
mowing site to determine the hills on which the
machine can be safely operated. When
performing this site survey, always use
common sense and take into consideration the
turf condition and the rollover risk.

To determine which hills or slopes on which the
machine may be safely operated, use the
inclinometer provided with each machine.  To
perform a site survey, lay a 1.25 meter board on
the slope surface and measure the angle of the
slope. The board will average the slope but will
not take into consideration dips or holes. THE
MAXIMUM SIDE HILL ANGLE SHOULD
NOT BE GREATER THAN 25 DEGREES.

Before Operating

3. 

Operate the machine only after reading and
understanding the contents of this manual and
viewing the operator’s training video supplied
with the machine. A free replacement manual is
available by sending complete model and serial
number to:

The Toro Company
8111 Lyndale Ave. S.
Bloomington, MN 55420-1196.

4. 

Only trained operators, skilled in slope
operation and who have read this manual and
viewed the operator’s training video should
operate the machine.  Never allow children to
operate the machine or adults to operate it
without proper instructions.

5. 

Become familiar with the controls and know
how to stop the machine and engine quickly.

6. 

Do not carry passengers on the machine. Keep
everyone, especially children and pets, away
from the areas of operation.

7. 

Keep all shields, safety devices and decals in
place. If a shield, safety device or decal is
damaged, malfunctioning or illegible, repair or
replace it before operating the machine.

8. 

Always wear substantial shoes. Do not operate
machine while wearing sandals, tennis shoes or
sneakers. Do not wear loose fitting clothing
because it could get caught in moving parts and
possibly cause personal injury.

9. 

Wearing safety glasses, safety shoes, long pants
and a helmet is advisable and required by some
local ordinances and insurance regulations.

10.

Make sure the work area is clear of objects
which might be picked up and thrown by the
blades.

11.

Fill fuel tank with diesel fuel before starting
engine. Avoid spilling any fuel. Since fuel is
highly flammable, handle it carefully.

A.  Use an approved fuel container.

B.  Do not remove cap from fuel tank when

engine is hot or running.

C.  Do not smoke while handling diesel fuel.

D.  Fill fuel tank outdoors and not over one

inch from the top of the tank, (bottom of
the filler neck). Do not overfill.

– 3 –

Safety

Summary of Contents for Groundsmaster 3500-D

Page 1: ...OPERATOR S MANUAL FORM NO 3325 238 Rev A MODEL NO 30821 200000001 UP GROUNDSMASTER 3500 D The TORO COMPANY 2000 ...

Page 2: ...y Storage 32 Fuses 32 PREPARATION FOR SEASONAL STORAGE 33 IDENTIFICATION AND ORDERING 33 2 The Groundsmaster 3500 D was developed to provide an efficient reliable and time saving method of mowing high quality turf The latest concepts in engineering and design have been incorporated into this machine along with the highest quality parts and workmanship Excellent service will be derived if proper op...

Page 3: ...only after reading and understanding the contents of this manual and viewing the operator s training video supplied with the machine A free replacement manual is available by sending complete model and serial number to The Toro Company 8111 Lyndale Ave S Bloomington MN 55420 1196 4 Only trained operators skilled in slope operation and who have read this manual and viewed the operator s training vi...

Page 4: ...e slope angle increases to a Toro recommended maximum limit of 25 degrees the risk of a rollover increases to a moderate level DO NOT EXCEED A 25 DEGREE SIDE HILL ANGLE BECAUSE THE RISK OF A ROLLOVER AND SERIOUS INJURY OR DEATH IS VERY HIGH The Groundsmaster 3500 D is equipped with an angle indicator mounted on the steering tube which indicates the side hill angle the machine is operating on and i...

Page 5: ...lic fluid escaping under pressure can have sufficient force to penetrate skin and do serious damage If fluid is injected into the skin it must be surgically removed within a few hours by a doctor familiar with this form of injury or gangrene may result 33 Before disconnecting or performing any work on the hydraulic system all pressure in system must be relieved by stopping engine and lowering cutt...

Page 6: ...tion Dismember ment front engine mowerin rearward motion Severing of fingers or hand engine fan Whole body entanglement implement input drive line Fingers or hand entangle ment chain drive Hand arm entanglement belt drive Thrown or flying objects whole body exposure Thrown or flying objects face exposure Thrown or flying objects rotary mover Runover back over vehicle Machine tipping riding mower M...

Page 7: ... polarity Minus decrease negative polarity Horn Battery charging condition Hourmeter elapsed operating hours Fast Slow Continuous variable linear Volume empty Volume full Machine travel direction forward rearward Control lever operating direction dual direction Control lever operating direction multiple direction Clockwise rotation Counter clock wise rotation Grease lubrication point Oil lubricati...

Page 8: ... temperature Hydraulic oil failure malfunction Fuel level Parking brake Fuel Fuel filter Fuel system failure malfunction Lock Unlock Differential lock 4 Wheel drive Power Take Off Diesel fuel Unleaded fuel Headlights Cutting unit lower Cutting unit hold Cutting unit float Cutting unit Cutting unit raise Power Take Off rotational speed Blade cutting element Blade cutting element height adjustment C...

Page 9: ...stable Transport speed 0 14 5 kmh Reverse speed 0 5 6 kmh Tires Wheels Front tires are20x 12 10and rear tires are 20 x 10 10 tubeless 4 ply rating with demountable rims Recommended tire pressure 97 124 kPa front and rear tires Frame Tricycle vehicle with 3 wheel traction drive and rear wheel steering Frame consists of formed steel welded steel and steel tubing components Steering Power steering Br...

Page 10: ...this range adjust the stop bolts to attain clearance 3 Start the engine raise the decks and check to make sure clearance between the wear strap on top of the rear cutting unit wear bar and the bumper strap is 0 51 2 54mm 020 0 10 Fig 4 If clearance is not in this range adjust the rear cylinder to attain clearance To adjust the cylinder lower the cutting units and back off the jam nut on the cylind...

Page 11: ...il the level reaches the FULL mark on the dipstick Figure 7 1 Oil fill cap 4 The engine uses any high quality 10W30 detergent oil having the American Petroleum Institute API service classification CD CE CF CF 4 or CG 4 5 Install the oil fill cap and close the hood IMPORTANT Check the level of oil every 5 operating hours or daily Change the oil after every 50 hours of operation Fill The Fuel Tank F...

Page 12: ...lic fluid The machine s reservoir is filled at the factory with approximately 13 liters of DTE 15M hydraulic fluid Check the level of hydraulic fluid before the engine is first started and daily thereafter IMPORTANT Use only the types of hydraulic fluids specified Other fluids could cause system damage Group 1 Hydraulic Fluid Moderate climate average duty Note The fluids within this group are inte...

Page 13: ...ratures of 32 F O C to 105 F 41 C The ISO Type 46 48 fluid has been found to offer optimal performance in a wide range of temperature conditions for the average user The Universal Tractor Fluids offer similar performance for those who prefer them with perhaps some slight loss of efficiency at high ambient temperatures compared to the Type 46 48 fluids Group 2 fluids are recommended for heavy duty ...

Page 14: ... is low add appropriate fluid to raise the level to the full mark 5 Install the dipstick and cap onto the filler neck Check The Tire Pressure The tires are over inflated for shipping Therefore release some of the air to reduce the pressure Correct air pressure in tires is 97 124 kPa IMPORTANT Maintain recommended pressure in all tires to assure a good quality of cut and proper machine performance ...

Page 15: ...T position to engage the starter motor Release the key when the engine starts The key will move automatically to the ON RUN position To shut off the engine turn the key to the OFF position Remove the key from the switch to prevent accidental starting Throttle Fig 14 Moving the throttle forward increases engine speed moving it rearward decreases engine speed Cutting Unit Shift Lever Fig 14 To lower...

Page 16: ...tor Fig 14 An Indicator light that glows when the glow plugs are operating Parking Brake Fig 14 Whenever the engine is shut off the parking brake must be engaged to prevent accidental movement of the machine To engage the parking brake pull up on the lever The engine will stop if the traction pedal is depressed with the parking brake engaged Lift Lever Lock Fig 14 Move the lever rearward to preven...

Page 17: ...hine in forward and reverse for one to two minutes Also operate the lift lever and the deck drive switch to be sure all parts operate correctly Turn the steering wheel to the left and right to check steering response Then shut the engine off and check for oil leaks loose parts and any other noticeable malfunctions 6 To stop the engine move the throttle control to the IDLE position move the deck dr...

Page 18: ... operator on the seat engine running deck transport slide in mow and the deck switch in the ON position lower the cutting units The decks should come on Pull back on the lift lever the decks should stop when fully raised Correct the problem if not operating properly Note The machine is equipped with an interlock switch on the parking brake The engine will stop if the traction pedal is depressed wi...

Page 19: ...e The Groundsmaster is a precision mowing machine so always drive slowly in rough areas If a person appears in or near the operating area stop the machine and don t start up again until the Operation 19 The mower has a unique traction system that will allow the machine to move forward on side hills even if the uphill wheel should come of the ground If this should happen the operator or any bystand...

Page 20: ...le for some applications find a tree or other object in the distance and drive straight toward it As soon as the front decks reach the edge of the mowing area lift the cutting units and perform a tear drop shaped turn to quickly line you up for your next pass Mowing around bunkers ponds or other contours is easily done with The Groundsmaster 3500 D with Sidewinder To use the Sidewinder application...

Page 21: ...cap and burp valve Lubricate all grease fittings Change engine oil Check battery cable connections Check fan and alternator belt tension Check battery fluid level Every 400 hours Every 800 hours Every 200 hours Every 100 hours Every 50 hours Minimum Recommended Maintenance Intervals Recommendations Items are recommended every 1600 hours or two years whichever occurs first Safety Interlock Operatio...

Page 22: ...ction unit bearings and bushings that must be lubricated are Rear cutting unit pivot Fig 18 Front cutting unit pivot Fig 19 SideWinder cylinder ends 2 Model 03201 only Fig 20 Steering pivot Fig 21 Rear lift arm pivot and lift cylinder 2 Fig 22 Left front lift arm pivot and lift cylinder 2 Fig 23 Right front lift arm pivot and lift cylinder 2 Fig 24 Neutral adjust mechanism Fig 25 Mow Transport sli...

Page 23: ...Figure 23 Figure 24 Figure 25 Figure 26 Figure 27 Figure 28 Figure 29 See note on previous page Maintenance 23 ...

Page 24: ... sure cover is sealing around the air cleaner body Servicing The Air Cleaner 1 Release the latches securing the air cleaner cover to the air cleaner body Separate cover from body Clean inside of the air cleaner cover Figure 31 1 Air cleaner dust cup 2 Air cleaner latch 2 Gently slide the filter out of the air cleaner body to reduce the amount of dust dislodged Avoid knocking the filter against the...

Page 25: ...ealed properly by applying pressure to outer rim of the filter when installing Do not press on flexible center of the filter 6 Reinstall covers and secure the latches Make sure the cover is positioned with the TOP side up Engine Oil and Filter Change the oil and filter initially after the first 50 hours of operation thereafter change the oil every 50 hours and the filter every 100 hours 1 Remove e...

Page 26: ...nnot drain when lines are removed 3 Loosen the hose clamps at both ends of the filter and pull the fuel lines off the filter Figure 36 1 Fuel pre filter 2 Hose clamps 4 Slide the hose clamps onto the ends of the fuel lines Push the fuel lines onto the fuel filter and secure them with hose clamps Be sure the arrow on the side of the filter points toward the injection pump Bleeding Air From The Inje...

Page 27: ...ove the access panel Figure 38 1 Access panel 2 Oil cooler 3 Radiator C Remove access panel Unlatch the oil cooler and pivot rearward Clean both sides of the oil cooler and radiator area thoroughly with water or compressed air Pivot the oil cooler back into position Figure 39 D Install access panel and close the hood Servicing Engine Belts Check the condition and tension of all belts after the fir...

Page 28: ...re 41 1 Hydrostat Drive Belt 2 Spring end Adjusting The Throttle 1 Position the throttle lever rearward so it stops against control panel slot 2 Loosen the throttle cable connector on the lever arm at the injection pump Figure 42 1 Injection Pump Lever Arm 3 Hold the injection pump lever arm against the low idle stop and tighten the cable connector 4 Loosen the screws securing the throttle control...

Page 29: ... hydraulic fluid Refer to Checking Hydraulic Fluid Figure 45 1 Hydraulic Reservoir IMPORTANT Use only hydraulic fluids specified Other fluids could cause system damage 4 Install the reservoir cap Start the engine and use all hydraulic controls to distribute hydraulic fluid throughout the system Also check for leaks Then stop the engine 5 Check the level of fluid and add enough to raise the level t...

Page 30: ...ral If the machine creeps when the traction pedal is in the neutral position the traction cam must be adjusted 1 Park the machine on a level surface and turn the engine off 2 Raise one front wheel and the rear wheel off the floor and place support blocks under the frame 3 Loosen the locknut on the traction adjustment cam Figure 46 1 Traction adjustment cam 2 Locknut Maintenance 30 Keep your body a...

Page 31: ...t ring inside each cell Install the filler caps with vents pointing to the rear toward the fuel tank 4 Keep the top of battery clean by washing periodically with a brush dipped in ammonia or bicarbonate of soda solution Flush the top surface with water after cleaning Do not remove the fill caps while cleaning 5 Battery cables must be tight on terminals to provide good electrical contact 6 If corro...

Page 32: ...les disconnected if stored on the machine Store the battery in a cool atmosphere to avoid quick deterioration of the charge in the battery To prevent battery from freezing make sure it is fully charged The specific gravity of a fully charged battery is 1 265 1 299 Fuses The fuses in the machines electrical system are located under console cover Maintenance 32 ...

Page 33: ...ngine 1 Drain the engine oil from the oil pan and replace the drain plug 2 Remove and discard the oil filter Install a new oil filter 3 Refill the oil pan with SAE10W30 motor oil 4 Start the engine and run at idle speed for approximately two minutes 5 Stop the engine 6 Thoroughly drain all fuel from the fuel tank lines and the fuel filter water separator assembly 7 Flush the fuel tank with fresh c...

Page 34: ......

Page 35: ......

Page 36: ......

Reviews: