


Controller Specifications:
The DDCWP will run one master valve and one station valve
simultaneously. The DDCWP is a DC controller. This means it ONLY
runs DC latching solenoids. It will not run AC solenoids. It has been
fully tested using Toro DC Latching Solenoids. If you intend to use other
brands, test them before making an installation.
As DC latching solenoids are more susceptible to debris than AC solenoids,
Toro recommends that a filter be installed in the system upstream of
the valves.
The DDCWP is tested to be operational under 2 meters of water and is
marked IP68. It is important to completely dry the controller before
opening the battery compartment. It is also important to make waterproof
connections for the longevity of the system components. The DDCWP is
supplied with 3M waterproof connectors for this purpose. If more
connectors are required, Toro recommends 3M
®
DBY type connectors as
these are readily available in most markets.
Connect all field wiring before applying battery power to the controller.
This will insure that all connected DC solenoids are properly calibrated
for operation.
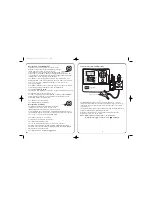
Installation Instructions: DDCWP Controller
Level and mount controller mounting bracket to a solid surface. If
mounting in a valve box, it is suggested to mount the bracket under
the lid and leave sufficient wire so the lid can be removed to access
the controller.
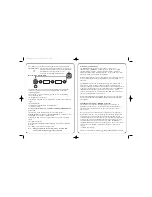
Next connect the solenoid wires to the controller. The controller drives
Toro latching solenoids. It is essential for proper operation that the wire
colors between the solenoid and the controller be matched. The red
controller station wire is connected to the red solenoid wire and the black
controller common wire is attached to the black solenoid wire. It is also
essential that a waterproof wire connection be made. The DDCWP is
shipped with waterproof connectors for this purpose. These can be used
for wire sizes 19 to 26 AWG. (0.9 metric is the largest size wire these
accept)
(continued on next page)
3M is the registered trademark of the Minnesota Mining and Manufacturing Corporation
Press NEXT to set next function OR Press DIAL to move to AUTO-RUN
PROGRAM ERASE – You can erase all program information for a selected
program. This can be done for any selected program.
Press NEXT to select the program to erase.
Press +/ON to erase.
will flash 5 times.
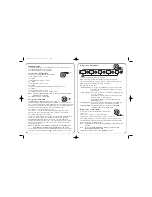
Dial position: AUTO-RUN
The AUTO-RUN position is used to provide information regarding the
controller's operation as well as for reviewing all data stored in the
irrigation programs.
The following is a list of information you can observe on the display:
• Current Time & Day
• A program(s) in OFF position
• Information regarding the operating station: program, station and start
times
• Active Rain Delay
• If irrigation is suspended due to SENSOR input
• Low battery state
To turn OFF the working cycle, press DIAL to MANUAL PROGRAMS and
press -/OFF.
If you wish to review what data you have in each program:
Program Review:
Press NEXT to PROGRAM REVIEW. Press PROG to select
the program. Press +/ON to start the review.
Status:
If you wish to have a complete status report on the operating
station:
Press NEXT to STATUS.
Remaining station RUN TIME will be displayed as well as the operating
program.
Press NEXT to return to AUTO-RUN position.
Note: During programming, the dial will return to the AUTO-RUN
position automatically after 3 minutes of inactivity.
- 10 -
- 3 -
ddcwp_manual_gb_revised.ai 10/23/06 Page 3


