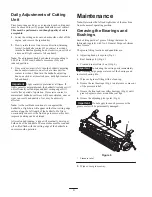
background image

5

Adjusting the Top Shield
Height

1. Loosen bolts and nuts securing the shield to each side

plate.

2. Adjust the shield to the desired position and secure the

fasteners.

3. Repeat this procedure on the remaining cutting units

and adjust the top bar.

Note: The shield can be raised for extremely wet
conditions.

Adjusting the Top Bar

Adjust the top bar, under the rear shield, to ensure that
clippings are cleanly discharged from the reel area.

1. Loosen the screws securing the top bar. Insert a 0.06 in.

(1.5 mm) feeler gauge between the top of the reel and
bar and tighten the screws. Ensure that the bar and reel
are an equal distance apart across the complete reel.

2. Repeat the settings on the remaining cutting units.

Note: The bar is adjustable to compensate for changes in
turf conditions. The bar should be adjusted closer to the
reel when the turf is extremely wet. By contrast, adjust the
bar further away from the reel when turf conditions are dry.
The bar should be adjusted whenever the top shield height
is changed, the reel wears, or the reel is sharpened by
grinding.

Adjusting the Height of Cut

1. Verify that the front roller is level and the

bedknife-to-reel contact is correct.

2. Turn the cutting unit over (90

°

) and rest it on the rear

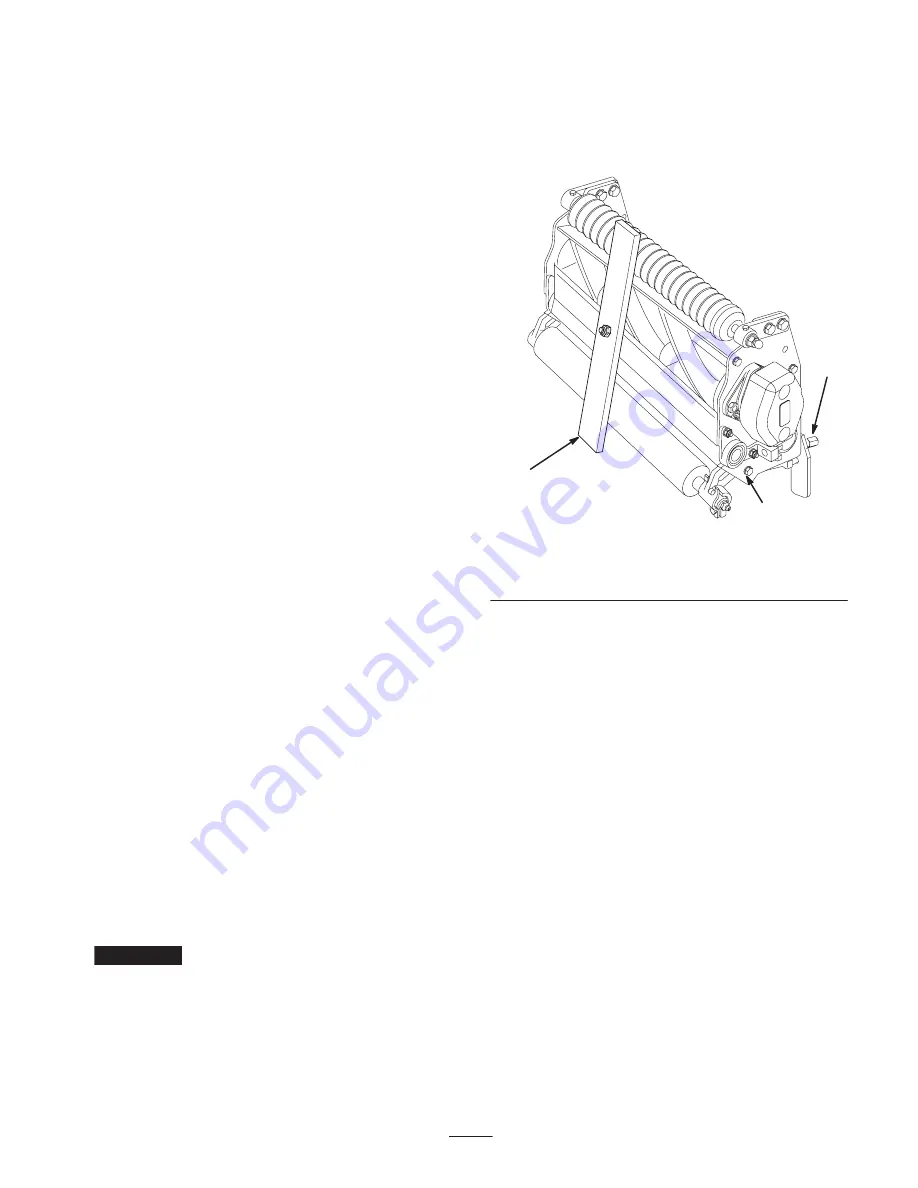
roller and top rear tabs. Loosen the locknuts on the bolts
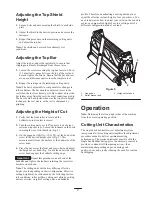
retaining the rear roller brackets (Fig. 5).

3. On the gauge bar (Part No. 13-8199), set the head of the

screw to the desired height of cut (Fig. 5). This
measurement is from the bar face to the underside of the
screw head.

4. Place the bar across the front and rear rollers and adjust

the height-of-cut knob (Fig. 5) until the underside of the
screw head engages the bedknife cutting edge.

Important


Repeat this procedure on each end of the

bedknife and tighten the locknuts retaining the rear roller
brackets on each end.

Note: The cutting units will deliver differing effective
height of cuts depending on their configuration. Effective
cutting height may be influenced by the following factors:
turf conditions, roller profiles, cutting unit attitude, cutting
unit accessories, weight of cutting units, and bedknife

profile. Therefore, benchsetting a cutting unit does not
equal the effective (actual) height of cut you achieve. You
need to determine how to adjust your cutter on the bench to
achieve a comparable height of cut to a cutting unit of a
different configuration, model, or brand.

1

2

3

Figure 5

1.

Gauge bar

2.

Roller bracket bolt

3.

Height-of-cut knob

Operation

Note: Determine the left and right sides of the machine
from the normal operating position.

Cutting Unit Characteristics

The single knob bedknife-to-reel adjustment system
incorporated in this cutting unit simplifies the adjustment
procedure needed to deliver optimum mowing
performance. The precise adjustment possible with the
single knob/bedbar design gives the necessary control to
provide a continual self-sharpening action—thus
maintaining sharp cutting edges, ensuring good
quality-of-cut, and greatly reducing the need for routine
backlapping.


Summary of Contents for 04472

Page 1: ...Operator s Manual English EN GB Form No 3326 890 8 and 11 Blade SPA Reel Mowers Greensmaster 3250 D Model No 04472 Serial No 220000001 and Up Model No 04473 Serial No 220000001 and Up ...

Page 2: ...space below Model No Serial No This manual identifies potential hazards and has special safety messages that help you and others avoid personal injury and even death Danger Warning and Caution are signal words used to identify the level of hazard However regardless of the hazard be extremely careful Danger signals an extreme hazard that will cause serious injury or death if you do not follow the r...

Page 3: ...ar pivot housing 3 Flange nuts 4 Frame tab 3 On either end of front side of reel insert a long strip of newspaper between the reel and bedknife Fig 3 While slowly rotating the reel forward turn the bedknife adjusting knob clockwise one click at a time until the paper is pinched lightly on one end of the reel which results in a slight drag when the paper is pulled 4 Loosen locknuts retaining the le...

Page 4: ...it on a flat level surface 2 Place a 1 4 inch or thicker plate under the reel blades and against the front face of the bedknife Note Be sure that the plate covers the full length of the reel blades and three blades contact the plate 3 Loosen the locknuts retaining the right front roller bracket Fig 4 1 2 Figure 4 1 Right front roller bracket 2 Upper right roller mounting bolt 4 While holding the r...

Page 5: ...w to the desired height of cut Fig 5 This measurement is from the bar face to the underside of the screw head 4 Place the bar across the front and rear rollers and adjust the height of cut knob Fig 5 until the underside of the screw head engages the bedknife cutting edge Important Repeat this procedure on each end of the bedknife and tighten the locknuts retaining the rear roller brackets on each ...

Page 6: ...ersely affected Note As the reel blades continue to run against the bedknife a slight burr will appear on the front cutting edge surface along the full length of the bedknife If a file is occasionally run across the front edge to remove this burr improved cutting can be obtained After extended running a ridge will eventually develop at both ends of the bedknife These notches must be rounded off or...

Page 7: ...units and disconnect and remove the cutting units from the lift arms 3 Connect the backlapping machine to the cutting unit by inserting a piece of 3 8 in square stock into the splined coupling at the right end of the cutting unit Note Additional instructions and procedures on Backlapping are available in the Toro Sharpening Reel Rotary Mowers Manual Form No 80 300PT Note For a better cutting edge ...

Page 8: ...eather storage practices contamination use of unapproved coolants lubricants additives or chemicals etc Normal wear and tear items Normal wear and tear includes but is not limited to damage to seats due to wear or abrasion worn painted surfaces scratched decals or win dows etc Parts Parts scheduled for replacement as required maintenance are warranted for the period of time up to the scheduled rep...

Reviews: