4. Disconnect the air from the machine.
5. While manually advancing the tool tray toward the spindle,
align the fork with the tool. Complete the following steps in
the order listed:
a. Slowly jog the Z-axis up or down until the groove in the
fork aligns with the groove in the tool holder.
b. Determine if the tray must move clockwise or
counterclockwise to align the fork with the tool holder.
From the PathPilot interface, in the
ATC
tab, either select
-
-
to step the tool tray counterclockwise or
++
to step the
tool tray clockwise.
c. Fully seat the ATC to its tray load position, verifying that
the tool and its drive dog slots are fully inserted into the
fork.
6. Verify that, from the
Status
tab, the
ATC Tray In
LED is still
illuminated.
If the LED isn't illuminated, examine the tool tray. It may have
exceeded the Tray In sensor during adjustments in the
previous step.
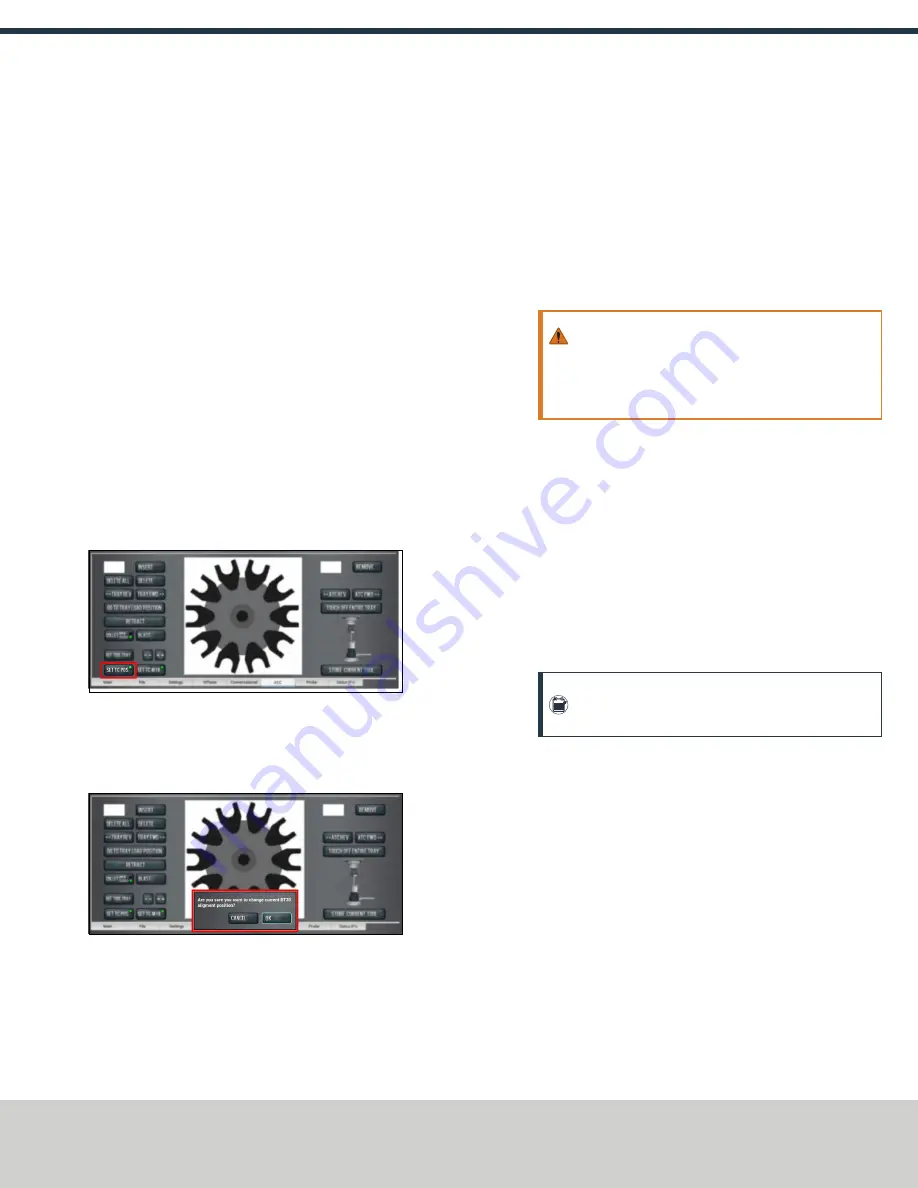
7. On the
ATC
tab, select
Set TC POS
.
Figure 2-17: Set TC POS button on the ATC tab.
The tool change position has now been set.
8. Select
Set TC M19
. Then, in the dialog box that displays, select
OK
.
Figure 2-18: Confirmation dialog box to change the
spindle's alignment position.
9. Follow the on-screen instructions to set the spindle's tool
change rotation position:
a. Rotate the spindle clockwise in the fork by hand, and hold
it in place. Then, select
OK
.
b. Rotate the spindle counterclockwise in the fork by hand,
and hold in place. Then, select
OK
.
The tool change rotation position has now been set. In the
dialog box that displays, select
OK
.
10. Manually move the ATC back to the retracted position.
WARNING!
Crush Hazard: If the ATC isn't completely
retracted, it could move once the air is reconnected.
When you reconnect the air, you must keep your
hands away from the ATC.
11. Reconnect the air.
12. Remove the tool from the spindle.
13. Move the Z-axis up: in the
MDI Line
DRO field, type
G20 G53
G1 Z0 F20
. Then select the
Enter
key.
14. On the
ATC
tab, select
Go To Tray Load Position
. Then,
manually load a tool into the fork.
15. Orient the spindle: from the PathPilot interface, in the
MDI
Line
DRO field, type
M19 R0 Q10
. Then select the
Enter
key.
16. Open the collet: on the ATC tab, select
Collet
, and wait until
the LED toggles from
Closed
to
Open
.
Note:
You must verify that the collet is open (and not
just that the brake is engaged) before you continue.
17. Verify that the spindle is concentric with the tool: slowly jog
the Z-axis down and, depending on the result, do one of the
following:
l
If the Spindle is Concentric with the Tool
You've
completed the alignments.
l
If Adjustments are Required
Go to Step 18.
Page 10
©Tormach® 2019
Specifications subject to change without notice.
tormach.com
TD10627: Owner's Guide: 770MX Automatic Tool Changer (ATC) (1019A)
TECHNICAL DOCUMENT


