background image

4

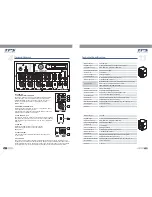
7 CHANNEL EQ

THREE BANDS MASTER EQ

8- HIGH

9- MIDDLE

10- LOW

11- MONITOR OUT

12- MAIN POWER OUT

Note: in case to connect two passive speaker cabinets, it must be
sure that load of each speaker cabinet is at least 8 ohms.

13- MAIN

14- MAIN LED METER

Each Input channel has its own 2-band equalizer with an adjustable range of +/-15dB.
The HIGH control creates a shelving filter that will boost/cut all the frequencies above 12kHz.
You can use it to eliminate high frequency noise and hiss (such as those produced by Tape
Recorders) or to boost and make crispier the cymbals or certain harmonics of the human voice.
The LOW control will create a shelving filter that will boost/cut frequencies below 80Hz.
Use the LOW control to put in evidence Kick Drum or enhance male voice.

This equalization circuit is inserted before the MAIN level control. You have available 3 controls:
BASS, MIDDLE and HIGH.

Use it as a further boost to the overall MIX to get more
colour from your program or turn the control down if
you want to avoid high frequency noise.

This is a unique control designed for a wide variation of
middle frequencies.
Turn the control down (from center position) and you will make the human voice more warm
and smooth while turning the control up will enhance vocal intelligibility. Be careful not to
boost these frequencies too much to avoid feed back on microphone inputs.

Turn the control down (from center position) if you experience rumble or low frequency noise
or turn it up to make the TPS 16AM.UB sound much bigger than what it is.

Connect a powered Monitor to this socket or an external AmMonitor Speaker. You can
also use it to connect a pair of Headphones.

You can connect a pair of passive speakers to these
Output sockets. The 70 Watt (@ 4ohms,min) internal amplifier signal
will be assigned to these sockets.

There is the Main Mix Control adjusting the overall volume assigned to
the 2 internal speakers or to the MAIN POWER OUT speakers.

This 4 segments LED Meter will monitor the volume assigned by MAIN level control. If the +10
LED flashes, you have reached limit of the internal 70+70W amplifier and the outgoing signal
is approaching distortion. +10 LED should flash only occasionally. If no LED is blinking, it means
that the output level is too low, so either you do not hear any music or the signal is too low to
the noise level. For optimal functioning LEDs marked -10 and 0 should always be blinking.

7

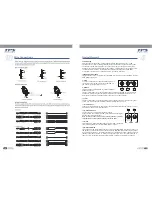
Wire Connections

10

14

Summary of Contents for TPS 16A.UB

Page 1: ...TPS 16P 16A UB 16AM UB ...

Page 2: ...2 ...

Page 3: ...cription Connection Diagram Frequency Response Diagram Block Diagram Presets List Wire Connections Technical Specification WARRANTY Control Element Features Introduction 9 10 11 12 13 14 15 17 5 4 4 Notas 18 18 Notas 13 ...

Page 4: ...nd dependable reliability Also great emphasis is placed in creating and bringing to market products that can fill multiple applications and also for customers exceptional values Every TOPP PRO audio products is tested and must comply to very strict standards 2 Way 6 5 Vented Active Speaker Cabinet ClassD 70Wx2 6 5 165mm woofer 1 Voice Coil 1 Neodymium Tweeter Trapezoidal painted wood cabinet metal...

Page 5: ...signal sources Balanced or unbalanced configuration is possible MAIN POWER OUT You can connect a pair of passive speakers to these Output sockets The 70 Watt 4ohms min internal amplifier signal will be assigned to these sockets 3 2 1 4 5 6 7 8 9 10 4 5 Technical Specification Model Active TPS 16AM UB System Type 2 Way 6 5 Vented Active Speaker Cabinet Power Handling RMS 140Watts Program 280Watts F...

Page 6: ...ly assigned to external effect or processor equipment directly but also to internal digital multi effect Technical Specification Model Active TPS 16A UB System Type 2 Way 6 5 Vented Active Speaker Cabinet Power Handling RMS 70Watts Program 140Watts Frequency Response 75Hz 20KHz 6dB Sensitivity 110dB Max Low Frequency 6 5 165mm woofer 1 Voice Coil 1 Neodymium Tweeter Connectors MIC LINE blanced inp...

Page 7: ...the control down from center position and you will make the human voice more warm and smooth while turning the control up will enhance vocal intelligibility Be careful not to boost these frequencies too much to avoid feed back on microphone inputs Turn the control down from center position if you experience rumble or low frequency noise or turn it up to make the TPS 16AM UB sound much bigger than ...

Page 8: ... 15 MONITOR 16 POWER LED Presets List NO Preset Description 9 13 1 Chorus room 1 2 Chorus room 2 3 Room 4 Flange 5 Rotary 6 Vocal Cancel 7 Delay 1 8 Delay 2 9 Delay 3 10 Hall 1 11 Hall 2 12 Hall 3 13 Chorus 14 Plate 1 15 Plate 2 16 Plate 3 Chorus with reverb for guitars synths and pianos Auto wah guitar effect with reverb for lead instruments Hardwood studio for acoustic instruments Stereo flanger...

Page 9: ... of USB playing This is the fastest way to get something out from your TPS 16AM UB if you have a keyboard and a microphone A Well there is not really much to say before starting to operate the TPS 16AM UB It includes Mixer Amplifiers and Speakers so just put it on a clean table first and make sure that the Power switch on the back panel is at OFF position B Turn down the Input Channel Gain Control...

Page 10: ... it must be sure that load of each speaker cabinet is at least 8 ohms DAT Recorder Powered Stage Monitor Passive Speakers Drum Machine MIC 6 10 Laptop Computer iPOD CD Player MP3 Tape Recorder Headphone MIC This will be typical setting for a Business Presentation making use of Power Point slides and background music effects generated by CD player iPOD or other sources such as Mp3 Players The Prese...

Reviews: