


tips, use the string technique described in the
previous step, or glue two large-diameter
pushrod tubes (not supplied) inside the wing,
ahead of the spars, to serve as a conduit for
the wires.
❏ ❏
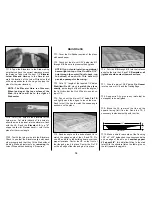
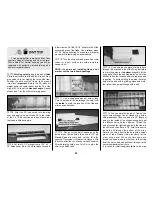
15. Glue the 1/2” x 1/2” x 1” basswood
Wing Strut Mount Block
to the inboard side of
the W-6 rib and to the sheeting at the location
shown on the plans. We recommend
6-Minute Epoxy for this job. To help locate the
blocks later, drill a 1/16” hole through the center
of the blocks, out through the bottom sheeting.
❏ ❏
16. True all edges with a sanding block.
Mark the location of the Aileron Hinge Blocks on
the outside edge of the aft Outer Spar.
❏ ❏
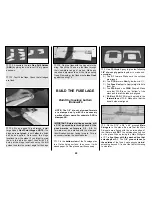
17. Carefully cut off all of the jig tabs on the
top surface of the wing. Lightly sand the tops of
the ribs and spars. Clean up any glue blobs that
will interfere with the top sheeting, then double
check your work.
If you aren’t installing operational flaps (the neat
looking, highly effective, simulated Fowler Flaps)
skip the next section and proceed to “Sheet
The Top Of The Wing”. Are you sure you
won’t reconsider?
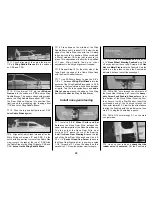
NOTE: This kit includes a special set of
wing jigs to hold the wing at the proper
washout angle (2 degrees washout at each
tip) while you apply the top skins. Twisted
wings are a major cause of bad flight
characteristics. Polyhedral angles can vary
slightly, so if your tip jigs require
adjustment, just be sure that both tip jigs
are modified the same, and are therefore
identical. Be careful not to change the
washout angle (the negative angle of attack
of the tip ribs) if you adjust the jigs.
❏ ❏
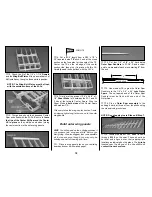
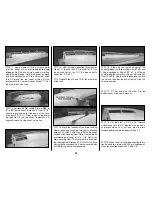
1. Locate all of the 1/8” die-cut ply wing jigs
as shown in the photo. Assemble the two parts
of both
TE Jigs
as shown.
Sheet the top of the wing
❏ ❏
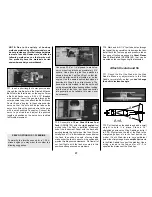
3. Turn the wing over, then
carefully
cut
away the balsa sheeting from between the
marks. Don’t cut through the ribs until the top
of the wing has been sheeted and you are
instructed to do so.
That’s all you need to do for now regarding the
flaps. Let’s move on and put the skins on the
top of the wing.
❏ ❏
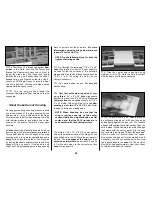
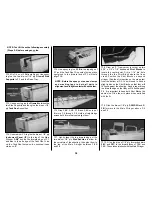
2. Mark the location for the
Flap LE
by
inser ting a shar pened wire through the
sheeting at the locations shown in the photo.
❏ ❏
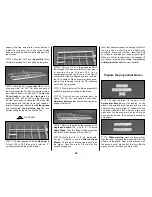
1. Cut the shaped 5/8” x 9” balsa
Flap
Hinge Block
into four pieces 1-1/2” long, and
two pieces 1” long. Glue the blocks to the aft
Inner Spar, sheeting, and ribs as shown on
the plans.
Do the following steps if you are building
operational flaps.
Even though building operational flaps requires
a little bit of patience and elbow grease, you
will be rewarded by more scale appearance
and slower landings than the less ambitious
modeler. If that isn’t enough, they look great
during slow fly-bys and shorten the takeoff roll.
Prepare the wing panels
for the flaps
24
Summary of Contents for CESSNA 182 SKYLANE
Page 8: ...8 DIE CUT PATTERNS ...


