


12
8. USING A WIRED MICROPHONE
Step 1.
Connect the wired microphone to the Wired
Microphone terminal.
Step 2.
Set the power switch to the ON position.
Step 3.
Set the Wired Microphone volume control to
approximately “5” on the dial.
Step 4. Adjust the sound quality using the tone
control.
9. USING A WIRELESS MICROPHONE
Step 1.
Set the power switch to the ON position.
Step 2. Set the wireless microphone’s power switch
to the ON position. (The Radio Signal
Reception indicator lamp will light.)
Step 3.
Adjust the volume by setting the corresponding
Wireless Microphone Volume control (either
WIRELESS MIC1 or WIRELESS MIC2) to
approximately “3” on the dial if a Clip-on
wireless microphone is used, or “7” if a hand-
held wireless microphone issued.
Step 4. Adjust the sound quality using the tone
control.
Notes :
•
Use only TOA wireless microphones.
•
Set the wireless microphone 1 and 2 to different channels from each, otherwise radio interferences.
•
Keep the wireless microphone 3 – 20 m away from the Meeting Amplifier.
•
If the wireless microphone is positioned less than 3 m from the Meeting Amplifier, feedback noise or radio
interference could result.
•
When simultaneously using 2 different channels, keep the 2 wireless microphones at least 50 cm away from
each other.
•
When the Meeting Amplifier's power switch is set to the ON position, if the amplifier's Radio Signal
Reception indicator lamp lights before the wireless microphone's power switch is turned ON, this indicates
that the currently set channel is in use. In such cases, change the different channel.
0
10
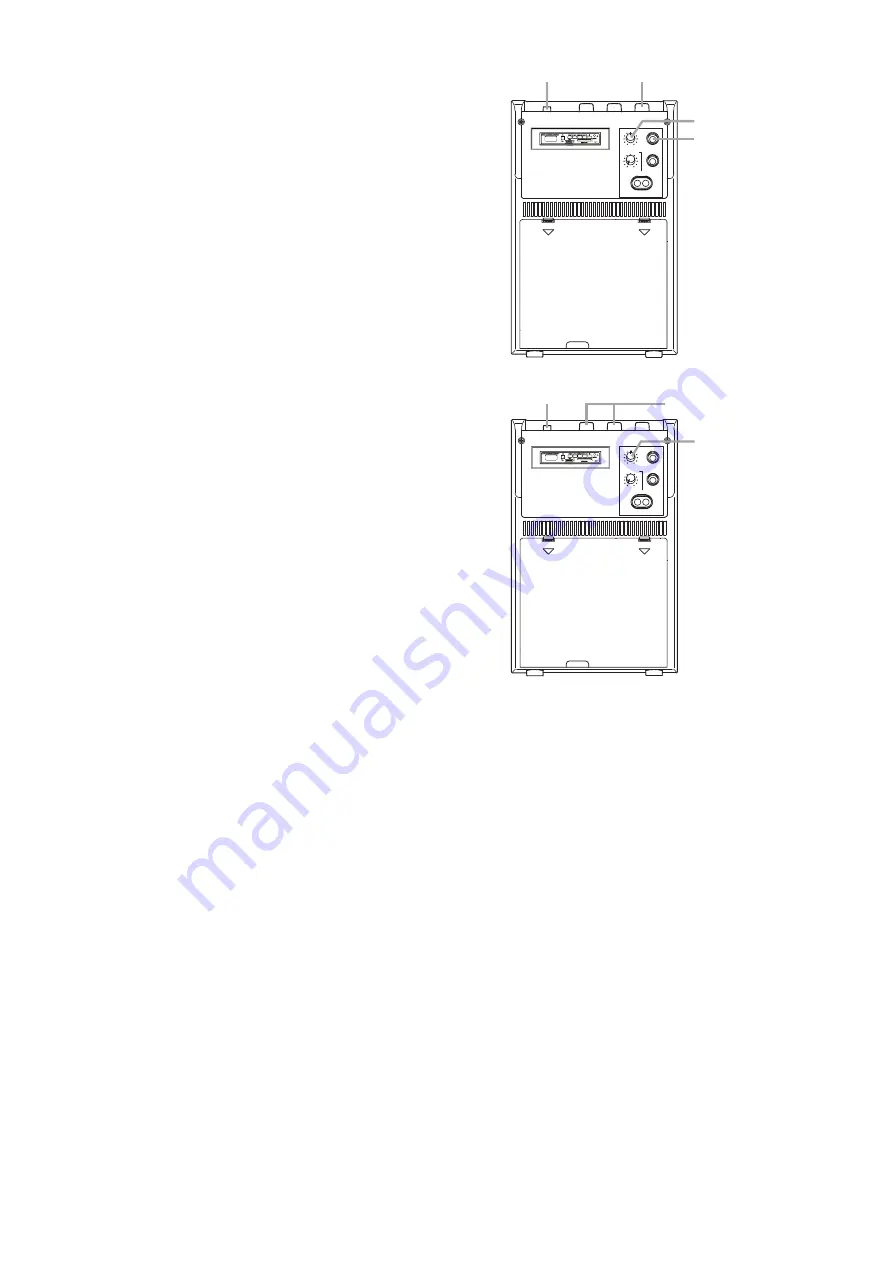
Power switch
Wired microphone
terminal
Tone control
Wired microphone volume control
LINE OUT
AUX IN
LOW
AUX IN (MONO)
HIGH
WIRED MIC
TONE
0
10
Tone control
LINE OUT
AUX IN
LOW
AUX IN (MONO)
HIGH
WIRED MIC
TONE
Wireless microphone
volume control
Power switch
OPEN
OPEN
OPEN
OPEN
0
10
Power switch
Wired microphone
terminal
Tone control
Wired microphone volume control
LINE OUT
AUX IN
LOW
AUX IN (MONO)
HIGH
WIRED MIC
TONE
0
10
Tone control
LINE OUT
AUX IN
LOW
AUX IN (MONO)
HIGH
WIRED MIC
TONE
Wireless microphone
volume control
Power switch
OPEN
OPEN
OPEN
OPEN


