W W W . T M G I N D U S T R I A L . C O M
P 1 2 / 2 8
T o l l F r e e : 1 - 8 7 7 - 7 6 1 - 2 8 1 9
STEP 5
(Lift Arm Installation)
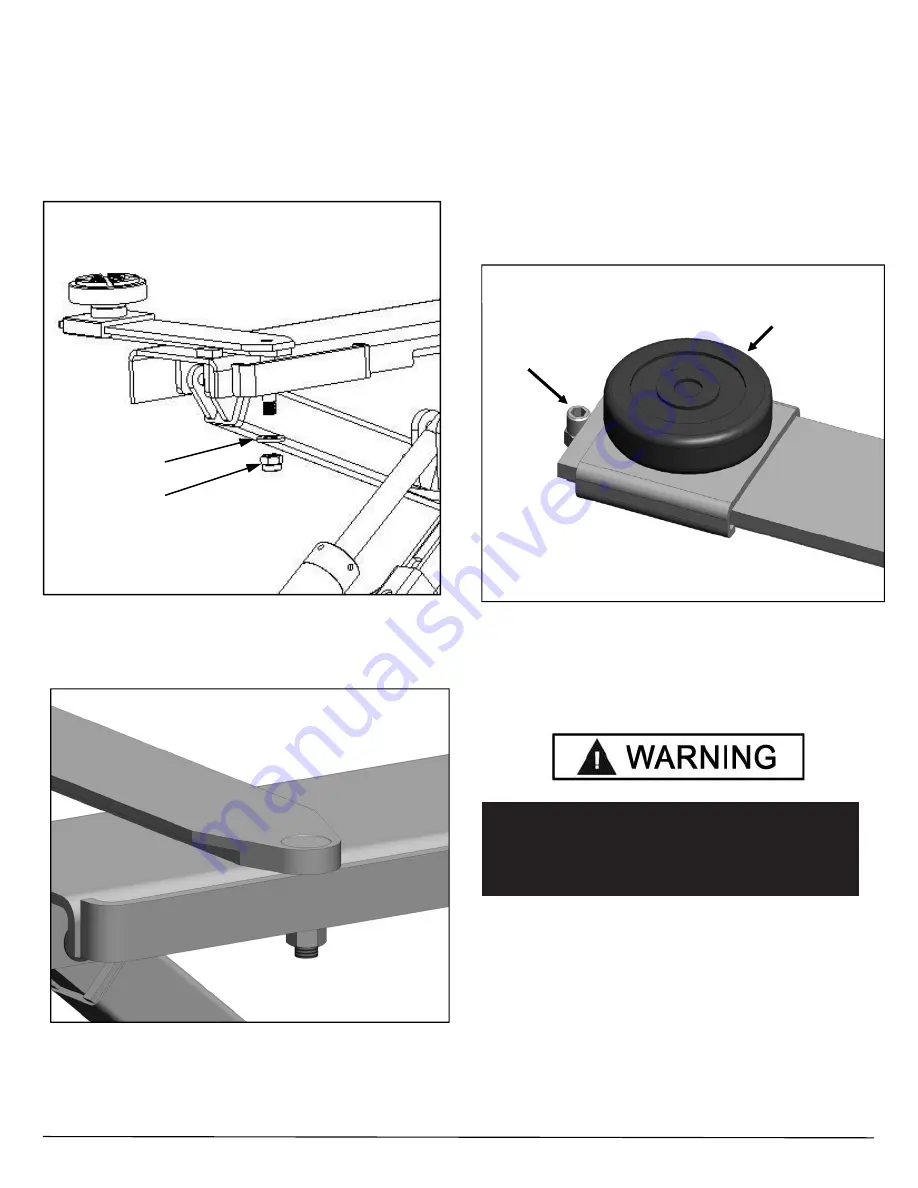
1. Set the Adjustable Arm on the Ramp ensuring that the
Bolt on the arm is inserted through the arm holder channel
on the side of the ramp. (See Fig 5.1)
3
. Tighten the M20-10 nut until the arm cannot pivot, then
back the nut off until the arm is just loose enough to pivot
freely. (See Fig.5.2)
STEP 6
(Installing / Changing Lift Pads)
1.
Remove the Socket Head Screw from the end of the
lift arm.
2.
Slide the desired height Lift Pad riser onto the lift arm.
Replace and tighten the Socket head Screw. Drop in the
Lift Pad if applicable. (See Fig 6.1)
3.
Repeat the above procedure for the other three arms.
4.
Use the 5” Lift Pad Extension as necessary to reach
proper lifting points on the vehicle.
WARNING!
ALWAYS set the adjustable arms and pads under the
proper lifting points as indicated in the Lifting Guide
or owners manual of the vehicle.
Fig 5.2
Fig 6.1
Lift Pad
Assembly
M10 x 1.5 x
20mm Screw
Fig 5.1
M20 Washer
M20x10 Nut


