10
IF THE DOSED VOLUME IS LESS THAN 10ML
Please Note:
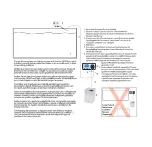
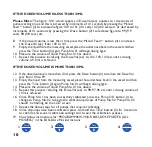
The figure “100” which appears in ‘Dose Vol (ea)’ equates to 10 seconds of
pump working time, and this is increased by increments of 0.1 seconds by pressing the ‘Manual
Feed +’ button (4) to increase the figure ‘100’ to 101 (10.1 secs), 102 (10.2 secs) etc or decreased by
increments of 0.1 seconds by pressing the ‘Dose’ button (2) to decrease figure to 99 (9.9
secs), 98 (9.8 secs) etc.
8. If the dosed volume is less than 10ml, press the ‘Manual Feed +’ button (4) to increase
the ‘Dose Vol (ea)’ from 100 to 101.
9. Empty the liquid from the measuring vessel, place the outlet hose back in the vessel and then
press the ‘Time’ button (3) again. Pump No: 01 will begin dosing again.
10. Measure the volume of liquid Pump No: 01 has dosed.
11. Repeat this process, increasing the ‘Dose Vol (ea)’ to 102, 103, 104 etc until a dosing
volume of 10ml is achieved.
IF THE DOSED VOLUME IS MORE THAN 10ML
12. If the dosed volume is more than 10ml, press the ‘Dose’ button (2) to reduce the ‘Dose Vol
(ea)’ from 100 to 99.
13. Empty the liquid from the measuring vessel, place the outlet hose back in the vessel and then
press the ‘Time’ button (3) again. Pump No: 01 will begin dosing again.
14. Measure the volume of liquid Pump No: 01 has dosed.
15. Repeat this process reducing the ‘Dose Vol (ea)’ to 98, 97, 96 etc until a dosing volume of
10ml is achieved.
16. Once Pump No: 1 has been successfully calibrated press the ‘Pump OK’ button (1) to
change to Pump No: 02 to begin the calibration process of Pump No: 02. Pump No: 02
should be flashing on the LCD screen
17. Repeat the above steps for all pumps that require calibrating.
18. Once all pumps have been calibrated, press and hold the ‘Time’ button (3) for 3 seconds
to confirm and save all calibration settings and to exit the calibration process.
19. Now follow instructions for “PROGRAMMING YOUR EASI-DOSE MASTER (ALL
MODELS)” in the
EASI-Dose
Plus
instructions.
Dose
Time
Manual
Feed
+
Pump
OK
1
2
3
4


