


TJM Vehicle Mount Compressor Installation and User Manual
For product warranty please refer to our website www.tjm.com.au
File: F-17800.docx
Page 4 of 12
29/05/2019
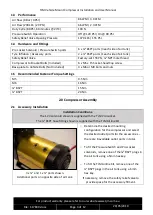
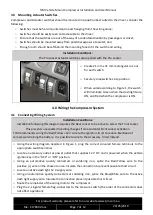
o
Apply sealant paste (e.g. Loctite 567) or
sealant tape to one end of the threaded
fitting of the accessory.
o
Insert accessory into the air tank port and
tighten.
o
Recommended installation positions are
shown in the figure.
If the safety relief valve was removed, apply
sealant paste or sealant tape and re-install the
valve to the same port.
Notes:
DO NOT over-tighten, may cause damage to thread.
If using a thread sealant allow curing time according to the manufacturer specification.
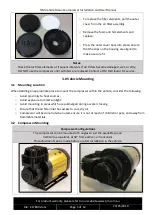
2.2
Air Filter Installation
Installation Conditions:
Ensure filter is assembled in a dry working environment.
o
Each compressor has a two-stage air filter
supplied loose which must be installed prior to
operation.
o
Remove the protective plug from the
compressor inlet port.
o
Screw the filter housing into the port.
Hand tighten only.


