


www.tivolilighting.com tel: 714-957-6101 fax: 714-427-3458
Copyright © 2019 Tivoli 07.08.19
Page
2
of
10
TivoCUE10 Quick Start Guide
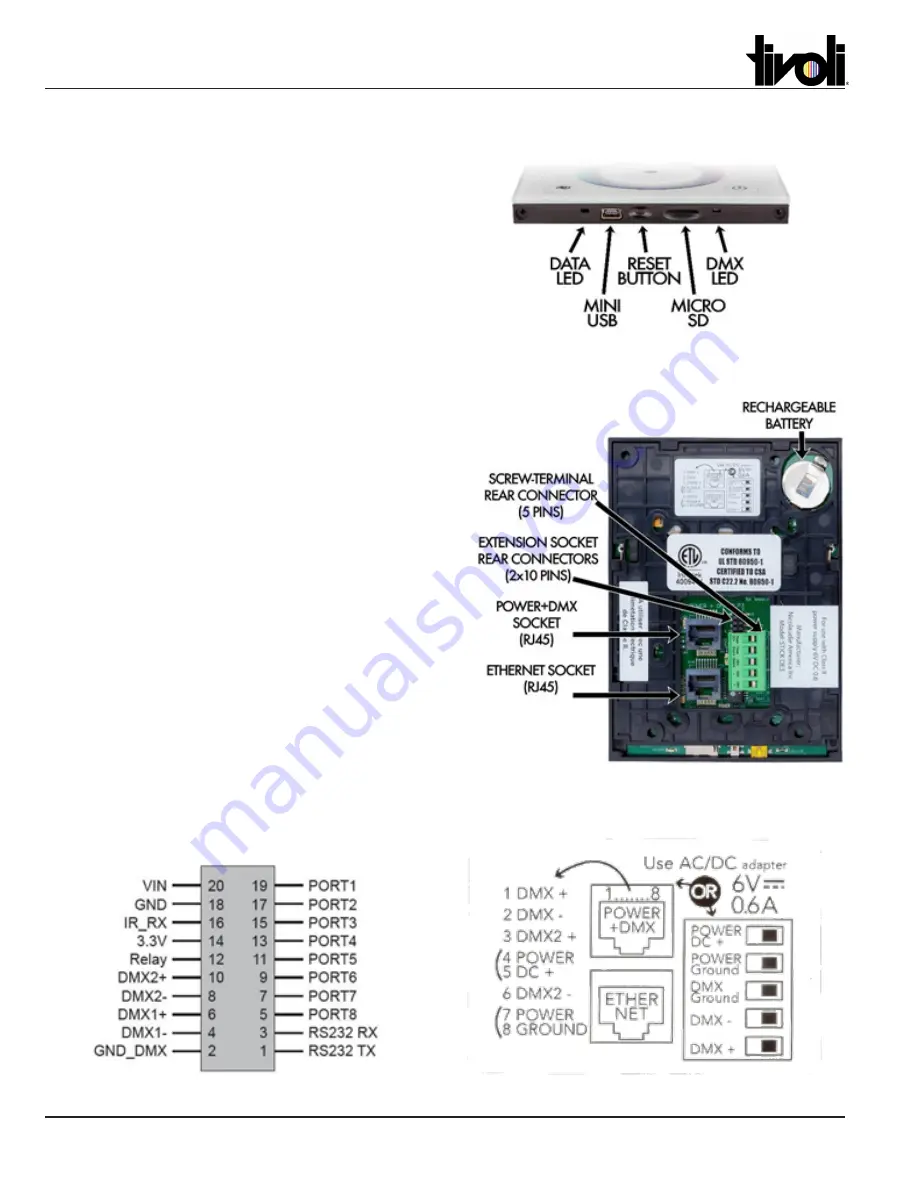
TivoCUE10 Bottom Connections and Controls
•
Data LED
– Flashes to indicate that the TivoCUE10
is communicating with another device.
•
Mini USB Port
– Used to connect the TivoCUE10
directly to a computer with the included cable.
•
Reset Button
– Resets the TivoCUE10.
•
Micro SD Slot
– Holds the Micro SD memory card
for saving scenes.
•
DMX LED
– Flashes to indicate that the TivoCUE10
is outputting a DMX signal.
TivoCUE10 Rear Connections
•
Rechargeable Battery
– Powers the calendar and
clock. Can be replaced with a rechargeable
3.6V LIR 2032 battery.
•
Extension Socket
(2x10 pin) – Provides access to
many IO signals on the device, including
port triggers and both DMX universes. The pinout is
shown below.
•
Power + DMX RJ45 Socket
– Used to connect DC
power to the TivoCUE10 and output both
DMX universes. The pinout is shown below.
•
Ethernet Socket (RJ45)
– Used to connect the
TivoCUE10 to a local computer network.
•
Screw Terminal Connector
– Used to connect
DC power and output DMX universe 1. The pinout is
shown below.
Extension Socket Pinout
RJ45 and Screw Terminal Pinout


