


www.tivolilighting.com tel: 714-957-6101 fax: 714-427-3458
Copyright © 2019 Tivoli 07.08.19
Page 1 of 10
TivoCUE10 Quick Start Guide
The TivoCUE 10 is a powerful and easy-to-use two-universe (1024 channel) DMX controller. To begin, install CUE Pro or CUE
software onto a computer. CUE Pro is recommended because it can utilize all the features of the TivoCUE10.
This guide will focus on using CUE Pro. Please consult the CUE manual for instructions on using that program. Install the
software by downloading the “.exe” file from the Tivoli website. Please read the manuals for both the TivoCUE10 and CUE Pro
software for additional instructions.
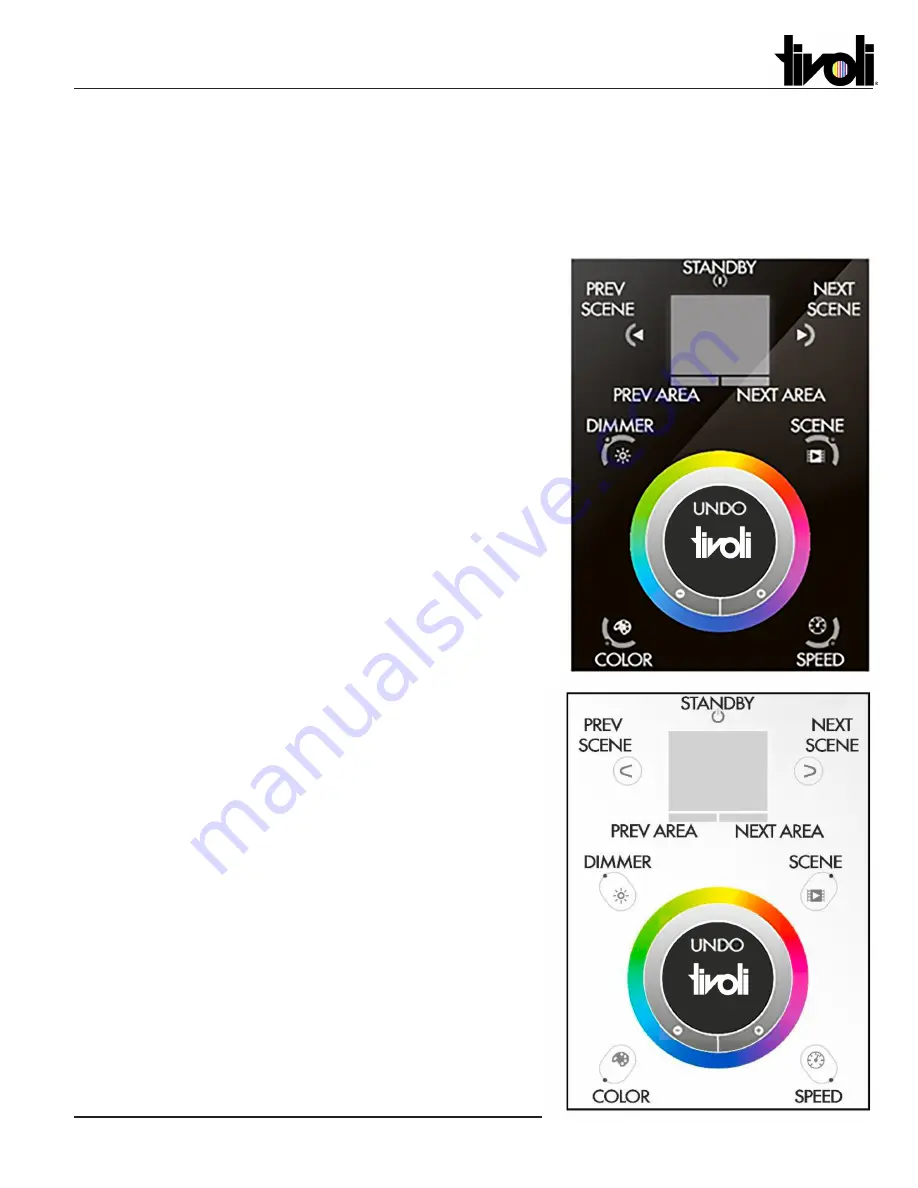
TivoCUE10 Front Controls
•
Standby
– Powers the unit on and off. Hold for
the settings menu, where settings and controls can
be customized. The settings menu is covered in
detail in the TivoCUE10 product manual.
•
Prev/Next Scene
– Cycle through saved scenes in
the currently selected area.
•
Prev/Next Area
- Cycle through all programmed
areas.
•
Dimmer
– Activates dimming mode. Use the color
wheel to adjust brightness.
•
Scene
– Activates scene selection mode. Use the
arrows to cycle through saved scenes.
•
Color
– Activates color selection mode. Use the
color wheel to cycle through colors.
•
Speed
–Activates speed selection mode. Use the
color wheel to adjust the speed of the scene.
•
Undo
– Undoes the previous change.