- 10 -
XS-COMPACT-OP-EN
MACHINE SETUP
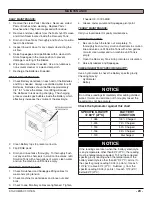
UN-CRATING MACHINE:
Carefully check the crate for any signs of damage and that
the Batteries are in the unit.
To un-crate the machine, remove banding strips from
around the crate. Take off the top and sides and dispose
properly. Remove brackets
(A)
from machine frame. Re-
move bolts from pallet, then remove board. Carefully roll
the machine off of the base. Notify the carrier immediately
if concealed damage is discovered.
CONNECTING BATTERIES:
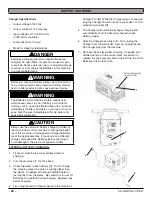
Your machine is equipped with (2
×
) 12-Volt/ 130 AH, or
(2
×
) 12-Volt/ 150 AH Wet Lead Acid, AGM, or Deep Cycle
Batteries which form a 24 Volt system.
(SEE PICTURE BELOW FOR CORRECT CABLE CON-
NECTIONS)
1. Turn all switches to the
OFF
position and remove Key
(if machine is equipped with optional key switch)
.
2. Attach Battery Cables as shown below.
3. Turn
ON
main power switch and check the battery
condition meter to ensure correct installation. Charge
Batteries if needed
(SEE BATTERY CHARGING)
.
NOTICE
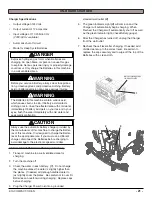
Batteries are a possible environmental hazard. Consult
your Battery supplier for safe disposal methods.
NOTICE
Orientation of Batteries is critical for cables to reach.
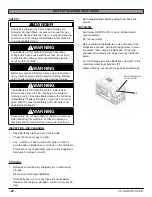
ATTACHING SQUEEGEE:
1. Lower the Squeegee Mounting Plate by rotating the
Squeegee Lift Lever
(A)
in a clockwise motion
(SEE
BELOW)
.
2. Loosen the two knobs
(B)
on the squeegee and slide
them into the slots in the Squeegee Mounting Plate
(SEE BELOW)
.
3. Tighten the two knobs and connect the Vacuum Hose
(C)
from the machine to the Squeegee
(SEE BELOW)
.
4. You may have to adjust the Squeegee Pitch
(SEE AD-
JUSTING SQUEEGEE ON THE NEXT PAGE)
24 VOLTS
A
B
B
C
A

