10
Measuring
1. Open TigerGauge jaws.
2. Place the part to be measured in the jaws.
Note: For maximum accuracy, ensure the part is lying flat and the ends are held securely.
3. Gently close the jaws.
4. The measurement will display on the TigerGauge screen.
Transmitting Data
Press
when measuring a part to transmit part length data.
Building a Part List Using TigerGauge
If you use the List functionality on your TigerStop, you can use TigerGauge to enter lengths instead of
entering them by hand.
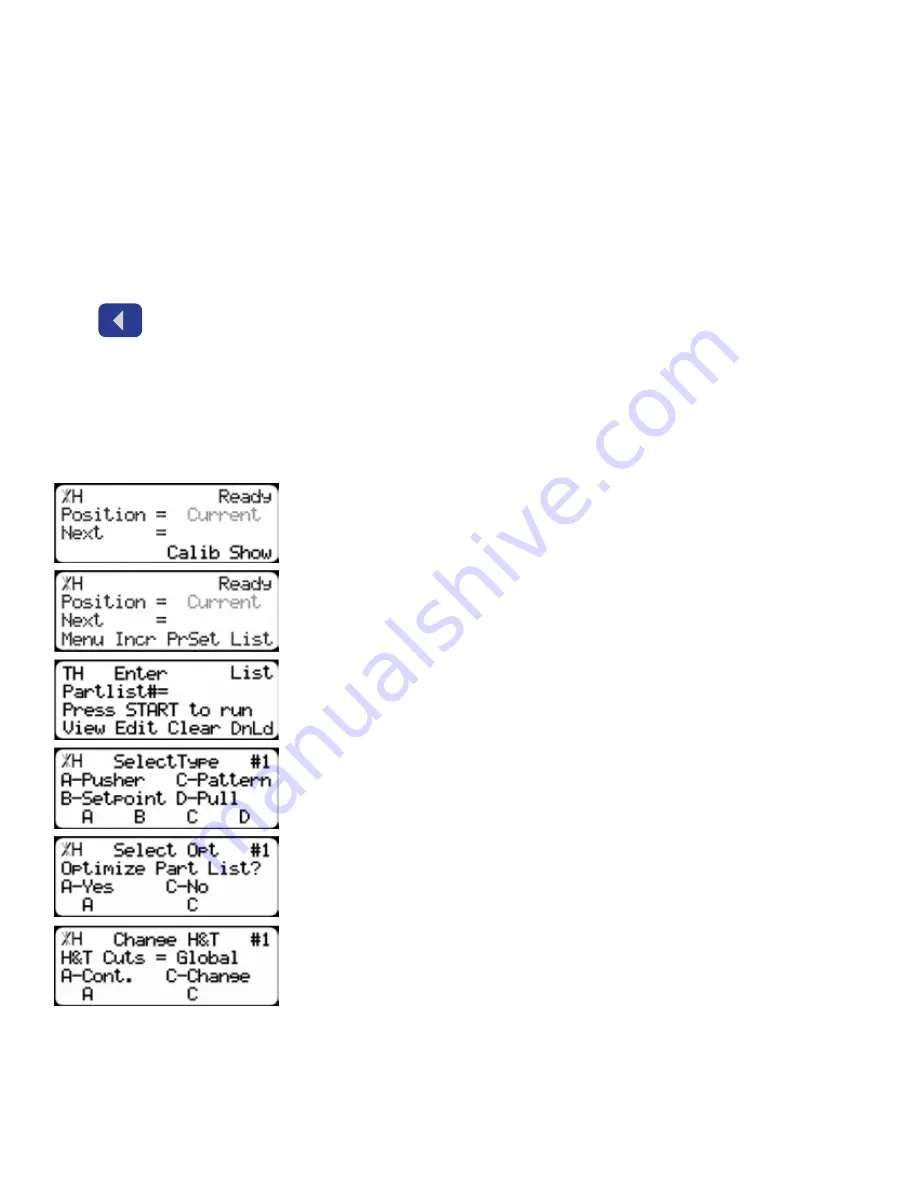
3. Press the [List] soft key to access the list interface.
1. Start at the Ready Screen.
2. Press the [Show] soft key.
4. At the List interface, enter the list number you wish to program and
press the [Edit] soft key.
Note: The list number is a memory slot that houses the list. You can choose numbers
1 - 100.
5. Select the type of list you would like to program.
6. TigerStop will ask you if you want to optimize the list for material
yield. If you choose no, TigerStop will process the list exactly as
entered and will NOT optimize for material yield.
Note: You will only see this prompt if you have the Dynamic Optimization Upgrade.
7. Select if you want to use a global or a local head and tail cut.
Note: Head and tail cuts are trim cuts at the ends of your material.
Global
- Uses the head and tail cut setting from the Part List menu
Local
- Allows you to set a head and tail cut that is used for this list only.
Summary of Contents for TigerGauge
Page 1: ...1 2017 TigerStop LLC Installation Guide Installation Guide TigerGauge February 2017 Mk1 ...
Page 18: ...18 ...
Page 19: ...19 ...


