background image

57

Battery Precautions for Rechargeable Battery 
Packs

The TI-Navigator™ network hub contains a Lithium Ion battery pack. 
Adherence to the following instructions and cautions will help you get 
the most from your battery pack.

Contact TI if you have problems with the battery.

WARNING: THERE IS A RISK OF EXPLOSION IF REPLACED BY AN 
INCORRECT TYPE. REPLACE ONLY WITH THE SAME OR EQUIVALENT TYPE 
RECOMMENDED BY TEXAS INSTRUMENTS. DISPOSE OF USED BATTERIES 
ACCORDING TO LOCAL REGULATIONS. DO NOT RECHARGE, 
DISASSEMBLE, CRUSH, HEAT ABOVE 140º (60º C), OR INCINERATE.

Always follow the following guidelines:

Replace only with TI-specified battery pack.

Use only in TI-Navigator™ network hubs.

Do not disassemble, puncture, crush, or incinerate batteries.

Charge batteries only with an approved charger designed for use 
with your Texas Instruments product.

Do not place non-rechargeable batteries in a battery recharger.

Properly dispose of used batteries immediately. Do not leave them 
within the reach of children.

Remove batteries for disposal in accordance with your local 
regulations before disposing of the TI-Navigator™ system.

Storage

Remove batteries from the calculator.

Store in controlled climate conditions between 20 degrees C and 35 
degrees C.

Avoid high temperature storage conditions. Do not store under 
sunlight or in an automobile.

Recharge after storing if rechargeable.

Do not leave batteries within reach of children.

InstallationGuide.book  Page 57  Wednesday, May 3, 2006  10:19 AM

Summary of Contents for Navigator

Page 1: ...TI Navigator Installation Guide _____________________________________________ Write the System ID number here The number is printed inside the case for the CD ...

Page 2: ...d whatsoever against the use of these materials by any other party Copyright 2006 Texas Instruments Incorporated Microsoft Windows Apple Macintosh Belkin and ZoneAlarm are trademarks of their owners Regulatory Information USA FCC Information Concerning Radio Frequency Interference Federal Communication Commission Interference Statement This equipment has been tested and found to comply with the li...

Page 3: ...l interference and 2 This device must accept any interference received including interference that may cause undesired operation FCC Caution Any changes or modifications not expressly approved by Texas Instruments could void the user s authority to operate this equipment IMPORTANT NOTE FCC Radiation Exposure Statement This equipment complies with FCC radiation exposure limits set forth for an unco...

Page 4: ... equipment ETS EN 301 489 1 17 General EMC requirements for radio equipment Restrictions France Outdoor use limited to 10 mW e i r p within the band 2454 2483 5 MHz Italy If used outside of own premises general authorization is required Canada Industry Canada IC To prevent radio interference to the licensed service this device is intended to be operated indoors and away from windows to provide max...

Page 5: ...d 14 Identifying your hardware and selecting a channel 15 Identifying the network connection 17 Configuring an Ethernet port 18 Configuring a USB port 20 Setting up your classroom network 25 Activating the access point 26 Activating Type 2 network hubs 27 Activating Type 1 network hubs 31 Registering your TI Navigator system 36 Installing the calculator operating system 39 Connecting the calculato...

Page 6: ...ice 55 For general information 55 For TI Navigator technical questions 55 For product hardware service 55 Battery Precautions for Calculators 56 Battery Precautions for Rechargeable Battery Packs 57 Storage 57 Texas Instruments TI Warranty Information 58 Customers in the U S and Canada Only 58 Australia New Zealand Customers only 58 All Other Customers 59 TI LearningCheck 3 x License Agreement 72 ...

Page 7: ...e the students responses to the polls and review the poll results with your students Screen Capture Lets you capture your students calculator screens Class Analysis Lets you create distribute and analyze educational content LearningCheck Creator Lets you create quizzes and self assessment opportunities App and OS Transfer Lets you transfer TI Graphing Calculator Operating System OS and Application...

Page 8: ...d the entire TI Navigator system including the TI Navigator software and the Type 2 hardware However if you already own a TI Navigator 1 0 or 1 1 system you can use your current Type 1 hardware with the TI Navigator 2 0 or later software Some of the setup procedures are different if you are using Type 1 hardware these differences are included in the section Setting up your TI Navigator network the...

Page 9: ...gher Recommended items Cradles for the TI 73 Explorer TI 83 Plus and TI 83 Plus Silver Edition calculators sold separately TI ViewScreen panel to project the image of your calculator s screen using your overhead projector requires a ViewScreen calculator TI Presenter video adapter to connect your ViewScreen calculator to a TV or projector A digital multimedia projector to project the image of your...

Page 10: ...uire a USB port The USB to Ethernet adapter is not needed if the teacher s computer already has an available Ethernet port The USB Silver Edition cable is used to connect a calculator to the teacher s computer Note Connecting a calculator to the teacher s computer with the USB Silver Edition cable adds the calculator to the network without the need for a network hub When a teacher uses the calcula...

Page 11: ... 1 network hub with AC9926 power adapter 1 network connector 1 clamp 4 data cables to connect the calculators to the network connectors Student kit Hub charging bay 4 network hub clamps 4 network hubs and 4 network connectors AC9940 power adapter for the charging bay 16 data cables AC9926 power adapter for individual hub or access point Network hub with network connector Network hub clamp Individu...

Page 12: ...ing bay you should charge them for 12 hours Typically this is done overnight or over a weekend When the hubs are fully charged in the bay the LED shows solid green Note You cannot damage the batteries by leaving them in the charging bay beyond the time needed to fully charge them Also it is not necessary to fully discharge the batteries before recharging them 1 Make sure you have enough 3 4 power ...

Page 13: ...connector attached If you remove a hub from the charging bay with no network connector attached the hub s power status LED goes off until you attach a connector Removing the network connectors When the hubs are out of the charging bay using battery power but are not in use we recommend removing the network connectors from the hubs to extend battery life f To remove a network connector from a hub u...

Page 14: ...b is fully charged A complete list of LED operations and status modes is available along with complete information about the network hubs rechargable batteries and how to store the hubs See Technical information on page 45 Before you begin To install software on your computer you must have administrator privileges when you log in to Windows If you don t know whether or not you have administrator p...

Page 15: ...t the TI Navigator CD in your computer s CD ROM drive The window to the CD should open automatically Note If your computer is running Windows XP Service Pack 2 you may see the following message If so click Yes to continue ...

Page 16: ... continue 4 Five separate installations will occur TI Connect TI Navigator software Class Analysis LearningCheck Creator Network Manager software Note If version 1 3 or earlier of TI Connect is already installed on your computer the installation program will uninstall it and install TI Connect 1 6 If earlier versions of other TI Navigator components are already installed the installation program w...

Page 17: ...ro 7 When the installation is complete the TI Navigator Setup dialog displays the status of installed components You are now ready to set up your network Note If you are using Windows XP Service Pack 2 and have the built in firewall activated you may have to specify TI Navigator and other other TI applications as exceptions that you want to allow to communicate with the TI Navigator network For mo...

Page 18: ... power outlet If you are using the USB to Ethernet adapter make sure it is not yet connected to the computer s USB port 3 Make sure each hub is fully charged LED is solid green 4 Remove the hubs from the charging bay Each hub must have a network connector attached The LED changes from solid green to blinking green when you remove a hub from the charging bay 5 Have a ball point pen or paper clip ha...

Page 19: ...ich hardware you are using Another consideration is the network port on your computer If you have an available Ethernet port on your computer you should use it to connect to the TI Navigator access point If you do not have an available Ethernet port on your computer you must use the USB to Ethernet adapter to connect to the TI Navigator access point Connecting the cables to the access point 1 Iden...

Page 20: ...t you will use the network adapter USB to Ethernet Starting the wizard A First Time Setup screen opens automatically when you complete the installation of the TI Navigator software You are immediately prompted to run the network setup wizard Note If you want to run the Setup Wizard later you will click Start Programs TI Tools TI Network Manager When Network Manager opens or click Actions Setup Wiz...

Page 21: ...rk Manager opens click Actions Setup Wizard The wizard lists the three major steps involved in setting up your classroom network 2 Click Next to proceed with the wizard Identifying your hardware and selecting a channel 1 Choose the hardware type you are using If you are using hardware from a TI Navigator 1 x system click Type 1 ...

Page 22: ...3 If you are in a country other than the United States choose your country 4 Notice the operating channel Normally you should use the default channel If it is necessary to change to a different channel to avoid interference and improve reception you can do it later 5 Click Finish to proceed with the Network Adapter Wizard ...

Page 23: ...er cable or the USB to Ethernet adapter to the computer 6 Click Next to proceed Identifying the network connection 1 Select the network port on your computer that you plan to use for your TI Navigator network If you have an available unused Ethernet port on your computer click Ethernet port If you do not have an available Ethernet port on your computer click USB port to use the USB to Ethernet ada...

Page 24: ...tions on the screen insert the black Ethernet crossover cable into the Ethernet port on the computer to connect the access point 2 Confirm that the AC9926 adapter is connected to the access point 3 Now plug the AC adapter into a power outlet 4 Select the option that says The access point is plugged in and connected and then click Next ...

Page 25: ...for a wireless network select the adapter whose Ethernet port you plan to use for TI Navigator 6 Optional Advanced If you want to specify a subnet number for this network adapter click an arrow button until the number you want is displayed 7 Click Next to proceed You have completed configuring the Ethernet port 8 Click Finish ...

Page 26: ...hese instructions only if you are connecting to a USB port 1 If you have not already done so click USB port and then click Next 2 Following the instructions on the screen make sure the USB to Ethernet adapter is disconnected from your computer 3 Click The Adapter is disconnected and then click Next ...

Page 27: ...over cable into the Ethernet jack on the USB to Ethernet adapter Don t connect the adapter to the computer yet 7 Confirm that the crossover cable connects the access point and the USB to Ethernet adapter 8 Select the options to confirm that you have completed all connections except that the USB adapter is not connected to the computer and then click Next ...

Page 28: ...message regarding a Code 10 error After you click OK to dismiss the error message a large Troubleshooting window opens Close the Troubleshooting window disconnect the adapter from the USB port and then reconnect the adapter to the port You can then use the wizard to complete the setup Your computer recognizes the new hardware component and Windows launches a new wizard ...

Page 29: ... software is not compatible with Windows click Continue Anyway This does not mean there is a problem When the driver installation is complete the following screen appears 11 Click Finish and then click Start Shut Down Restart and click OK to restart your computer 12 After your computer has restarted double click the TI Navigator shortcut on your Windows desktop The TI Navigator home screen opens 1...

Page 30: ...24 The Network Adapter Wizard takes a few minutes to configure the USB to Ethernet adapter 15 Click Next to proceed 16 Click Finish ...

Page 31: ...u will set up the hardware components of your classroom network the access point and hubs 1 Click Next 2 Make sure that all of your hardware components are connected Review the checklist on the screen and select each option to verify that all requirements are complete 3 When you are ready click Next ...

Page 32: ...n added to your network Activating the access point 1 Click Add the access point to the classroom network and then click Next Network Manager sends signals to the access point to add it to the network After the access point is found the wizard displays a message ...

Page 33: ...tifying your hardware With the Network Setup wizard running you must reset each hub and wait for the software to recognize each hub on the network TI Navigator is designed to communicate with a maximum of 11 hubs per access point more than 11 hubs are not supported 1 Before you begin count the number of network hubs in your classroom so that you will know when all of them have been associated with...

Page 34: ...28 3 Make sure the hubs are charged that is the LED is green and blinking 4 Click Add Hubs and wait 5 When the next screen appears follow the directions on the screen ...

Page 35: ...he reset button on the back of the hub Hold the button in until the LEDs are solid amber then release the button This resets the hub to its factory default settings Repeat for each hub in the classroom Reset button Network hub bottom view ...

Page 36: ... 8 were found 8 If some of the hubs were not found match the serial numbers on the screen with the hubs in the classroom to identify which hubs were found Use a sticker or some other method to mark the hubs that were found and then press the reset button again on the hubs that were not found 9 When all the hubs have been found total number of hubs matches what you have in your classroom click OK A...

Page 37: ...screen When all of the hubs have been found click Next 11 When the process is complete click Finish 12 Skip ahead to Registering your TI Navigator system on page 36 Activating Type 1 network hubs Use these instructions only if you selected Type 1 while identifying your hardware ...

Page 38: ...u begin count the number of network hubs in your classroom so that you will know when all of them have been associated with the access point 2 Click Next to begin activating the network hubs 3 Make sure the hubs are charged and awake that is the LED is green and blinking If a hub is asleep LED is off remove the network connector and then re attach it to wake it up 4 Click Add Hubs and wait 5 When ...

Page 39: ...e on the bottom of the hub and gently press and hold the reset button inside the unit 7 Hold the reset button until the power status LED shows solid red This may take up to 10 seconds 8 When you see the solid red light remove the paper clip 9 Repeat steps 6 through 8 for all network hubs and wait Reset hole Network hub bottom view ...

Page 40: ...he last few digits of the serial number stamped on the back of the hub 10 When all the hubs have been found total number of hubs matches what you have in your classroom click OK The Setup Wizard displays various messages as it reconfigures the access point When all of the hubs are found the Setup Wizard notifies you ...

Page 41: ...r hubs is listed If necessary you can check the hub number last few digits of the serial number on the back of each unit to make sure it is listed in the dialog box Then click Next 12 Click Finish to return to the Network Setup wizard ...

Page 42: ...r When you register you send Texas Instruments the information needed by technical support personnel to solve any problems you may have with your specific network configuration After you have entered all the information you will have the option to register online via the Internet by e mail or by printing and then mailing or faxing the printed form to Texas Instruments 1 Click Next ...

Page 43: ... user profile information and checking the May we contact you box will help us serve our customers better and improve TI Navigator in the future 4 After you fill out each page click Next to proceed Some of the information is generated by your own computer to create System Generated Information 5 Click Next to proceed ...

Page 44: ... 866 842 6664 If you were not able to complete all of the information you can click Later to postpone the registration until you are able to enter all of the information Any information you entered previously is saved Later when you are ready to register open Network Manager and click Help Register Note If your classroom computer doesn t have Internet access or a printer just call 866 TI NAVIGATOR...

Page 45: ... work properly For TI 73 Explorer use OS version 1 90 or higher TI 83 Plus calculators use OS version 1 19 or higher For TI 84 Plus calculators use OS version 2 41 or higher Note TI 73 users can update the OS on all calculators at once using the App and OS Transfer tool Refer to the Guide to TI Navigator with the TI Explorer An operating system may take ten minutes per calculator to transfer and i...

Page 46: ... the operating system on the calculator a Locate the operating system file on the CD b Right click the operating system file c Click Send to TI device TI Connect s Select TI Device dialog box opens d Follow the instructions on the screen An operating system may take ten minutes per calculator to transfer and install 6 Install the operating system on every calculator to be used with your TI Navigat...

Page 47: ...and If a problem occurs you can substitute a spare part Connecting the calculators to the hubs After charging the hubs and resetting them so they are recognized by Network Manager you are ready to connect the hubs to the calculators Using the clamps is optional however they save space reduce clutter and prevent the hubs from being accidentally knocked off your work surface 1 Attach one clamp for e...

Page 48: ...s many as four TI graphing calculators into the four jacks on the network connector at the top of each network hub Insert the plug carefully do not bend the plug 4 Connect the graphing calculator with a data cable ...

Page 49: ... must be installed on all the calculators on the network These Apps are named NavNet used to connect to the TI Navigator system EAlgACT Enavstk and LearnChk used to view activities on the calculator TI 73 Explorer users require an additional App EMSact which is used to run the Visual Fractions and NumberLine Activities Use the App Transfer utility to install the Apps 1 Click Start Programs TI Tool...

Page 50: ...ties double click the App Transfer icon and then click Start Transfer The four Apps are automatically sent out to all the calculators connected to the network Optional Additional software Apps for TI calculators TI 83 Plus TI 83 Plus Silver Edition TI 84 Plus or TI 84 Plus Silver Edition are included on the product CD StudyCards Viewer CellSheet Converter App NoteFolio App TImeSpan Viewer App You ...

Page 51: ...etwork based on the IEEE 802 11b industry standard also know as Wi Fi wireless fidelity This networking standard provides high speed data transfer in the license free 2 4 GHz band The TI Navigator system has been tested to perform at a range of 70 feet If possible avoid sources of potential interference such as metal walls microwave ovens and wireless phones Note You cannot mix Type 1 and Type 2 h...

Page 52: ...r directly from the hub to a power outlet It is not necessary to fully discharge the batteries before recharging them Do not leave the hubs in an extremely cold or extremely warm location such as inside an automobile in hot weather Every few weeks you should clean the electrical contacts on the charging bay and the hubs using a clean dry cloth Storing the hubs If you need to store the wireless net...

Page 53: ...ata activity or power status This can occur either when the hubs are seated in the charging bay or when they are outside the charging bay When a hub powers up because you have either inserted it into the charging bay or connected a network connector all the LEDs emit solid amber and then each LED one at a time emits solid green When the power up sequence is complete the LEDs indicate status as fol...

Page 54: ...sk 255 255 255 0 Color and pattern Meaning Changing from green to amber to red The battery is charging Solid green Power on fully charged and powered by a charging bay or power adapter Blinking green Power on battery powered The battery is 30 to 99 charged Blinking amber Low battery lower than 30 charged Blinking red Battery is critically low lower than 8 charged ...

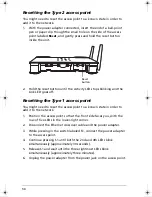
Page 55: ... paper clip Type 1 hubs to reboot the hub To reboot a Type 2 hub hold the reset button for 2 3 seconds and release it while the LEDs are still blinking This reboots the hub but does not reset the hub to its factory defaults which happens when you hold the reset button until the LEDs emit solid amber Rebooting a Type 2 hub allows it to be reassociated with the access point Resetting the hub to its ...

Page 56: ...d or Windows 2000 with Service Pack 4 installed Click Start Control Panel and double click Network Connections If you see a bridged connection remove it Note that this may disable another network device Run the Network Adapter Wizard Click Start Programs TI Tools TI Navigator Network Manager and then click Actions Configure Network Adapter On the wizard screen titled Identify the Network Adapter y...

Page 57: ...r Device not found No access point was located by the system The hubs cannot be configured until this is corrected The network adapter was not found The access point has not yet been added to the system The access point is turned on but still initializing Click Start Control Panel and double click Network Connections If you see a bridged connection remove it Note that this may disable another netw...

Page 58: ...s point on page 56 The software may be blocked by filters Some firewall and virtual private network software prevent Network Manager from getting access to the ports required for configuration Have the system administrator verify that other programs or drivers are not blocking access to the network adapter If you have activated Internet Connection Firewall or Internet Connection Sharing on your sy...

Page 59: ...onnected Make sure that the network connector is properly attached to the hub Make sure the hub is within range of the access point When in the process of adding hubs be patient It may take up to 30 seconds after resetting a hub before it is recognized and configured by the software You may have to reset the hub a second time Remember to hold the reset button until the LEDs are solid amber Sometim...

Page 60: ...ks red or amber contact Texas Instruments for help Phone 1 866 TI NAVIGATOR 1 866 846 2844 E mail ti navigator ti com Extra hubs appear on the network Do not attempt to configure more than one classroom network at the same time Remove the network connector from hubs that you do not want to add to your network Compare the hub numbers listed in the Network Manager window with the numbers stamped on ...

Page 61: ...r click Actions Setup Wizard click Next select your hardware type and click Next On the Operating Channel Selection screen in the Operating Channel list click a different channel number and click Finish If the changing the channel doesn t correct the problem try a different channel The computer s firewall is blocking communications If you have a software firewall on the computer such as ZoneAlarm ...

Page 62: ...ccess point You might need to reset the access point to a known state in order to add it to the network 1 Position the access point so that the front side faces you with the row of five LEDs in the lower right corner 2 Disconnect the Ethernet crossover cable and the power adapter 3 While pressing in the switch labeled S1 connect the power adapter to the access point 4 Continue pressing S1 until bo...

Page 63: ...ning a product for service All other customers Refer to the leaflet enclosed with this product hardware or contact your local Texas Instruments retailer distributor Home Page education ti com KnowledgeBase and e mail inquiries education ti com support Phone 800 TI CARES 800 842 2737 For U S Canada Mexico Puerto Rico and Virgin Islands only International information education ti com international E...

Page 64: ...ED BATTERIES ACCORDING TO LOCAL REGULATIONS Do not leave batteries within the reach of children Do not mix new and used batteries Do not mix brands or types within brands of batteries Do not mix rechargeable and non rechargeable batteries Install batteries according to polarity and diagrams Do not place non rechargeable batteries in a battery recharger Properly dispose of used batteries immediatel...

Page 65: ... with TI specified battery pack Use only in TI Navigator network hubs Do not disassemble puncture crush or incinerate batteries Charge batteries only with an approved charger designed for use with your Texas Instruments product Do not place non rechargeable batteries in a battery recharger Properly dispose of used batteries immediately Do not leave them within the reach of children Remove batterie...

Page 66: ...ations or exclusions may not apply to you Legal Remedies This warranty gives you specific legal rights and you may also have other rights that vary from state to state or province to province Warranty Performance During the above one 1 year warranty period your defective product will be either repaired or replaced with a reconditioned model of an equivalent quality at TI s option when the product ...

Page 67: ...limitations or exclusions may not apply to you Legal Remedies This warranty gives you specific legal rights and you may also have other rights that vary from jurisdiction to jurisdic tion Warranty Performance During the above one 1 year warranty period your defective product will be either repaired or replaced with a new or reconditioned model of an equivalent quality at TI s option when the produ...

Page 68: ... in other countries Licensor grants you a non exclusive non transferable license to install and use the Program on all institution owned leased or rented computers located at the Site for which the Program is licensed You may make one copy of the software for backup and archival purposes You agree to reproduce all copyright and proprietary notices shown in the software and on the media Except as e...

Page 69: ...ed Compliance with such regulations is your respon sibility You agree that you do not intend to nor will you directly or indirectly export re export or transmit the Program or technical data to any country to which such export re export or transmis sion is restricted by any applicable United States regulation or statute without the proper written consent or license if required of the Bureau of Exp...

Page 70: ...ese restrictions translate to certain responsibilities for you if you distribute copies of the software or if you modify it For example if you distribute copies of such a program whether gratis or for a fee you must give the recipients all the rights that you have You must make sure that they too receive or can get the source code And you must show them these terms so they know their rights We pro...

Page 71: ...t including an appropriate copyright notice and a notice that there is no warranty or else saying that you provide a warranty and that users may redistribute the program under these conditions and telling the user how to view a copy of this License Exception if the Pro gram itself is interactive but does not normally print such an announcement your work based on the Program is not required to prin...

Page 72: ...ise that contradict the conditions of this License they do not excuse you from the conditions of this License If you cannot distribute so as to satisfy simultaneously your obligations under this License and any other pertinent obligations then as a consequence you may not distribute the Program at all For example if a patent license would not permit royalty free redistribution of the Program by al...

Page 73: ...e can redistribute and change under these terms To do so attach the following notices to the program It is safest to attach them to the start of each source file to most effectively convey the exclusion of warranty and each file should have at least the copyright line and a pointer to where the full notice is found one line to give the program s name and a brief idea of what it does Copyright C ye...

Page 74: ...se restrictions translate to certain responsibili ties for you if you distribute copies of the library or if you modify it For example if you distribute copies of the library whether gratis or for a fee you must give the recipients all the rights that we gave you You must make sure that they too receive or can get the source code If you link other code with the library you must provide complete ob...

Page 75: ...ted under these terms A work based on the Library means either the Library or any derivative work under copyright law that is to say a work containing the Library or a portion of it either verbatim or with modifications and or translated straightforwardly into another language Hereinafter translation is included without limitation in the term modification Source code for a work means the preferred...

Page 76: ...tomarily used for software interchange If distribution of object code is made by offering access to copy from a designated place then offering equivalent access to copy the source code from the same place satisfies the requirement to distribute the source code even though third parties are not compelled to copy the source along with the object code 5 A program that contains no derivative of any po...

Page 77: ...e other library facilities is otherwise permitted and provided that you do these two things a Accompany the combined library with a copy of the same work based on the Library uncom bined with any other library facilities This must be distributed under the terms of the Sections above b Give prominent notice with the combined library of the fact that part of it is a work based on the Library and exp...

Page 78: ...software and of promoting the sharing and reuse of software generally NO WARRANTY 15 BECAUSE THE LIBRARY IS LICENSED FREE OF CHARGE THERE IS NO WARRANTY FOR THE LIBRARY TO THE EXTENT PERMITTED BY APPLICABLE LAW EXCEPT WHEN OTHERWISE STATED IN WRITING THE COPYRIGHT HOLDERS AND OR OTHER PARTIES PROVIDE THE LIBRARY AS IS WITHOUT WARRANTY OF ANY KIND EITHER EXPRESSED OR IMPLIED INCLUDING BUT NOT LIMIT...

Page 79: ...tted provided that the following conditions are met Redistributions of source code must retain the above copyright notice this list of conditions and the following disclaimer Redistributions in binary form must reproduce the above copyright notice this list of conditions and the following disclaimer in the documentation and or other materials provided with the distribution Neither the name of the ...

Page 80: ...e Licensed Materials In no event shall TI or its suppliers be liable for any indirect incidental or con sequential damages loss of profits loss of use or data or interruption of busi ness whether the alleged damages are labeled in tort contract or indemnity Some states or jurisdictions do not allow the exclusion or limitation of inciden tal or consequential damages so the above limitation may not ...

Page 81: ...nt Licensable by grantor 1 11 Source Code means the preferred form of the Covered Code for making modifications to it including all modules it contains plus any associated interface definition files scripts used to control compilation and installation of an Executable or source code differential comparisons against either the Original Code or another well known available Covered Code of the Contri...

Page 82: ...ional rights described in Sec tion 3 5 3 2 Availability of Source Code Any Modification which You create or to which You contribute must be made available in Source Code form under the terms of this License either on the same media as an Executable version or via an accepted Electronic Distribution Mechanism to anyone to whom you made an Executable version available and if made available via Elect...

Page 83: ...he Source Code version from the rights set forth in this License If You distribute the Executable version under a different license You must make it absolutely clear that any terms which differ from this License are offered by You alone not by the Initial Devel oper or any Contributor You hereby agree to indemnify the Initial Developer and every Contribu tor for any liability incurred by the Initi...

Page 84: ... with draw Your litigation claim with respect to the Contributor Version against such Participant If within 60 days of notice a reasonable royalty and payment arrangement are not mutually agreed upon in writing by the parties or the litigation claim is not withdrawn the rights granted by Par ticipant to You under Sections 2 1 and or 2 2 automatically terminate at the expiration of the 60 day notic...

Page 85: ...f the Covered Code as Multiple Licensed Multi ple Licensed means that the Initial Developer permits you to utilize portions of the Covered Code under Your choice of the NPL or the alternative licenses if any specified by the Initial Developer in the file described in Exhibit A EXHIBIT A Mozilla Public License The contents of this file are subject to the Mozilla Public License Version 1 1 the Licen...

Page 86: ... its representatives including but not limited to communication on electronic mailing lists source code control systems and issue tracking systems that are managed by or on behalf of the Licensor for the purpose of discussing and improving the Work but excluding communication that is conspicuously marked or otherwise designated in writing by the copyright owner as Not a Contribution Contributor sh...

Page 87: ...y responsible for determin ing the appropriateness of using or redistributing the Work and assume any risks associated with Your exercise of permissions under this License 8 Limitation of Liability In no event and under no legal theory whether in tort including negli gence contract or otherwise unless required by applicable law such as deliberate and grossly negligent acts or agreed to in writing ...

Page 88: ...ntributors may be used to endorse or promote products derived from this software without specific prior written permission THIS SOFTWARE IS PROVIDED BY THE COPYRIGHT HOLDERS AND CONTRIBUTORS AS IS AND ANY EXPRESS OR IMPLIED WARRANTIES INCLUDING BUT NOT LIMITED TO THE IMPLIED WARRANTIES OF MERCHANTABILITY AND FITNESS FOR A PARTICULAR PURPOSE ARE DISCLAIMED IN NO EVENT SHALL THE COPYRIGHT OWNER OR C...

Page 89: ...ing calculators to hubs 41 contact information 55 contents of kits 3 copyright statement ii crossover cable 13 customer support and service 55 E error messages 49 Ethernet crossover cable 13 F FCC statement ii H hubs activating 12 assembling and charging 6 checking power status 8 connecting calculators to 41 resetting 12 I Individual kit 5 inventory 3 K kit Classroom 4 Individual 5 Student 5 L LED...

Page 90: ...s 12 S safety battery 56 rechargeable batteries 57 service and support 55 setting up network 12 software installing on calculators 43 Student kit 5 StudyCard 1 support and service 55 system requirements 2 T technical information 45 TI Navigator overview 1 trademarks ii troubleshooting 49 50 U unpacking the boxes 3 V ViewScreen 3 W warranty 58 Windows version required 2 wizard network setup 12 ...

Reviews: