background image

12

PREPARING THE ENGINE FOR STARTING 

引擎整備工作

14

a

b

c

a. 

To start an engine, first remove the glow plug.

b. 

Prime the carburetor by squeezing the primer bulb while watching the fuel come through the line and just reach the carburetor inlet. 
Then, give the bulb another 1/4 squeeze(1/8"). 

BE CAREFUL NOT TO SQUEEZE TOO MUCH

 or the engine will become flooded. 

Attempting to start a grossly flooded (or hydrolocked) engine (full of fuel) can cause serious damage to internal engine parts.

c. 

Check the glow plug by plugging it into the glow plug igniter. The glow plug element should light up brightly. If it lights up dimly, then the 

glow plug igniter is low (and it needs recharging). If it does not light up or the plug element looks distorted, then the glow plug is bad 
(replace with new one). After checking, reinstall the glow plug.  The glow plug used for this engine can be: Thunder Tiger 9281, McCoy 
#9 / #59, Novarossi C4S / C5S / C6S,OS #8 / #A3 / #A5, and Picco P6S / P7S.

a. 

首次啟動引擎前,請使用扳手將火星塞卸下。

b. 

利用送油裝置將燃油送至化油器前端,再多擠壓約

1/4

送油器容積量即可。

注意:不可送油過量,以免造成引擎積油。

c. 

將火星塞塞入電夾內檢查,若火星塞呈現明亮、紅熱的現象表示正常,若火星塞無法正常點火,請將電夾充飽電再檢查一次;若
能無法正常點火,請更換電夾或火星塞。確認無誤後,將火星塞裝回引擎。

STARTING THE ENGINE 

發動引擎

15

When start your RTA4, use both
hands to hold the power drill.

啟動引擎時,雙手請緊握啟動器。

When start your RTA4, use both
hands to hold the power drill.

啟動引擎時,雙手請緊握啟動器。

a

c

c

d

d

b

d

Not included

需另購

a. 

Turn on the radio (transmitter first, then receiver).

b. 

Clip the glow plug igniter onto engine's glow plug.

c. Pull Start

 - Hold the truck by the handle with one hand and pull the pull-start-cord with the other. Use quick and short pulls and make 

sure that you are only pulling the cord about 10-12 inches. Pulling the cord more than 14 inches or all the way will damage the pull-start 
mechanism. If the cord is difficult to pull or is stuck it is an almost sure sign that the engine is flooded.

d. Hex Start

 - Make sure that your drill is set to the clockwise or forward position. Insert the Hex Starting Shaft to the drill and tighten the 

drill chuck with the ball end facing away from the drill. BEFORE inserting the Hex Starting Shaft into the dual start output, squeeze the 
trigger and verify that the drill is turning clockwise.

If the engine becomes flooded: 

Turn off your truck, and then the radio. Remove the glow plug using a glow plug wrench and

then remove the air filter. Turn the truck over to allow any excess fuel in the engine to run out. Turn the truck right side up. Reinstall
the air cleaner. Squeeze the trigger 3 to 4 times. Reinstall the glow plug with the glow plug wrench. Return to step 16b.

      CAUTION : 

Attempting to start the motor by using a counter-clockwise direction could damage the Hex Start mechanism or

possibly the engine internal components. Insert the ball end of the Hex Start Shaft into the Hex Start output. Grasp the drill tightly
and squeeze the trigger.

a. 

打開遙控器(先打開發射機電源,再開接收機電源)。

b. 

將電夾與火星塞連接。

c.  

拉動手拉器啟動引擎

:油門微調可稍微提高一些,方便引擎的

動。注意:手拉器拉出之長度必須保持在

20-35

公分之內,不可超過

35

分,避免將手拉器繩索拉出過長,造成損壞。

d. 

使用啟動棒啟動引擎

:先確認啟動器轉動方向為順時針旋轉。將啟動棒裝入啟動器內,另一端置入引擎起動裝置,啟動引擎。

引擎積油排除:

引擎於發動過程中,若發現阻力過大,有可能引擎發積油狀況,此時必須先將引擎積油排除。

將遙控器與接收機電源關閉,將火星塞與空氣濾清器卸下,將車輛以倒置或其他各種可能角度將積油排出。再將車輛擺正,將空氣濾
清器裝回,啟動引擎,重複

5

7

次,再將火星塞重新裝回。


注意事項:若啟動器轉動方向為逆時針旋轉,將會導致引擎啟動裝置與引擎內部構造損壞。

Summary of Contents for 6241-F

Page 1: ...cost of the original kit purchased This warranty does not cover any components damaged by use or modification Part or parts missing from this kit must be reported within 60 days of purchase No part o...

Page 2: ...rmance it is important to make sure all the moveable parts work free without binding 5 Do not operate model products in rain on public roads near crowds near airport or near areas with restricted radi...

Page 3: ...do not run in confined spaces Do not run where loud noises can disturb others such as hospitals and residential areas Never run indoors There is a high risk of fire and or damage 2 Inspect your model...

Page 4: ...batteries For safety we recommend using Alkaline batteries for only 30 minutes before testing mostly changing Battery strength affects braking power and radio range If voltage drops while running the...

Page 5: ...e charging complete pull on the glow plug igniter lever to unplug the glow igniter Charge the new glow plug igniterfor 16 to 24 hours on the first charge For subsequent charges charge it about 12 hour...

Page 6: ...teering wheel the ST trims steering and the TH trims throttle brake d For more details please check the transmitter instruction manual a b c d RADIO OPERATION 4 1 2 3 4 5 6 7 8 9 10 11 12 13 14 15 Tra...

Page 7: ...or right to adjust the amount of the steering dual rate Right to increase dual rate amount and left to decrease amount 8 AUX Ch Button Additional function for controlling of the model 9 External Charg...

Page 8: ...turn green red flash on the receiver d Release the Binding SW button Successful binding is confirmed by the binding LED changing from a quick blinking and then remain solid on the transmitter The LED...

Page 9: ...osition at Brake first push the trigger to the brake position and hold To set up F S with servo position at Neutral keep the trigger at neutral Caution Always set the throttle trigger to the neutral o...

Page 10: ...e carburetor should be fully opened and the brake disengaged To reverse this function flip the throttle brake servo reverse switch b Return the trigger stick to neutral The carburetor should be closed...

Page 11: ...ly close the carburetor and set the forward collar next to the spring with the spring slightly compressed Then set the other collar rearward next to the linkage pivot a b 1 5mm c a Loosen the setscrew...

Page 12: ...vehicle without the air filter If the vehicle will be operated in an area with fine dust use filter oil or caster oil instead of fuel It is important that the foam is only moist to trap dirt and allow...

Page 13: ...e s glow plug c Pull Start Hold the truck by the handle with one hand and pull the pull start cord with the other Use quick and short pulls and make sure that you are only pulling the cord about 10 12...

Page 14: ...rly broken in a Start the engine b With a running engine run the car back and foreth in a straight line full throttle achieved during each passage in an open parking lot Repeat and note the sound of t...

Page 15: ...or a small paintbrush to get to the hard to reach areas A damp cloth works well for cleaning the body Stubborn dirt and oil on the body is best removed with any diluted organic solvents Simple Green e...

Page 16: ...springs are better for rougher terrain rock crawling and jumping Softer springs will increase the rollover tendency of the truck at higher speeds Part Number PD1473 PD1474 PD1475 PD1476 Spring Color...

Page 17: ...richen fuel mixture see Fuel Mixture section below Carburetor incorrectly adjusted Re adjust carburetor see Fuel Mixture or Factory Carburetor Settings section below Exhaust blocked Check exhaust rem...

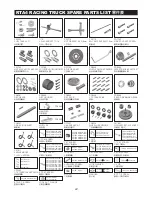
Page 18: ...D1536 PD1533 PD1536 PD1497 PD1465 PD1536 PD05 0019 PD1497 PD03 0013 PD1498 PD1499 PD1577 PD1572 PD1598 PD0971 PD1504 PD1536 PD03 0011 PD1471 PD1479 PD0432 PD09 0051 PD0674 PD0673 PD1515 PD1532 PD08 00...

Page 19: ...19 PD1536 PD1504 PD0971 PD1498 PD1572 PD1499 PD1577 PD8324 PD1479 PD1471 PD03 0012 PD1504 PD1497 PD1497 PD1465 PD0673 PD1535 PD0680 PD1713 PD0673 PD0673 PD09 0051 PD1532 PD1536 PD1533 PD1533 PD09 0038...

Page 20: ...D1490 PD1559 PD1194 PD1493 PD0677 PD1532 PD1543 PD1490 PD0677 PD1492 PD1598 PD1491 PD1559 PD1528 PD1461 PD1526 PD1526 PD0976 PD1712 PD1527 PD0961 PD1597 PD1192 PD0971 PD1490 PD1480 PD1594 PD1192 PD119...

Page 21: ...PD1444 PD1461 PD0961 PD1533 PD1533 PD1462 PD1463 PD1461 PD1573 PD1548 PD1439 PD1440 PD1566 PD1570 PD1439 PD1442 PD1547 PD1547 PD1438 PD1437 PD1441 PD6344 PD1444 PD1572 PD1448 PD1446 PD1711 PD1550 PD15...

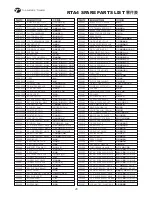
Page 22: ...TCH HUB PD02 0015 GEAR BOX SET MTA SPT PD03 0011 TURNBUCKLE PD03 0012 TURNBUCKLE M4x82 FLYWHEEL SHIM 0 5mm 0 5mm AIR FILTER 21 BLACK AD2555 FLYWHEEL COLLET 21 PD01 0008 CLUTCH HARDWARE CLUTCH BELL 23T...

Page 23: ...NT PD1452 BEVEL GEAR SET PD1444 FWD REV DRIVE GEARS PD1442 CTR TRANS SHIM CLIP E PD1446 FWD REV SHIFT GEARS PD1447 FWD REV CLUTCH HUB PD1448 FWD REV MAIN SHAFT PD1453 SLIPPER SHAFT PD1457 SLIPPER FRIC...

Page 24: ...D REV CLUTCH HOU PD1489 CHASSIS PD1490 CHASSIS GUARD COVER PD1497 SUSP HINGE PIN SET PD1498 KNUCKLE HUB PD1499 ADJUST BALL 4 10 8mm PD1504 F R TURNBUCKLE END PD1507 BELLCRANK PL PARTS PD1508 BELLCRANK...

Page 25: ...PD0681 M3x16mm 20 PD1532 M3x8mm 20 PD1533 M3x10mm 20 PD1534 M3x12mm 20 PD1535 M3x14mm 20 PD1536 M3x16mm 20 PD1537 M3x20mm 20 PD1595 M3x23mm 20 PD1596 M3x32mm 20 PD1599 M3x30mm 20 LOCK NUT SET SCREW P...

Page 26: ...AL LOCK NUT BLUE M4 PD1761 AL LOCK NUT BLUE M5 PD1582 SERVO SAVER HITECH HITECH PD1763 OPT STEERING RACK ARM PD1764 SERVO SAVER HUB SPRING PD1765 OPT STEERING HARDWARE PD1583 SERVO SAVER JR JR PN1806...

Page 27: ...V MAIN SHAFT REV IDLE GEAR SHAFT SHIFT LEVER REV GEAR SHIFT FORK MNT BEVEL GEAR SET SLIPPER SHAFT SLIPPER HUB SLIPPER RING 2sets O 20 M3x8 20 M3x10 20 M3x12 20 M3x14 20 M3x16 20 M3x20 20 M3x18 20 M3 5...

Page 28: ...D6350 PD7237 PD8324 PN1801 PN1811 20 M2 6x12 20 M2 6x8 46T 4 RTA4 OPTIONAL PARTS LIST AA2110 R PD01 0011 PD1301 PD1304 PD1582 PD1583 PD1741 PD1754 PD1759 PD1761 PD1762 PD1763 CYLINDER HEAD 28B R CLUTC...

Reviews: