background image

P12

basICoPEraTIons

5.7.1multimedia

If there is no USB device plugged in, a warning message „Not Find Any USB Device „ will be 

displayed. Otherwise you can select the 

Music, Photo, Movie or Recordings 

in this menu and 

press 

oK

 to enter the file browser and select the file to playback.

Music

 – supported file formats are MP3 and WMA.

Photo

 – supported file formats are JPG and BMP

Movie

 – supported video files in various formats (MPG, MPEG, TS, VOB, MP4, AVI,...)*

Records

 – to display the list of recordings.

Playbackofmovieandrecords.

In the Records menu you will need to select the folder “MYRECORD” where recordings are 

stored. In Movie menu you have to navigate to the file with movie.

Select the file and press 

oK

 to start the playback in preview mode. Use the 

rEd

 button to 

switch between full screen view and the list of recordings. During playback you can use the 

playback control buttons, such as 

5

 and 

6

:

 and 

"

2

,

1

 and 

3

.

Additionally in the list of recordings you can 

Delete

 or 

Rename

 a recording file.

To 

Delete

 a recording – select file with recording and press 

yellow

 button. Confirm file deletion 

with 

oK

 button or cancel it with 

EXIT

 button.

To 

Rename

 a recording – select the desired file and press 

green

 button. In appeared dialog 

you can select the character using the navigation buttons. Press 

oK

 to choose the character. 

Once you finish inputting the new name, navigate to “

oK

” button on screen and press 

oK

 on 

the remote control to store the new name.

* THOMSON cannot guarantee the playback of video files although extensions are listed here, as it depends 

on codec used, data bit rate and resolution. Please consult the THOMSON Hotline in your country to get 

more details.

5.7.2Photoconfiguration

slideTime:

You can adjust slide show interval to 1~8 seconds.

slidemode:

You can adjust slide show effect as mode 0~59 or random.

aspectratio:

Keep 

 Displays the picture as its original aspect,

Discard: 

 Displays the picture in full screen mode.

5.7.3movieconfigure

subtitlespecific:

Small:  

 Displays the subtitle as small mode.

Normal:  

 Displays the subtitle as normal mode.

Big:  

 Displays the subtitle as big mode.

subtitlebg:

White:  

 Displays the subtitle in white background.

Transparent:  

 Displays the subtitle in transparent background.

Grey:  

 Displays the subtitle in grey background.

Yellow green:  

 Displays the subtitle in yellow green background.

Summary of Contents for TTR500

Page 1: ...ten Live www thomsonstb net TTR500 Digital High Definition Terrestrial Receiver User manual Manuel d utilisateur Manuale utente Manual del usuario Brugervejledning Vartotojo instrukcija Инструкция пользователя ...

Page 2: ......

Page 3: ......

Page 4: ...ng the Batteries 6 2 6 Using the Remote Control 6 3 0 Connections 6 3 1 Connecting to TV Set 6 3 2 Connecting to Digital Audio Amplifier DVD Video recorder 6 3 3 Connecting and using the IR extender 6 4 0 First Time Installation 6 5 0 Basic Operations 7 5 1 Program 7 5 2 Video Setting 8 5 3 Channel Search 9 5 4 Time Setting 10 5 5 Option 10 5 6 System Setting 11 5 7 USB 11 6 0 Recording function 1...

Page 5: ...acket Follow the instructions that describe how to safely mount the product and use only the mounting devices recommended by the manufacturer Power Sources Connect this product only to the power source described on the product label If you are not sure about the type of power supply in your home consult your local power company Refer to instruction pages for information on using the product with a...

Page 6: ...n replacement parts are required make sure that the authorized service centre uses only parts with the same characteristics as the originals as recommended by the manufacturer Unauthorized substitution of parts could result in fire electrical shock or create other hazards Safety Check Upon completion of servicing or repairs ask the service technician to perform safety checks to determine that the ...

Page 7: ...echarged disassembled electrically short circuited or be mixed or used with other types of batteries If rechargeable accumulators instead of batteries are going to be used we recommend using e g NiMH types with low self discharge to ensure long time operation of remote control 2 0 Your Receiver 2 1 PIN code default 8888 2 2 Front panel Fig 1 1 Power button Turns your receiver ON Stand by 2 P P To ...

Page 8: ... or sub menu 13 GUIDE Shows the EPG Electronic Program Guide in TV mode 14 V V Volume up down 15 Mutes audio output of the receiver 16 P P Program up down in menu 17 SUB Shows the list of subtitle languages 18 TXT Shows teletext on OSD On Screen Display 19 AUDIO Shows the list of audio settings 20 LIST Opens the recordings list in viewing mode 21 OPT GOTO function in during playback 22 Changes Asp...

Page 9: ...le to control it Plug the IR extender into the IR connector on the back of the receiver Locate the extender on a position giving it direct sight to the remote control Once a suitable location is found remove the protecting foil from the adhesive tape on the back of the extender and fix it by slightly pressing it down on the surface it should be placed on 4 0 First Time Installation After all conne...

Page 10: ... the previous step to select more favourite programmes 3 To confirm and exit the menu press EXIT Disable favourite TV or radio programme Press FAVOURITE button on the remote control on the programme with the heart shaped symbol View favourite programme 1 In normal viewing mode no menu mode press the FAV to display a list of favourite programmes 2 Press pq to choose your favourite programme 3 Press...

Page 11: ... of the highlighted program If there are more then one page of program description you can use the YELLOW button for page down and the BLUE button for page up To view program schedule on other channels use tu buttons To book reminder for desired event press OK button To display a list of booked events press i button You will find more details about the booking of reminders in chapter 5 4 1 Schedul...

Page 12: ... to adjust the setting Press EXIT to exit the menu Auto Search Search and install all channels automatically This option overwrites all previously installed channels 1 Select Auto Search and press OK or u to start channel search 2 To cancel channel search press EXIT Manual Search Install new channels manually This option adds new channels without changing the current channels list 1 Select Manual ...

Page 13: ...lect auto or manual for GMT offset adjustments Country Region Select the Country Region when Time Offset is set to Auto Time Zone Select the Time Zone Offset when Time Offset is set to Manual Sleep This function will switch the receiver to standby when it doesn t receive any commands for a given period of time When this option is set to off the function is disabled Please set the time after which ...

Page 14: ... settings The receiver will reboots and start with Installation Guide menu Information View model hardware and software information Software update If the status is set ON it will scan every day at specified Start Time for the new software from broadcast Software update from USB Download the required update file for your receiver model from our website www thomsonstb net support page or contact to...

Page 15: ...on Confirm file deletion with OK button or cancel it with EXIT button To Rename a recording select the desired file and press Green button In appeared dialog you can select the character using the navigation buttons Press OK to choose the character Once you finish inputting the new name navigate to OK button on screen and press OK on the remote control to store the new name THOMSON cannot guarante...

Page 16: ...is complete message will appear Warning Format functions will delete all records data and information from your USB device THOMSON will not take any responsibility for damaged or lost data on the USB device 6 0 Recording function To perform a recording you have to insert USB storage device into USB port of the receiver Select a channel you would like to record and press 4 button The recording will...

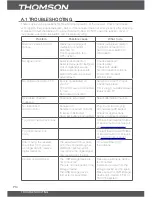
Page 17: ...onnection Switch to correct TV input Check mains lead Firmly plug in cables between receiver and TV Scrambled channel message Channel is scrambled Select alternative channel No response to remote control Receiver off Handset not aimed correctly IR sensor obstructed Hand set batteries exhausted Plug in and turn on plug Aim handset at IR sensor Check for obstructions Replace handset batteries Forgot...

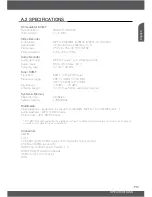
Page 18: ... VHF 174 MHz to 230 MHz UHF 470 MHz to 860 MHz Signal level 78 dBm 25 dBm Antenna supply 5 V DC max 50mA overload protected System Memory Flash memory 4 MBytes System memory 128 MBytes Multimedia Video playback supported in various formats MPG MPEG TS VOB MP4 AVI Audio playback MP3 WMA formats Picture view JPG BMP formats THOMSON cannot guarantee the playback of video files although extensions are...

Page 19: ...ght 1 2 kg This product complies with the basic requirements and other relevant regulations of directives CE 2004 108 EEC and 73 23EEC RoHS 2002 95EEC THOMSON is a trademark of TECHNICOLOR S A used under license to STRONG Europe Subject to alterations In consequence of continuous research and development technical specifications design and appearance of products may change All product names are tr...

Reviews: