background image

There are four options in the main setup menu: General Setup, Display Setup, Speaker Setup and
Language Setup.

Press the SETUP button to bring up the main menu. Select one of the menu icons across the top of
the screen using the left/right arrow buttons. The menu’s options are displayed on the left side of
the screen. Press the right arrow button to move to the option’s choices on the right. 

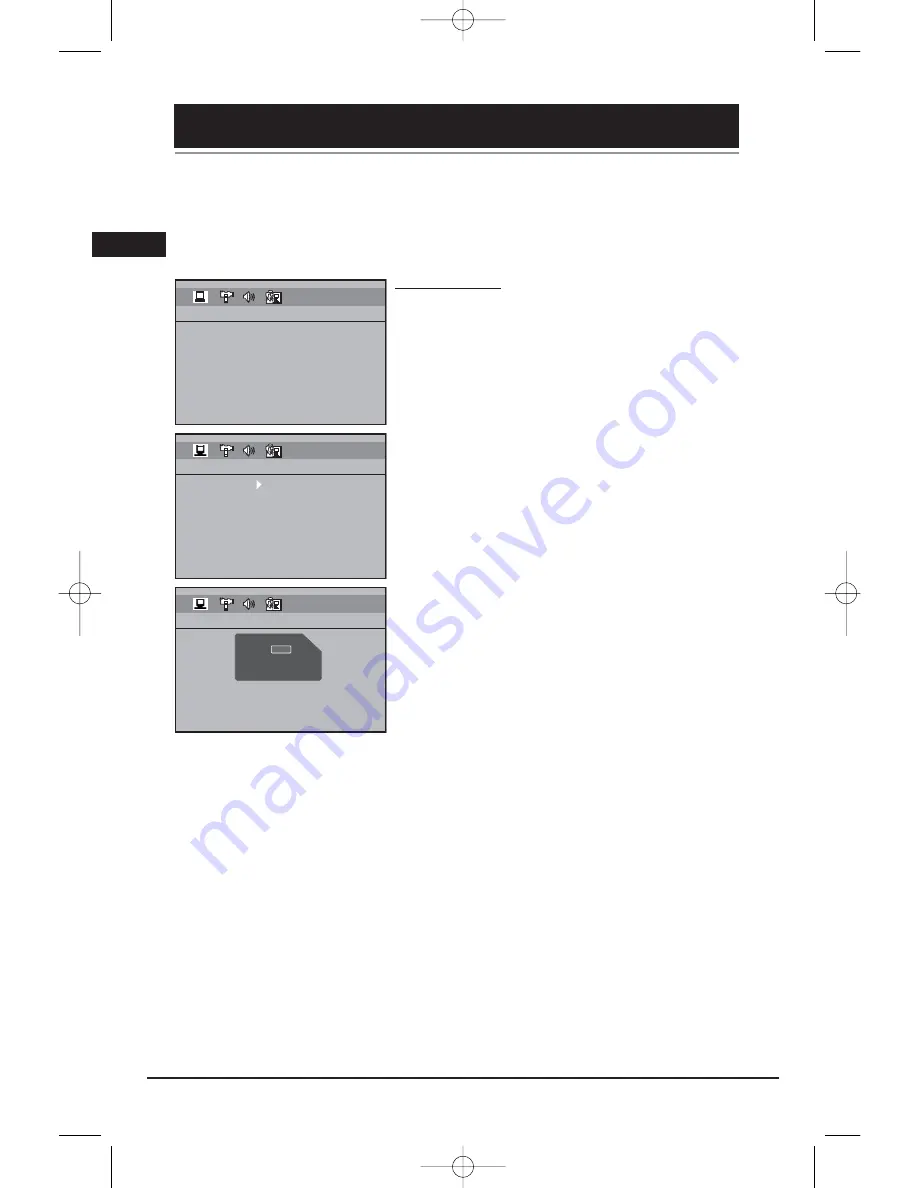
General Setup

You can control access to the player and the type of discs
your family can watch with the lock function. Locking the
player prevents playback of DVDs that may not be suitable
for all audiences by using the rating level encoded on the
disc (not all discs are rated). If the rating level of the disc is
higher than the preset level, playback is prohibited unless a
password is entered.

Password

Locking the Player

1. To activate locking according to your preset rating limits,
highlight the PASSWORD option using the up/down arrow
buttons and select LOCK.
2. You are asked for a new password. Enter four digits using
the number buttons and press OK.
3. You are asked for confirmation; enter the four digits
again and press OK.

Note: Choose a password that is easy to remember, or write it down.

Unlocking the Player

1. To unlock the player or set a new password, highlight the
PASSWORD option using the up/down arrow buttons and
select UNLOCK.
2. Enter your password and press OK.

Changing the Password

When you unlock the player, you must assign a new
password the next time you lock the player.
To change the current password, unlock the player as
described above, and then relock it.

Illustrations contained in this document are for representation only.

The Setup Menu

20

EXIT SETUP

GENERAL SETUP

PASSWORD 
RATING
SLIDE TIME
DEFAULT

EXIT SETUP

GENERAL SETUP

PASSWORD 
RATING
SLIDE TIME
DEFAULT

LOCK

UNLOCK

EXIT SETUP

GENERAL SETUP

PASSWORD 
RATING
SLIDE TIME
DEFAULT

LOCK

UNLOCK

–  –  –  –

–  –  –  –

    ENTER PASSWORD 
CURRENT:
NEW:
CONFIRM:
PRESS OK TO RETURN

–  –  –  –

EN

RTD206/207 EN  26/4/06  3:22 PM  Page 22

Summary of Contents for RCA RTD206

Page 1: ...Home Theater User s Guide RTD206 207 RTD206 207 cover US 26 4 06 3 56 PM Page 3 ...

Page 2: ...to the outlet completely turn the plug over and try to insert it the other way If it still won t fit contact a qualified electrician to change the outlet or use a different one Do not attempt to bypass this safety feature CAUTION TO PREVENT ELECTRIC SHOCK MATCH WIDE BLADE OF PLUG TO WIDE SLOT FULLY INSERT CAUTION To reduce the risk of fire use only No 26 AWG or larger telecommunication line cord A...

Page 3: ...hanging chapter track 12 Zoom 12 The Info Menu Using the Info menu 13 Title chapter DVD track audio CD and VCD 14 Time display 14 Audio DVD VCD 14 Subtitles DVD 14 Camera angle DVD 14 Play mode all discs exceot mp3 WMA JPEG 15 Creating a Program list for Play mode Audio CDs DVD and VCD discs 15 Creating a Program list for Play mode mp3 CDs 15 Bookmark DVD and audio CD 16 Sleep 16 PBC 16 IntroScan ...

Page 4: ... mains plug or an appliance coupler is used as a disconnect device the disconnect device shall remain readily operable Other important use and cleaning information at the end of the booklet Accessories provided Caution Invisible laser radiation when open Avoid exposure to beam Class 1 laser product This system must be opened only by qualified technicians to prevent accidents caused by the laser be...

Page 5: ...d sound light indicator The LED lights when Surround mode is active ON STANDBY Switch the unit on and off USB Socket Connects USB devices Connecting the Antennas The AM and FM antennas connect to the AM and FM terminals on the system s back panel They must be hooked up in order to receive clear reception AM Loop Antenna and FM Indoor Antenna 1 Uncoil the AM Antenna wire 2 Press down on the Antenna...

Page 6: ...ot included The Y Pb Pr jacks provide optimum picture quality by separating the video signal into three parts To ensure maximum picture quality use three video grade cables for the connection You can also buy bundled component video cables that are color coded to match the Y Pb Pr inputs green blue and red Note If your television is a high definition television use the DVD player s progressive sca...

Page 7: ... make sure the polarities speaker wire to on the receiver of speaker wires and terminals match If the cords are reversed the sound will be distorted Do not ground the output line it will damage the speaker Positioning speakers Left Right Front Speakers Front speakers carry primarily music and sound effects Center In surround mode the center speaker carries most of the dialog as well as music and e...

Page 8: ...permits install surround speakers 2 3 feet above viewers This helps to minimize localization effects Aiming Aim surround speakers straight across the room not down at viewers to help create a more open spacious surround sound field Alternative Surround Placement Rear wall If rear wall mounting is the only choice aim the speakers at each other A towards the front B or towards the sidewalls C D Expe...

Page 9: ...for balancing the channels As the signal travels from channel to channel adjust the level controls until each channel plays at the same loudness level see page 22 Level adjustment and surround channel level expectation Even though you adjust the surround channel to be as loud as the others on the test signal on actual program material the surround channel is usually much lower than the front Don t...

Page 10: ...s playing a disc FWD Starts forward accelerated play or forward slow motion When playback is paused press to advance one frame at a time REC Function not available on this model STOP Stops playback PAUSE Freeze frame frame advance or slow motion AUDIO Accesses the audio function of the Info menu ANGLE Accesses the camera angle function ZOOM Accesses the Zoom function SUBTITLE Selects the subtitle ...

Page 11: ...e remote to move through on screen menus in the direction of the arrow button to move right press the right arrow button etc The arrow buttons are used to highlight an option Once highlighted press the OK button to select the option that is highlighted Inserting batteries in the remote control Do not mix different types of batteries or new and old batteries Do not use rechargeable batteries In ord...

Page 12: ...sc tray for the player to work You can load any kind of compatible disc in any combination DVDs CDs VCDs The player will read the data on the disc and play it accordingly 1 To open the disc tray press OPEN CLOSE the disc tray opens 2 Insert a compatible disc into the top disc slot making sure it is fully in place 3 To fill the remaining slots slide a disc into the next empty slot and make sure it ...

Page 13: ...Press again to close the disc tray Play starts automatically or the disc menu appears If the disc menu appears select the Play option to begin playback 4 To skip to the next disc press DISC SKIP on the front panel To directly access a disc by number press the corresponding number on the remote for example to go to disc 3 press 3 on the remote 5 Press STOP to stop playback Note When you press STOP ...

Page 14: ...laying press the PAUSE button once PAUSE is displayed 2 Press the REVERSE or FORWARD button to vary the speed and direction of the slow motion 3 Press PLAY to resume normal playback Note Backward slow motion is not available on VCDs Changing chapter track While the disc is playing press the CH button to go immediately to the next or previous chapter or to the next or previous track Zoom 1 While a ...

Page 15: ...ime for play mode bookmark and sleep timer 4 Use the right left arrow buttons on the remote to select an icon 5 Use the up down buttons to scroll through the options Notes Many discs only have one title INVALID KEY will be displayed if you select a function that is not available DVD Info Display VCD Info Display The Info Menu 13 TT CH 5 1CH OFF title chapter time display subtitles camera angle e a...

Page 16: ...o format with the up down arrow buttons Notes This option is only available if the disc offers dialog languages or audio formats When you change the dialog language using the Info menu it only changes the dialog language of the disc being played When you eject the disc or switch off the player the language will revert to the one you selected in the Language Setup menu see page 24 Subtitles DVD Sub...

Page 17: ... the number buttons on the remote to enter a track number Note As for DVD discs T stands for Title while C stands for Chapter As for VCD discs and Audio CDs T stands for Track 4 Use the arrow buttons to move to the next spot in th list Enter the next track number 5 Continue entering tracks until you have completed your list 6 Highlight the Play option at the bottom of the screen and press OK or pr...

Page 18: ...rrow buttons 2 Select one of the available options using the OK button or pressing the SLEEP button on the remote Off 30 60 90 or 120 minutes PBC Playback Control VCD When playing a VCD PBC gives you access to scenes and information that can be selected through a menu PBC also lets you display high resolution pictures if the disc contains any 1 Press the INFO button then select the PBC icon with t...

Page 19: ...lders contained in the same folder The player then plays the contents of the folders at the same level as the folder containing the file selected at the start JPEG file the player starts the slide show with the JPEG file you have selected then displays all the JPEG files in the same folder then all the JPEG files in the subfolders located in the same folder You can set the amount of time a picture...

Page 20: ...o stations The player can store up to 30 radio stations in its memory You can enter every single radio station yourself or the player can store all available radio stations automatically in ascending order Automatic preset programming 1 Press TUNER to enter the Tuner mode 2 Press and hold TUNER down for 3 seconds to start automatic preset programming Note A weak signal can affect the Automatic pre...

Page 21: ...ice Playback Features 1 Press USB to select USB mode 2 Press PLAY to start playback or press PAUSE to pause playback 3 Press STOP to end playback 4 Press CH arrow buttons to skip to the previous or next file 5 You may also follow the playback instruction steps 3 7 on playing mp3 WMA files and JPEG files on P 17 Note The player does not support DVD audio Video on USB device Illustrations contained ...

Page 22: ...hlight the PASSWORD option using the up down arrow buttons and select LOCK 2 You are asked for a new password Enter four digits using the number buttons and press OK 3 You are asked for confirmation enter the four digits again and press OK Note Choose a password that is easy to remember or write it down Unlocking the Player 1 To unlock the player or set a new password highlight the PASSWORD option...

Page 23: ...distortion 4x3 LB gives best reproduction of pictures recorded in this format i e with horizontal bands at the top and bottom of the screen or in 16x9 16x9 widescreen reproduces 16x9 format films in full on a 16x9 screen Dark level This option lets you adjust the video brightness level on a scale of 0 to 12 with 12 being the brightest Illustrations contained in this document are for representation...

Page 24: ...that are closer to the listening position than the front speakers 1 Highlight a distance option using the up down arrow buttons Front FL FR DISTANCE Center CT DISTANCE Rear SL SR DISTANCE 2 Press the right arrow button to move to the default distance 3 Press the up down arrow buttons to adjust the distance Note The receiver speaker distance default settings are the following Front speakers FL FR 1...

Page 25: ...playback display the audio icon by pressing the AUDIO button Note If the selected language is not available on a disc the disc s language will be used instead Subtitles Select the subtitle language using up down arrow buttons and press OK To change the language of the subtitles during playback press the INFO three times for DVD and use the left right arrow buttons to highlight the Subtitle icon Pr...

Page 26: ...22 The picture is of poor quality with snow or lines Check the connections see pages 4 There is no sound or the sound is of poor quality Check the connections see pages 5 Make sure the speakers are connected Make sure the MUTE function is not on No surround sound Check the speaker configuration in the Speaker Setup menu see page 22 I can t find my file in the WMA mp3 JPG listing Make sure the file...

Page 27: ...iles for sale or any other business purpose constitutes or could constitute a violation of copyright law Cleaning Use a soft dry clean cloth Regularly dust the vents at the back or sides Using solvents abrasive or alcohol based products risks damaging the unit If an object or liquid enters inside the unit unplug it immediately and have it checked by an authorized engineer Handling and caring for d...

Page 28: ...ons on the computer to ensure reliable CD R disc recording mp3 files CD R and CD RW discs containing audio files in mp3 format For CD R mp3 discs please follow all the recommendations for CD R along with the comments below Your mp3 files should be ISO 9660 or JOLIET format ISO 9660 format and Joliet mp3 files are compatible with Microsoft s DOS and Windows as well as with Apple Mac mp3 filenames s...

Page 29: ...re processed in the Dolby Digital format Dolby Digital provides better sound quality and a more powerful presence than conventional Dolby Surround This unit is equipped with Dolby Digital 5 1 channel so that you can enjoy enhanced full digital surround sound Different from Dolby Pro Logic in that only four channels Front Left Front Right Centre and Rear are used the new system provides stereo sepa...

Page 30: ... is not received within 14 days the suggested retail value of the unit will be charged to your credit card This amount will be credited less a handling fee if the unit is subsequently received 4 Ship your defective unit back to us less accessories using the replacement unit s carton Shipping instructions will be included in the carton along with your SR number which will allow you to easily ship t...

Page 31: ...or warranty coverage Limitation of Warranty THE WARRANTY STATED ABOVE IS THE ONLY WARRANTY APPLICABLE TO THIS PRODUCT ALL OTHER WARRANTIES EXPRESS OR IMPLIED INCLUDING ALL IMPLIED WARRANTIES OF MERCHANTABILITY OR FITNESS FOR A PARTICULAR PURPOSE ARE HEREBY DISCLAIMED NO VERBAL OR WRITTEN INFORMATION GIVEN BY THOMSON ITS AGENTS OR EMPLOYEES SHALL CREATE A GUARANTY OR IN ANY WAY INCREASE THE SCOPE O...

Page 32: ...ton This will only add delays in service for your product Thomson Inc 10330 North Meridian Street Indianapolis IN 46290a 2006 Thomson Inc Trademark s Registered Marca s Registrada s Printed in China TOCOM 5625494A EN Visit the RCA website at www rca com RTD206 207 cover US 26 4 06 3 56 PM Page 2 ...

Reviews: