


Playing discs
12
EN
Info menu
You can display information about the disc during playback using the
Info
menu. It will also allow
you to access certain functions.To display the menu, press
PLAY
to start playback and then press
the
INFO
button on the remote control. Select the various options using the
and
buttons.
Then follow the instructions which appear on the screen and use the
or
buttons on the
remote control to scroll through the options.
Note: When one of the icons is greyed out, this means that the relevant function is not available on the disc
being played.
The invalid symbol indicates that the function selected or the button used is not available
at this stage.
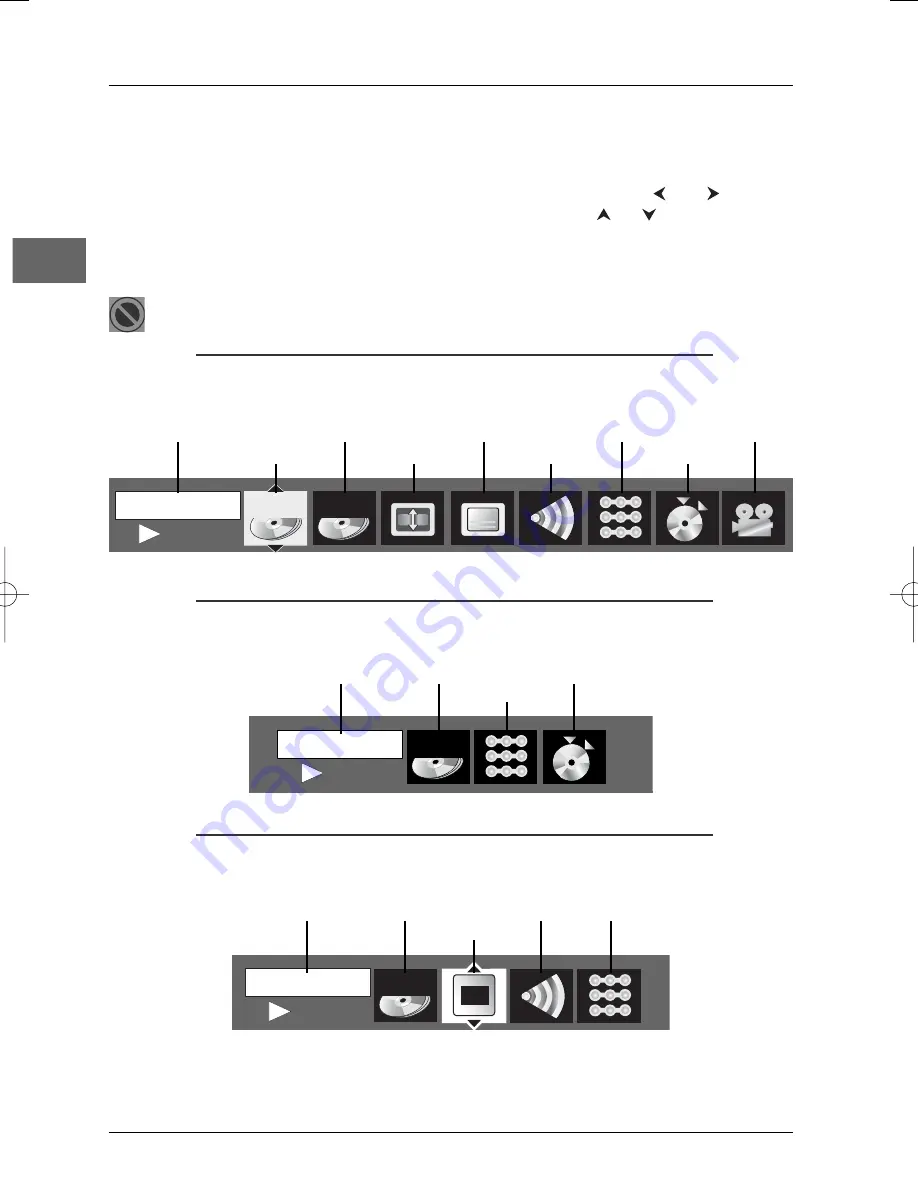
Info menu (DVD)
Time display
Chapter
Subtitles
Play mode
Camera angle
Title
Screen Fit
Audio
Bookmark
Info menu (audio CD)
Time display
Track
Play
Bookmark
mode
Info menu (VCD and SVCD)
Time display
Track
PlayBack
Audio
Play mode
Control
PLAY
T : 01
0 0 : 0 1 : 1 0
PLAY
T : 01
0 0 : 0 2 : 1 6
PBC
PLAY
0 0 : 0 2 : 1 6
C : 03
1 o f 1
T : 01
DTH226_EN 7/07/03 9:18 Page 12


