THOMSON 20LW052 Owner'S Manual Download Page 7


TELETEXT


The Teletext service is available in many countries under a variety of names (TOP Text, 
Fastext, FLOF text,Videotext). It is provided as a free service by television 
broadcasters.This service provides a real wealth of information, available at any time, on 
weather, sports results, news, games, etc.The information is presented in pages or 
organised in topics specified in colour on the screen and you can access this information by 
simply pressing the buttons of the relevant colour on the remote control.


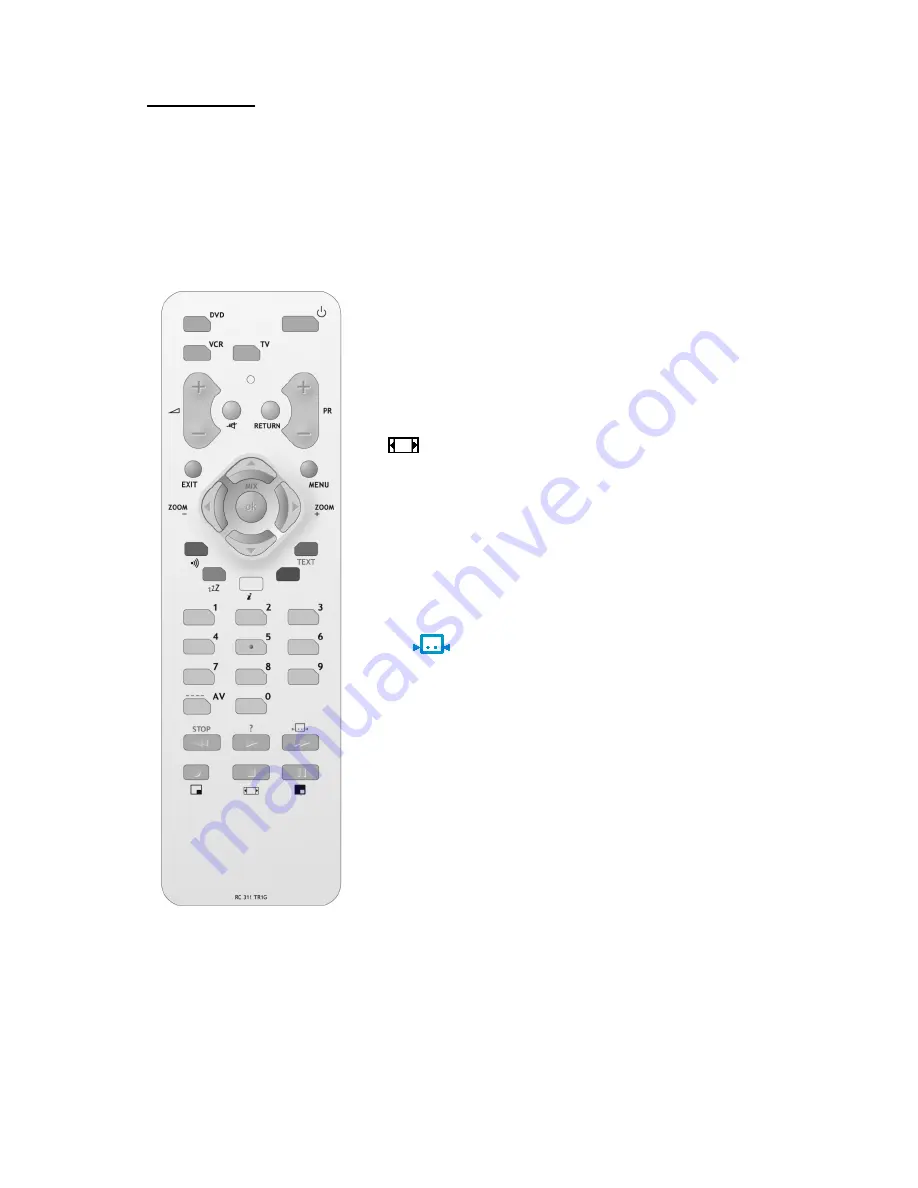
Press this key to select subtitle page. 

If the displayed page is not the subtitle one, search its 
number in the index page and select it.


TEXT 

Press this key, Teletext will display the last page selected, 
or if you have changed channel, the index page (usually 
100). 

Press 

EXIT

 to leave Teletext.


OK


Press this key to 

superimpose the teletext

 over the TV 

picture. A 2

nd

 key press displays the teletext in the left part 

of the screen. Press again to return to Teletext mode.


RED / GREEN / YELLOW / BLUE 

If Fastext is available, use 

coloured keys

 to access 

directly to the relevant colour topics. 

STOP


Press this key to stop the page scrolling. Press it again 

to restart the page scrolling

.


 (?)


Press this key to


reveal a hidden answer (for example, in 

games). Press it again to hide the answer.


PAGE SELECTION


Page can be selected in two ways. 
a. Press 

 or 

 to increase or decrease the page number by one..  

b. By entering the page number, using digit buttons 0~9.


SUBPAGE ACCESS 

Some information is spread across more than one page. To access sub-pages, press 

---- / 

AV

 key


then enter the sub-page number


using digit buttons 0~9.


Press this key, once to zoom in on the top part of the 
screen, a second time to zoom in on


the bottom part of 

the screen and a third time to return


to normal


display.


Summary of Contents for 20LW052

Page 1: ...ions 16 AV sockets 17 Headphone socket 18 HDMI socket 18 PC IN socket 19 BEFORE CALLING SERVICE 20 Thank you very much for choosing the LCD TV We recommend that you take a few minutes to read carefull...

Page 2: ...he set you must remove the plug from the mains supply socket During thunderstorms we recommend that you disconnect the TV set from the mains and aerial so that it is not affected by electrical or elec...

Page 3: ...ns that your inoperative electronic appliance must be collected separately and not mixed with the household waste The European Union has a implemented a specific collection and recycling system for wh...

Page 4: ...socket ANT at the back of the TV The aerial socket 75 Ohms VHF UHF cable can be used for connecting an external aerial or other equipment fitted with a modulator video recorder satellite receiver etc...

Page 5: ...the power cord to the wall outlet Your TV set should only be connected to a 220 240 V 50 60 Hz AC supply It must not be connected to a DC supply If the plug is damaged do not under any circumstances c...

Page 6: ...PIP is working Press this key to adjust PIP size when PIP is working Press this key to mute the sound Press this key again to restore it AV Press this key to return last AV or press repeatedly to sele...

Page 7: ...to leave Teletext OK Press this key to superimpose the teletext over the TV picture A 2nd key press displays the teletext in the left part of the screen Press again to return to Teletext mode RED GRE...

Page 8: ...t choose between Personal Vivid Standard or Mild Personal gives access to following adjustments Contrast Brightness Colour and Sharpness adjust these settings as required using the buttons Tint This o...

Page 9: ...s SRS WOW Using activate On or deactivate Off SRS function SRS is an audio technology which improve the sound quality Reset Return to default settings Press OK button to return to default settings Pre...

Page 10: ...e screen Source to select video source of the PIP PAP use the buttons to select video source of the picture in the PIP PAP frame TV or AV You can insert a TV picture while you are viewing an AV progra...

Page 11: ...n Country Select the relevant country using the buttons This is the country you are in or the country whose channels you want to receive if you live near its borders If you do not find your country se...

Page 12: ...on Using the buttons select Save Insert or Delete and press the OK button to confirm Swap prog Allows to swap 2 programme numbers Using the buttons select the Prog number option Using the buttons sele...

Page 13: ...buttons If you have modified Norm Skip Fine tuning options or if you have launch a Manual Search select Store Prog option using buttons and proceed as indicated above to save your modification Press...

Page 14: ...r setting the sleep timer setting will be erased Set it again Blue Screen To have a blue screen when there is no video input or when the RF signal is very bad Using the buttons select On Select Off if...

Page 15: ...H position use the buttons to move the picture horizontally on the screen V position use the buttons to move the picture vertically on the screen Focus Adjust as required to improve the picture quali...

Page 16: ...a sub menu or perform an adjustment in a menu Source button To select desire input source press the SOURCE button to display the selection menu Use the buttons to select each input sources Press the b...

Page 17: ...t AV2 S AV input To connect an S Video VCR or an S Video camcorder AV1 SCART socket To connect a VCR a camcorder a DVD player a satellite receiver a decoder or a games console AV1 SCART socket is an i...

Page 18: ...ket allows the connection to all appliances fitted with an HDMI socket The standard HDMI allows a digital transmisson of video and audio data using only one connector It gives you the possibility to o...

Page 19: ...ck of the TV set to the output of PC equipment through a mini D sub 15 pin cable 2 Connect the stereo PC IN audio jack located at the back of the TV set near the D sub socket to the audio output socke...

Page 20: ...st and brightness settings Check there is not a wrong connection or a wrong input mode selection Good picture but no sound Increase the VOLUME Check that the TV is not muted press the button on the re...

Page 21: ...guarantee 3 Damage to the product resulting from neglect misuse including but not limited to failure to use repair and or install the product for its normal domestic purposes and or in accordance with...

Reviews: