background image

4.

Playback control
Pre-count
One bar will be pre-counted before playback begins. The bar display starts with

a negative value. The practising song starts with bar 1.
Fast-forward, rewind, pause
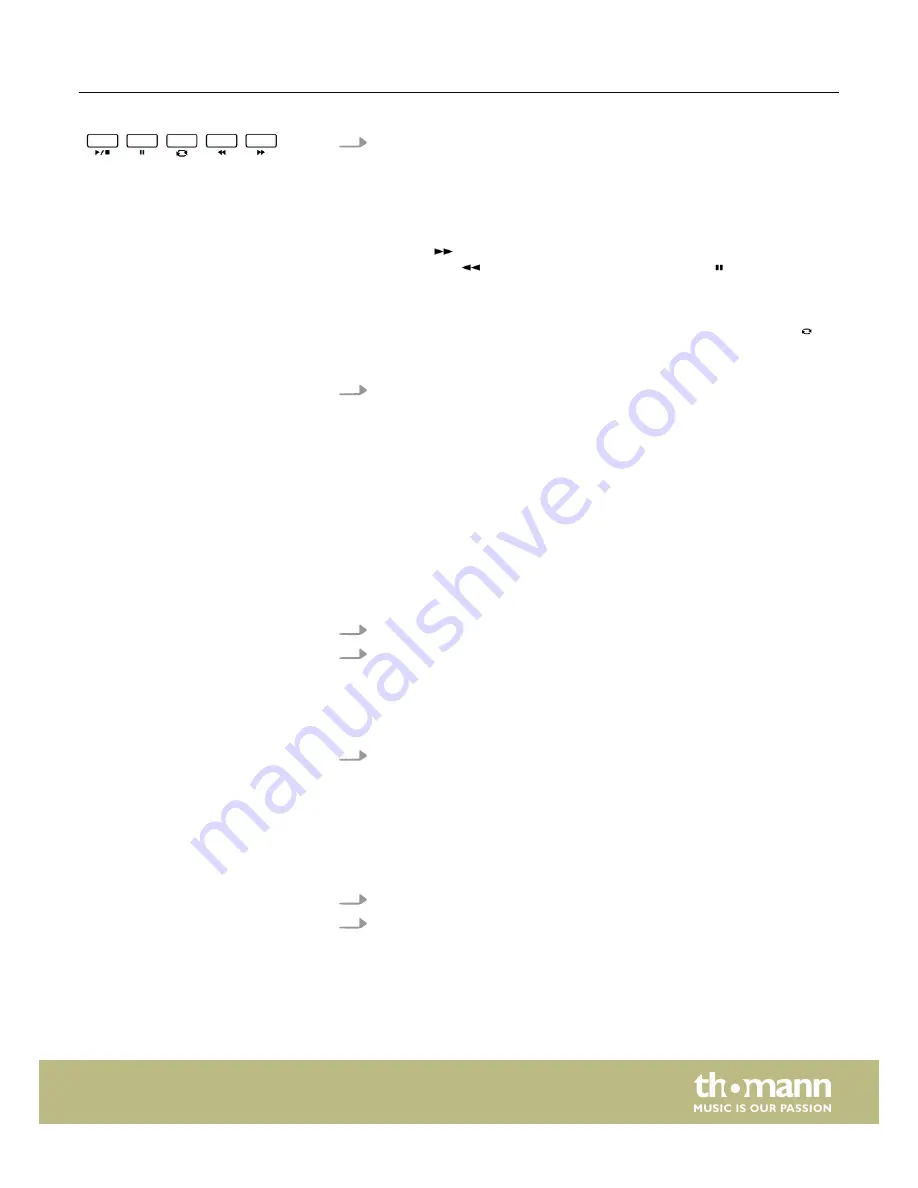
Keep the 

 button pressed during playback to fast-forward the practising

song. Use the 

 button to rewind bar by bar. Press the   button to pause

playback.
Repeat function
While the practising song is playing you can set two loop marks with the 

button. Press the button at the desired start point of the loop and again at the

end point.

5.

To exit practising song playback press any direct select or function button.

When practising, it is especially important to play the right notes at the right time . In

this mode you can check your progress. Press the 

[LESSON]

 button in SONG mode to

activate the Lesson mode. There are three training stages. Use the buttons 

[R]

 and 

[L]

to specify which hand you want to practise. If you don't select a hand, the right hand

will automatically be selected.

Press the 

[LESSON]

 button to enter the Lesson mode. 

‘LESSON 1’

 appears on the dis‐

play. In this mode, it is only rated whether you play the notes at the right time, but

not whether you hit the right notes.
1.

Press the 

[START/STOP]

 button, to start practising.

2.

If you have selected 

‘R’

 the right hand voice is muted and you have to play the

right hand yourself. As long as you are in time, you will hear the right hand

voice. If you have selected 

‘L’

 the left hand voice is muted and you have to play

the left hand yourself. As long as you are in time, you will hear the left hand

voice. Are both 

‘L’

 and 

‘R’

 selected the voices for both hands are muted. You

then have to play in time with both hands.

3.

After completing the exercise, you will learn the result.

Press the 

[LESSON]

 button again to enter the Lesson mode 2. 

‘LESSON 2’

 appears on

the display. In this mode, it is only rated whether you hit the right notes, but not

whether you play them at the right time. The practising song continues only when

you play the right note.
1.

Press the 

[START/STOP]

 button, to start practising.

2.

After completing the exercise, you will learn the result.

Lesson mode

Lesson 1 - playing in time

Lesson 2 - hitting the right notes

Operating


SP 5600

43

Summary of Contents for SP 5600

Page 1: ...SP 5600 portable grand keyboard user manual...

Page 2: ...Musikhaus Thomann Thomann GmbH Hans Thomann Stra e 1 96138 Burgebrach Germany Telephone 49 0 9546 9223 0 E mail info thomann de Internet www thomann de 30 05 2016 ID 378054...

Page 3: ...ng up the keyboard Function menu 20 7 7 1 Fine tuning 21 7 7 2 Time signature 21 7 7 3 Split point 21 7 7 4 Pedal function 22 7 7 5 Selection Harmony setting 23 7 7 6 Equalizer 24 7 7 7 Reverb effect...

Page 4: ...on 44 8 22 1 Recording preparation 44 8 22 2 Recording 45 8 22 3 Stopping recording 45 8 22 4 Play back a recording 45 8 23 MIDI functions 45 8 24 USB connection to a computer 46 8 25 USB storage medi...

Page 5: ...nual is also available as PDF file for you to download Keyword search Use the search function in the electronic version to find the topics of interest for you quickly Online guides Our online guides p...

Page 6: ...ll find an overview of the meaning of symbols and signal words that are used in this manual Signal word Meaning DANGER This combination of symbol and signal word indicates an immediate dangerous situa...

Page 7: ...young children Choking hazard Ensure that children do not detach any small parts e g knobs or the like from the unit They could swallow the pieces and choke Never let children unattended use electrica...

Page 8: ...rating of the device and that the AC outlet is pro tected by a residual current circuit breaker Failure to do so could result in damage to the device and possibly the user Unplug the external power s...

Page 9: ...programmed songs 5 user songs n 5 demo songs n Reverb Chorus and Sustain effects n Master EQ n Sequencer n Accompaniment and recording function n Learning function and chord library n Split and duo m...

Page 10: ...ation The unit is powered by the included 12 V power supply Make sure that the device is turned off before you connect it to the power supply or disconnect it Turn the volume control counter clockwise...

Page 11: ...t in speakers 2 Music stand holder 3 Control panel with function keys and display 4 Claviature with 88 keys 5 2 connection sockets for headphones 6 Pitch bend wheel for changing the pitch Overview Con...

Page 12: ...open the Function menu n HARMONY Enabling disabling the Harmony mode n TRANSPOSE Transposing the piano keys in semitone steps 10 START STOP To start stop the playback of demo songs or styles 11 SYNC...

Page 13: ...he SHIFT button Setting the accompaniment track volume 17 PERFORM Enabling disabling the Performance assistant 18 METRONOME Enabling disabling the Metronome 19 SHIFT Enabling the second function of du...

Page 14: ...on Enabling disabling the Recording mode 30 STORE ACCOMP Single button function Saving current values as user setting Button function while pressing the SHIFT button Record enabling accompaniment trac...

Page 15: ...ocket 1 4 phone jack 39 AUX OUT Output socket for connecting the device to an amplifier stereo system mixer or recording device 1 4 phone jack 40 AUX IN Input socket for connecting an external audio d...

Page 16: ...rn the volume down to Min imum before you connect other devices to the digital piano Use the AUX IN socket to connect a for example CD or MP3 player to the device So you can playback music through the...

Page 17: ...e device Use the connection socket MIC to connect a microphone to the device You can connect a triple pedal Sustain Sostenuto and Soft to the device via the connection socket on the bottom of the unit...

Page 18: ...evice on again after an automatic shutdown press the on off switch to the left of the panel 7 3 Adjusting the volume Adjust the rotary control VOLUME for a pleasant volume for playback and practising...

Page 19: ...tion is turned on all tones played on the keyboard linger 1 Press SHIFT and SUSTAIN simultaneously to add the effect 2 Press SHIFT and SUSTAIN again simultaneously to turn the effect off again 7 6 Dig...

Page 20: ...4 Close 1 4 Close 2 4 Open 1 5 Octave1 Octave2 Strum Echo1 Echo2 Echo3 Echo4 Tremolo1 Tremolo2 Tremolo3 Tremolo4 Trill1 Trill2 Trill3 Trill4 Duet Equalizer EQ TYPE Pop Rock Class Jazz Dance Reset Rese...

Page 21: ...just the time signature with the buttons YES and NO or with the jog dial 3 Press YES and NO simultaneously to restore the time signature standard value 004 7 7 3 Split point Using this function you ca...

Page 22: ...ired pedal function Sustain pedal Display Soft pedal Display Sustain pedal SPd Sust Soft pedal UPd Soft Soft pedal SPd Soft Enabling disabling the accompaniment track UPd St T Enabling disabling the a...

Page 23: ...r the jog dial to assign the desired function n Duet n Standard Trio n Full Chord n Rock Duet n Country Duet n Country Trio n Block n 4 Close 1 n 4 Close 2 n 4 Open 1 5 n Octave1 n Octave2 n Strum n E...

Page 24: ...PE menu The current setting appears on the display 2 Use the buttons YES or NO or the jog dial to assign the desired function n Room1 n Room2 n Room3 n Hall1 n Hall2 n Hall3 n Chr1 n Chr2 n Del n PanD...

Page 25: ...FUNCTION or FUNCTION to change into the ChrLev menu The cur rent setting appears on the display 2 Adjust the effects ratio with the buttons YES and NO or with the jog dial 3 Press YES and NO simultane...

Page 26: ...jog dial to assign one of the following options n 030 automatic shutdown after 30 minutes n 060 automatic shutdown after 60 minutes n OFF automatic shutdown off 3 Press YES and NO simultaneously to r...

Page 27: ...acks 1 Press SHIFT and RECORD simultaneously to enable the recording mode 2 Use NO and YES or the jog dial to select the track you want to delete accom paniment track ACCOMP or melody tracks MELODY 1...

Page 28: ...The demo sequences stored in the device show the sound and the pitch range of the instrument 1 Press DEMO to start playing the demo sequences in a continuous loop 2 Use NO and YES to toggle between th...

Page 29: ...RONOME to turn the Metronome on or off 2 Set the desired tempo with the two function buttons TEMPO 3 Set the desired time signature via the functions menu see Chapter 7 7 2 Time signature on page 21 T...

Page 30: ...8 9 Selecting voices The instrument features a selection of 600 authentic voices see Chapter 9 3 Voice list on page 54 1 Press VOICE or one of the direct selection buttons to activate the last set or...

Page 31: ...ode When the keyboard is split the Dual mode affects only the keys to the right of the keyboard split point 8 11 Split mode With this function you can split the claviature into two areas and assign di...

Page 32: ...taneously The display shows Octave 5 Use the buttons NO and YES or the jog dial to move the octave area by one octave up or down 01 01 Press NO and YES simultaneously to restore the default setting 00...

Page 33: ...3 n Trill4 3 Press SHIFT and HARMONY again to disable the Harmony mode The Harmony settings Duet Standard Trio Full Chord Rock Duet Country Duet Octave Echo Tremolo and Trill can be activated at any t...

Page 34: ...based on the root note of the chord some chords that could be played according to the chord dictionary can not be detected by A B C such as B6 Bb6 Bb6 9 B6 9 Baug Bbaug Bbm6 Bm6 Adim7 Bbdim7 Bdim Oper...

Page 35: ...he capabilities of the auto accompaniment Here we show you some examples of single finger chords C Cm C7 and Cm7 When the A B C function is activated press the keys to the left of the split point The...

Page 36: ...The root is the central sound of the chord on which the other chord notes are built upon The interval between adjacent notes and the root determines whether the result is a major or minor third n Chor...

Page 37: ...u have pressed the keys for chord type and root note the display shows the chord name and the individual notes in the notation system For example If you want to play a Cm7 chord press the C6 key root...

Page 38: ...F 6 F Gb C 6 C Db G6 G D6 D Ab6 G Ab Eb6 D Eb6 A6 A E6 E Bb6 A Bb F6 F B6 B Key names Chord type Key names Chord type C4 M C5 7b9 C 4 M 9 C 5 7 9 D4 6 D5 7 9 Eb4 mM7 Eb5 7b13 E4 M7 E5 7 13 F4 m F5 7 1...

Page 39: ...l be repeated until you release the button 4 ENDING If you press the INTRO ENDING button while Auto Accompaniment is acti vated an ending part suitable for the Accompaniment is started finishing the s...

Page 40: ...preset volume of the selected Style Fade in and decrease it again at the end of the piece Fade Out 1 Press SHIFT and FADE simultaneously before starting the Style The volume of the Style is raised wit...

Page 41: ...claviature The table shows the various play areas This area includes the keys A0 to B3 of the claviature The chord type appears in the display The root of the guitar chord sounds This area includes t...

Page 42: ...offers 120 practising songs where you can mute the right hand voice and play this part yourself 1 Playing and stopping practising songs Press the SONG button to enter the playback mode for practising...

Page 43: ...tton to enter the Lesson mode LESSON 1 appears on the dis play In this mode it is only rated whether you play the notes at the right time but not whether you hit the right notes 1 Press the START STOP...

Page 44: ...save up to five recordings as user songs in the internal memory Unsaved recordings are retained in the clip board memory after switching the digital piano off 8 22 1 Recording preparation 1 Press SHIF...

Page 45: ...starts as soon as you play the first tone or chord or press START STOP 8 22 3 Stopping recording With SHIFT and RECORD you can cancel or stop recording at any time When the storage capacity is reached...

Page 46: ...t a suitable USB stick with the keyboard and press the USB DEVICE button to enter the USB menu If the stick could be correctly initialized the display shows Play If an error occurs the display shows D...

Page 47: ...3 Use the jog dial to highlight the desired option and confirm with YES 4 Use the jog dial to highlight the desired directory and confirm with YES 5 Use the keyboard of the device to enter a file nam...

Page 48: ...InMood 013 Never On Sunday NeverSun 041 Jingle Bells JingBell 014 Oh Carol Oh Carol 042 Joy To The World JoyWorld 015 Oh Susanna Susanna 043 La Paloma LaPaloma 016 The Girl From Ipanema Ipanema 044 L...

Page 49: ...Sul Viso Lacrima 101 Cuckoo Cuckoo 072 Unchained Melody Melody 102 Basic Tutorial Beyer Piano 21 Beyer21 073 Love Story LoveStry 103 Basic Tutorial Beyer Piano 29 Beyer29 074 Words Words 104 Butterfl...

Page 50: ...009 8Beat 3 8Beat3 033 Pop Fusion PopFusn 010 Rhythm Beat 2 Rhy Bt2 034 Analog Night 1 AnalgNt1 16BEAT 035 6 8 Pop 6 8Pop 011 16Beat 1 16Beat1 036 Brit Pop 1 BritPop1 012 16Beat Funk 1 16BtFuk1 037 Br...

Page 51: ...ba2 062 New Wave NewWave 093 Jive Jive 063 Ska Ska 094 Fox Trot FoxTrot 064 Pop Rock 2 PopRock2 DANCE 065 Slow Rock SlowRock 095 Techno 1 Techno1 066 70 s Rock Roll 70 sRock 096 Hip Hop 1 HipHop1 067...

Page 52: ...k 124 Big Band 1 BigBand1 154 Beguine 3 Beguine3 125 Dixieland 1 Dixland1 155 Slow Bolero SlBolero 126 Guitar Swing 1 GtSwing1 156 Disco Samba DscSamba 127 Broadway Big Band BwayBand 157 Mambo Mambo 1...

Page 53: ...4 Jazz4 183 Hawaiian Hawaiian 213 Jazz 5 Jazz5 184 Sirtake Sirtake 214 Jazz 6 Jazz6 185 Dangdut Dangdut 215 Jazz 7 Jazz7 186 6 8 Flipper 6 8Flipp 216 Boogie Boogie 187 New Age NewAge 217 Jive Jive 18...

Page 54: ...Piano wide E GrandW 043 Phase Clavi PhaseClv 013 Electric Grand Piano dark E GrandD 044 Wah Clavi WahClv 014 Honky Tonk Piano HnkyTonk 045 Pulse Clavi PulseClv 015 Honky Tonk Piano 2 HnyTonk2 046 Dre...

Page 55: ...r GUITAR ORGAN 108 Acoustic Guitar nylon NylonGtr 078 Italian 60 s Organ 60 sOrgn 109 Acoustic Guitar nylon 2 NylonGt2 079 Drawbar Organ DrawOrgn 110 Acoustic Guitar nylon 3 NylonGt3 080 Drawbar Organ...

Page 56: ...itar Feedback GtrFedbk 167 Violin Violin 138 Distorted Rhythm Guitar DistRyth 168 Violin 2 Violin2 139 Guitar Harmonics GtrHarmo 169 Violin slow attack SlViolin 140 Guitar Harmonics 2 GtHarmo2 170 Vio...

Page 57: ...Aahs 3 ChorAah3 230 Synth Brass 2 SynBras2 200 Voice Oohs VoiceOoh 231 Synth Brass 3 SynBras3 201 Voice Oohs 2 VoicOoh2 232 Synth Brass 4 SynBras4 202 Humming Humming 233 Synth Brass 5 SynBras5 203 A...

Page 58: ...293 Ocarina Ocarina 263 2 English Horns 2EngHons 294 Ocarina 2 Ocarina2 264 Bassoon Bassoon SYNTH LEAD 265 Bassoon 2 Bassoon2 295 Lead 1 square SquareLd 266 Bassoon 3 Bassoon3 296 Lead 1a square 2 Squ...

Page 59: ...4 Pad 4 choir ChoirPad 324 Lead 8 bass lead BassLead 355 Pad 4 choir 2 ChoirPd2 325 Lead 8 bass lead 2 BasLead2 356 Pad 4a itopia ItopiaPd 326 Lead 8 bass lead 3 BasLead3 357 Pad 5 bowed BowedPad 327...

Page 60: ...6 FX 1 rain 2 FXRain2 417 Koto 2 Koto2 387 FX 2 soundtrack Soundtrk 418 Taisho Koto TaishoKt 388 FX 2 soundtrack 2 Sondtrk2 419 Kalimba Kalimba 389 Prelude Prelude 420 Kalimba 2 Kalimba2 390 FX 3 crys...

Page 61: ...ker 448 Pedal Hi hat PedalHH 480 Mute Surdo MuSurdo 449 Open Hi hat OpenHH 481 Open Surdo OpSurdo 450 Crash Cymbal CrashCym 482 Melodic Tom MeloTom 451 Analog Cymbal AnaCym 483 Melodic Tom 2 MeloTom2...

Page 62: ...arStop 542 Music Box Stereo Strings MBox Str 512 Car Pass CarPass 543 Vibraphone Stereo Strings Vib Str 513 Car Crash CarCrash 544 Vibraphone Octave VibraOct 514 Siren Siren 545 Vibraphone Marimba Kal...

Page 63: ...lub Brass ClubBras 590 Clarinet Bassoon Cl Bn 570 Brass Woodwinds Brs Wood 591 Clarinet Oboe Octave Cl ObOct 571 Woodwinds Strings Wood Str CHINESE INSTRUMENTS 572 Section Woods Small WoodSmal 592 Sta...

Page 64: ...eys No No Channels No No Pitch Bend Yes Yes Control Change 0 1 5 6 7 10 11 64 65 66 67 80 81 91 93 120 121 123 Yes No No Yes Yes No No Yes No Yes Yes No No Yes Yes No No No Yes Yes Yes Yes Yes Yes Yes...

Page 65: ...em Common Song Position Pointer No No Song Select No No Tune Request No No System Real Time Clock Yes No Commands No 1 No 1 Aux Messages Local ON OFF No No Active Sensing No Yes System Reset No No POL...

Page 66: ...yles 230 Practising songs 120 Demo songs 5 Connections 2 headphones 1 4 phone socket AUX IN AUX OUT USB MIDI OUT MIDI IN Microphone Speakers 2 10 W Operating supply voltage AC 230 V 50 Hz Dimensions W...

Page 67: ...e core Unbalanced transmission is susceptible to electromagnetic interference especially at low levels such as microphone signals and when using long cables In a professional environment therefore the...

Page 68: ...se follow the notes and markings on the packaging This product is subject to the European Waste Electrical and Electronic Equipment Directive WEEE Do not dispose with your normal household waste Dispo...

Page 69: ...Notes SP 5600 69...

Page 70: ...Notes portable grand keyboard 70...

Page 71: ......

Page 72: ...Musikhaus Thomann Hans Thomann Stra e 1 96138 Burgebrach Germany www thomann de...

Reviews: