5.5 Loops
The percussion pad offers 17 pre-installed loops, as well as the option to record your
own loops using the recording function.
1.
Hit the pad you want to play the loop back after you hit it.
2.
Press or to select the
‘LOOP’
menu.
ð
The display shows the respective submenus.
3.
Press
[SELECT]
repeatedly to switch between submenus.
4.
Use the rotary control or press
[–/+]
to change the respectively displayed value.
5.
Press
[OK]
to confirm the new value.
ð
The display shows
‘Save successfully!’
.
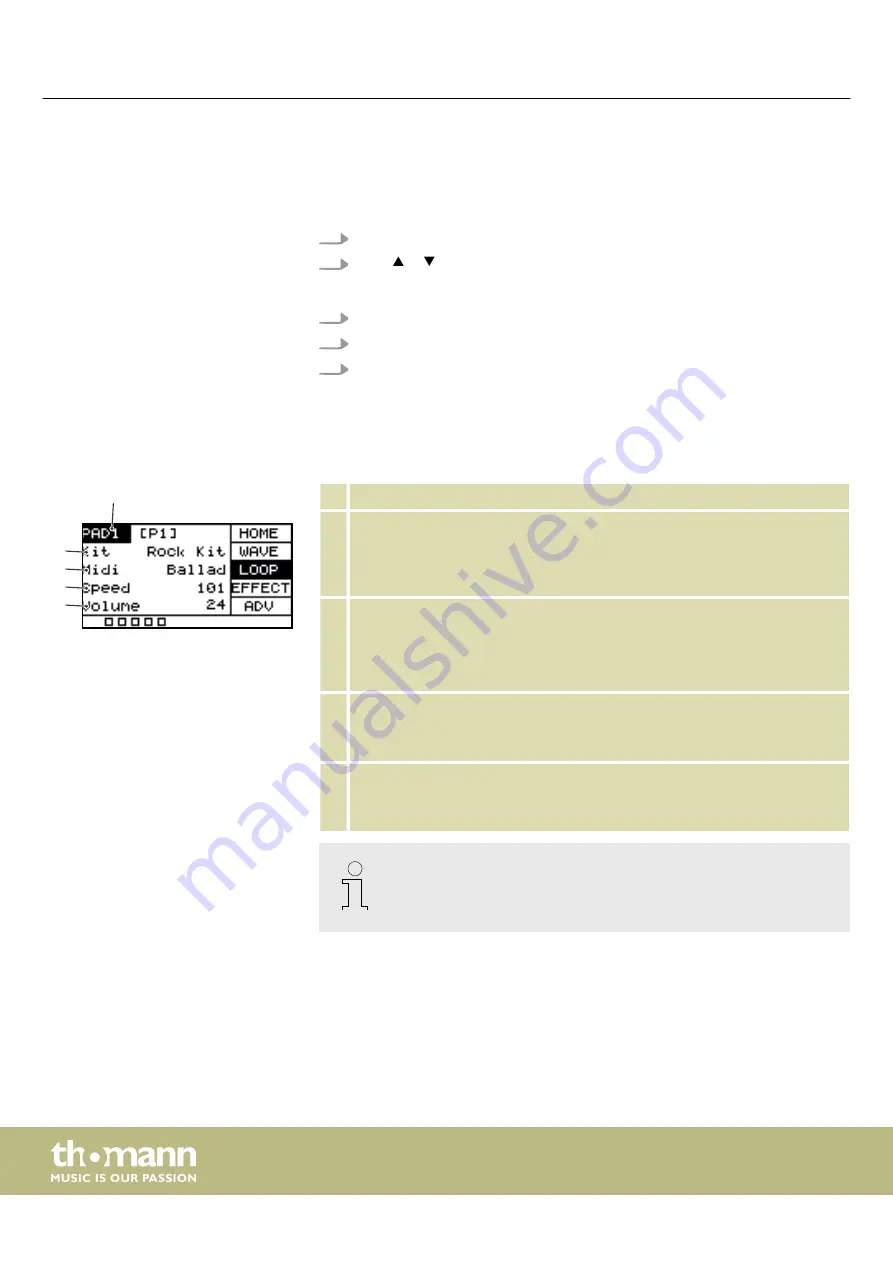
5.5.1 Loop display structure
1
Shows the currently selected pad.
2
Shows the name of the currently selected drum kit to which the currently
selected pad is linked.
Use the rotary control or press
[–/+]
to change the drum kit. Confirm the selec‐
tion with
[OK]
.
3
Shows the name of the currently selected loop.
Press
[SELECT]
and use the rotary control or press
[–/+]
to change the loop.
Press
[OK]
to play the loop continuously. Press
[OK]
again to stop loop play‐
back. Make sure that the
‘Midi’
submenu is still selected.
4
Shows the tempo of the selected loop.
Use the rotary control or press
[–/+]
to change the loop tempo between
20 bpm and 240 bpm. Confirm the selection with
[OK]
.
5
Shows the volume of the selected loop.
Use the rotary control or press
[–/+]
to change the loop volume between
‘0’
and
‘127’
. Confirm the selection with
[OK]
.
Once the loop for the selected pad is played, no sound is produced when the
pad is hit. Stop loop playback to play the selected pad with the original set‐
tings.
ö
#
$
%
&
Operating
sampling percussion pad
14


