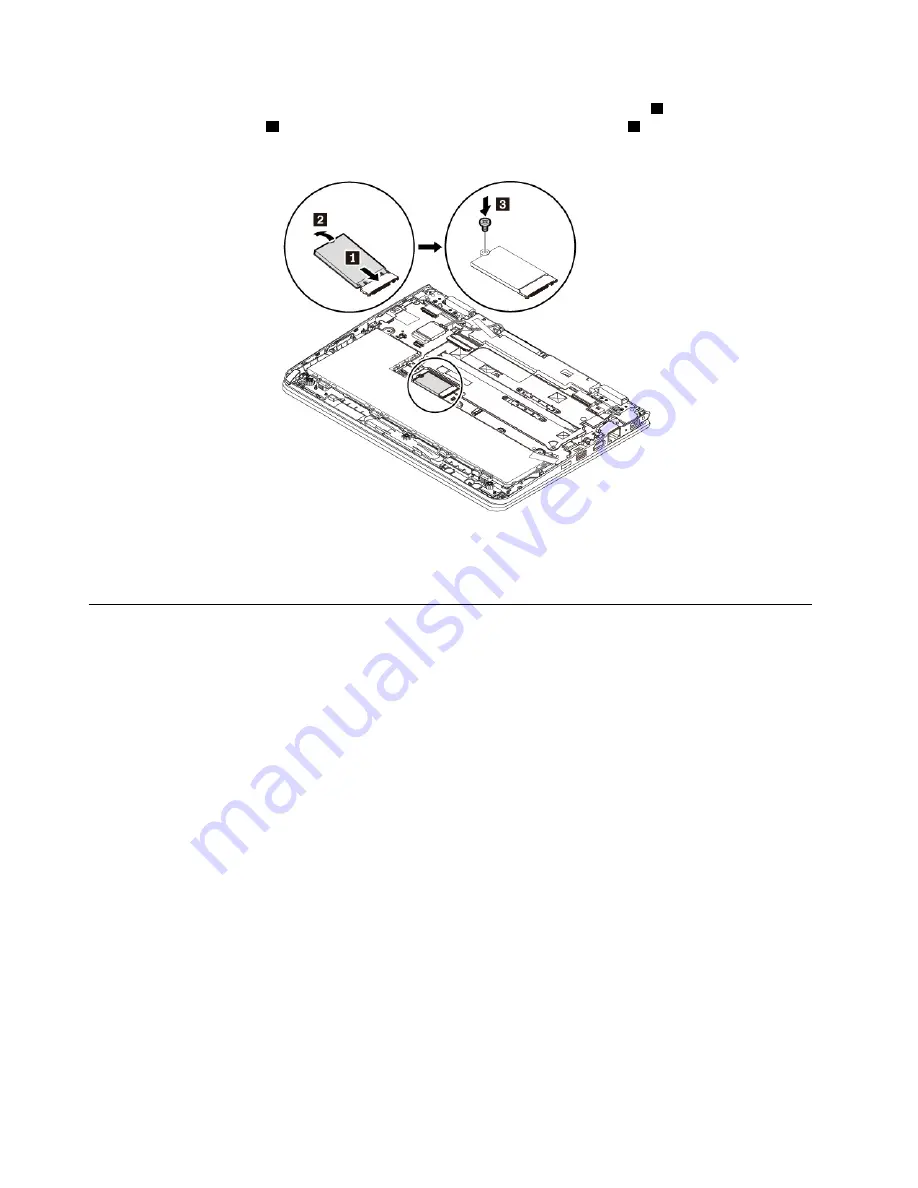
6. Insert the new M.2 solid-state drive into the slot at an angle of about 20 degrees
1
. Pivot the M.2 solid-
state drive downward
2
. Install the screw to secure the M.2 solid-state drive
3
.
7. Reinstall the base cover assembly.
8. Turn the computer over. Connect the ac power adapter and all cables to the computer.
Replacing the keyboard
Before you start, read “Important safety information” on page v and print the following instructions.
To remove the keyboard, do the following:
1. Disable the built-in battery. See “Disabling the built-in battery” on page 84.
2. Ensure that the computer is turned off and disconnected from ac power and all cables.
3. Close the computer display and turn the computer over.
4. Remove the base cover assembly. See “Replacing the base cover assembly” on page 85.
88
11e 5th Gen and Yoga 11e 5th Gen User Guide
Summary of Contents for Yoga 11e 5th Gen
Page 1: ...11e 5th Gen and Yoga 11e 5th Gen User Guide ...
Page 6: ...iv 11e 5th Gen and Yoga 11e 5th Gen User Guide ...
Page 52: ...34 11e 5th Gen and Yoga 11e 5th Gen User Guide ...
Page 62: ...44 11e 5th Gen and Yoga 11e 5th Gen User Guide ...
Page 68: ...50 11e 5th Gen and Yoga 11e 5th Gen User Guide ...
Page 116: ...98 11e 5th Gen and Yoga 11e 5th Gen User Guide ...
Page 120: ...102 11e 5th Gen and Yoga 11e 5th Gen User Guide ...
Page 122: ...104 11e 5th Gen and Yoga 11e 5th Gen User Guide ...
Page 128: ...110 11e 5th Gen and Yoga 11e 5th Gen User Guide ...
Page 134: ...116 11e 5th Gen and Yoga 11e 5th Gen User Guide ...
Page 135: ...Taiwan RoHS Appendix D Restriction of Hazardous Substances RoHS Directive 117 ...
Page 136: ...118 11e 5th Gen and Yoga 11e 5th Gen User Guide ...
Page 142: ...124 11e 5th Gen and Yoga 11e 5th Gen User Guide ...
Page 143: ......
Page 144: ......


