•
Press the arrow keys to highlight the length of
time you want the instrument will wait before
entering standby mode and press
ENTER
.
Setting baseline expiration time
If you will be performing scans on your samples,
you can set a time limit for a collected baseline.
To set the baseline expiration time:
•
With the
Utility
screen displayed, press the
arrow keys to highlight
Baseline Expiration
(hr:min) and press
ENTER
.
•
Enter the desired time into the Entry baseline
expiration time field. Press
ENTER
.
Setting the screen contrast
To make it easier to read the display, you can
adjust the screen contrast on the spectrophotometer.
•
With the
Utility
screen displayed, press the
arrow keys to highlight
Screen Contrast
and
press
ENTER
.
•
Press the arrow keys to adjust the screen
contrast.
•
When the screen contrast is correct, press
ESC
.
Setting up the internal printer
To set up the printer properly, you need to load the
paper and set the utility parameters for the printer.
Before setting up the parameters for the printer, be
sure that the printer is installed. If you have
ordered the internal printer as a separate item, you
will need to install it. Refer to the section
Connecting & using accessories
for instructions on
installing the printer.
Loading paper in the internal printer
Note:
Make sure that the paper roll holders are in
place as shown in Figure 3. When installed
correctly, they will fit flush with the top of
the instrument.
•
Cut the paper so the edge is even.
Note:
Arrows on the paper roll holders indicate
the direction of the paper feed (see
Figure 3).
•
Feed the paper straight into the paper entry
slot. The printer grabs the end of the paper and
pulls it in.
•
In Basic Absorbance/%Transmittance (%T),
when the paper stops, press
ENTER
to
continue advancing the paper until the paper
comes out of the paper exit slot.
•
Pull out on the finger tabs on the paper roll
holders and secure the roll of paper onto the
paper roll holder.
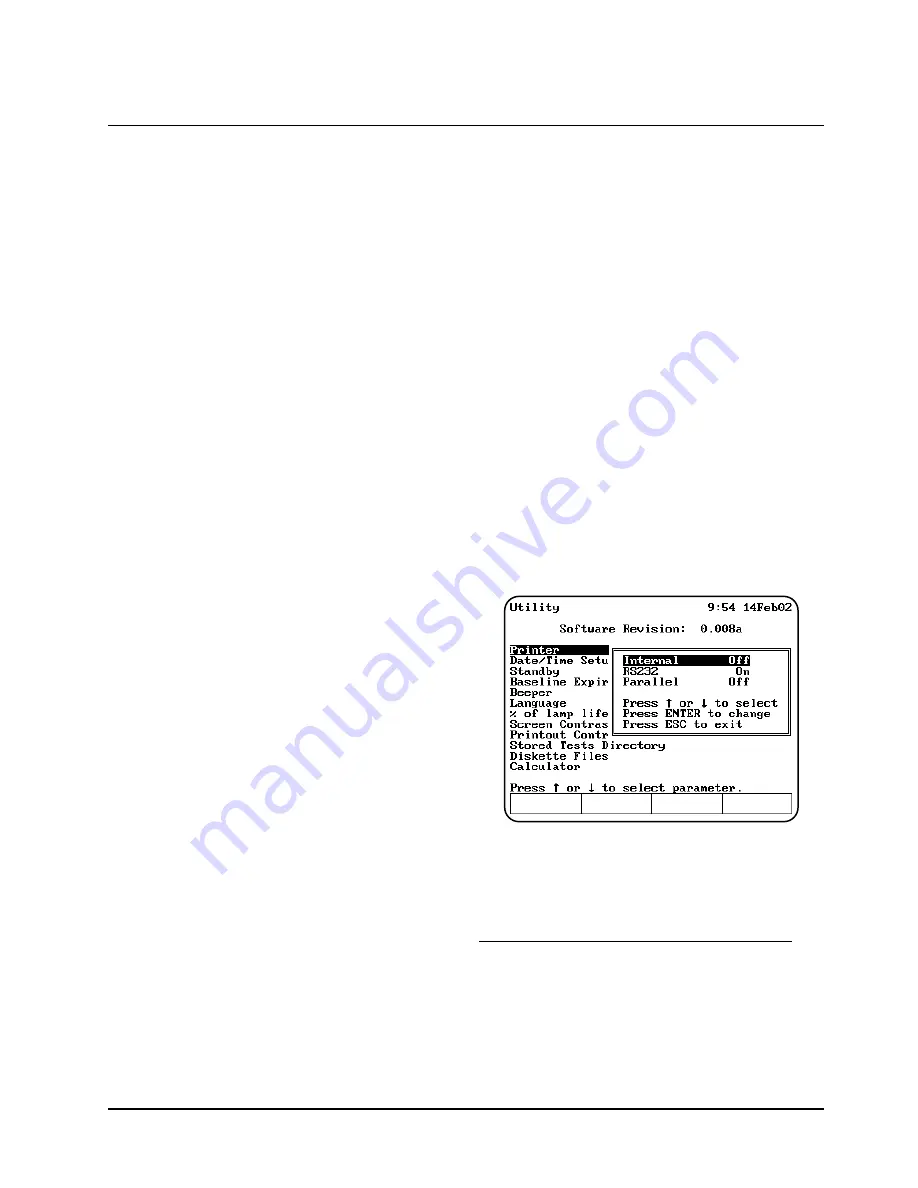
Setting the utility parameters for the printer
If you wish to use a printer you can output to:
•
Internal printer.
•
External RS232 printer.
•
Parallel port to an HP PCL formatted printer
(only available on the GENESYS 10
UV
scanning
model only - catalog numbers
335906 and 335907).
To ensure that the spectrophotometer can output
information correctly to the printer, you need to
select the appropriate device.
•
Press the
UTILITY
key. The
Utility
screen
appears on the display.
•
Press the arrow keys to highlight
Printer
and
press
ENTER
.
•
Select the printer that you want to use and
press
ENTER
until
On
appears.
•
Press
ESC
to save the settings and return to
the Utility screen.
Selecting and positioning glassware
The wavelength range for different types of cells
varies depending on the manufacturer:
•
Glass - From 320 to 360nm, up to 1100nm.
•
Quartz - From 190 to 230nm, up to
1100nm.
•
Disposable - Refer to manufacturer's
Setting Up the Instrument
GENESYS 10 Operator’s Manual
1-3
Summary of Contents for GENESYS 10
Page 1: ...GENESYS 10 Series Spectrophotometers Operator s Manual ...
Page 2: ...Copyright 2002 Thermo Spectronic All rights reserved ...
Page 8: ...GENESYS 10 Operator s Manual ...
Page 9: ......
Page 10: ......
Page 14: ...iv GENESYS 10 Operator s Manual ...
Page 18: ...Table of Contents viii GENESYS 10 Operator s Manual ...
Page 50: ...Using the Instrument 2 28 GENESYS 10 Operator s Manual ...
Page 60: ...Connecting Using Accessories 4 4 GENESYS 10 Operator s Manual ...
Page 64: ...Performing Maintenance Procedures 5 4 GENESYS 10 Operator s Manual ...
Page 72: ...Appendix C Calculations C 4 GENESYS 10 Operator s Manual ...


